Install the Fastly app
Setup
Follow the instructions in Observe apps to install the Fastly app.
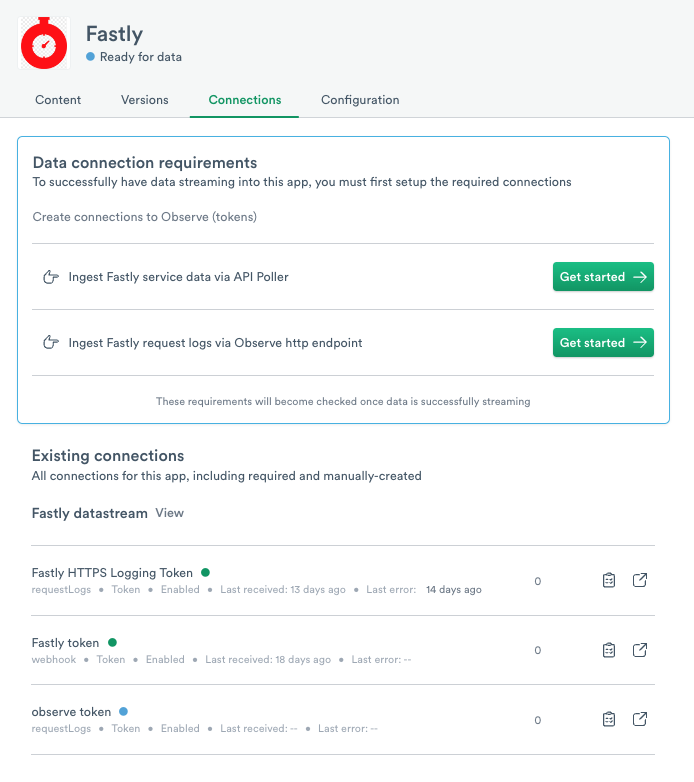
After you install the Fastly app, go to Fastly and configure the HTTP logging endpoint and Observe poller. Click Get started for each task to begin.
Set up the HTTPS logging endpoint
In Fastly, set up a logging endpoint for your Fastly service. As traffic is served, request logs will then be sent to Observe.
To configure a logging endpoint for your service, navigate to the configuration page for any service in Fastly.
- Select
Loggingin the left side navigation menu.
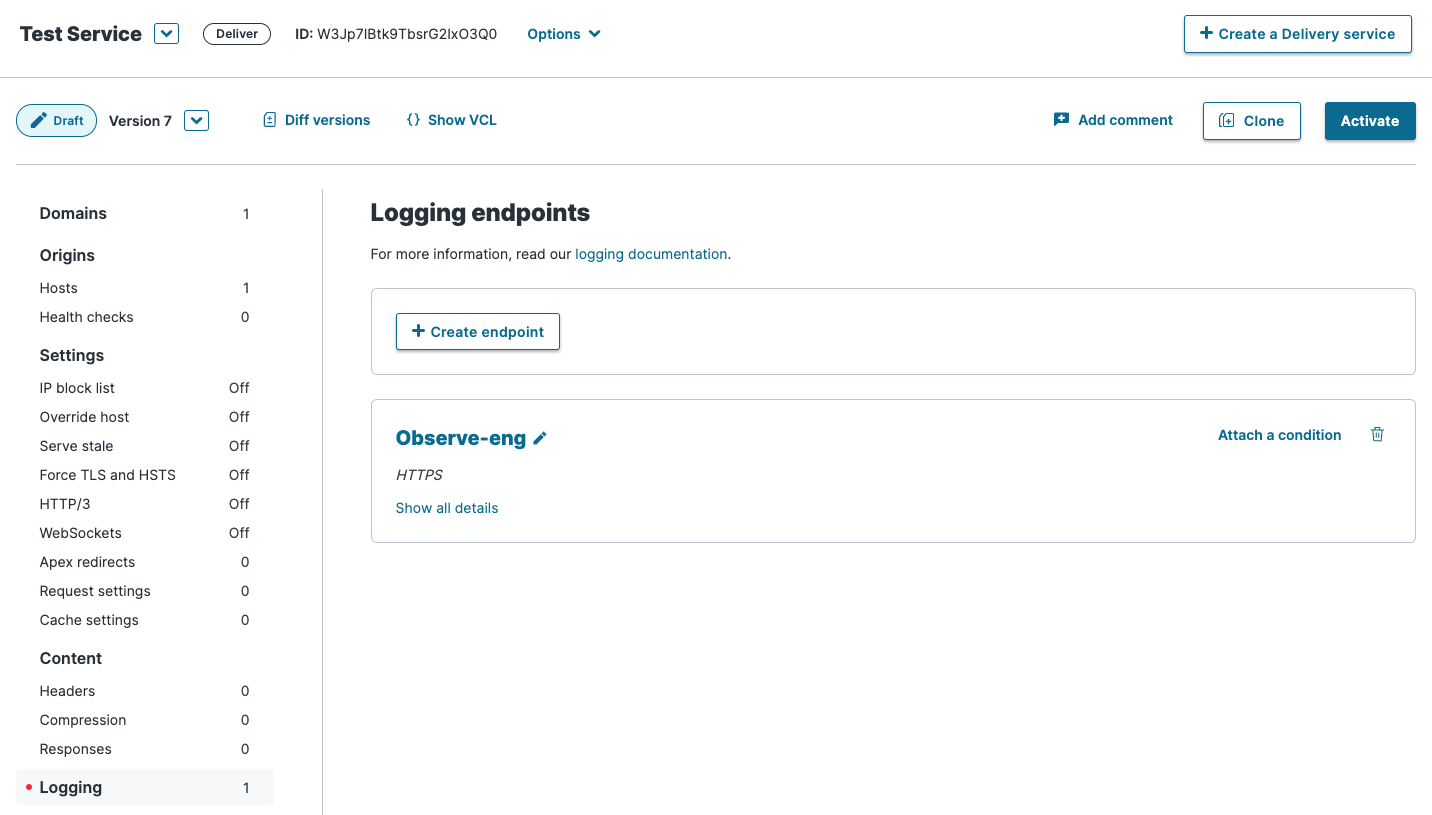
- Create a new logging endpoint. When prompted on which type of logging endpoint to create, scroll down to the
HTTPSoption.

- Enter the following URL in the URL field:
https://${OBSERVE_CUSTOMER?}.collect.${OBSERVE_DOMAIN?}/v1/http/fastly/logs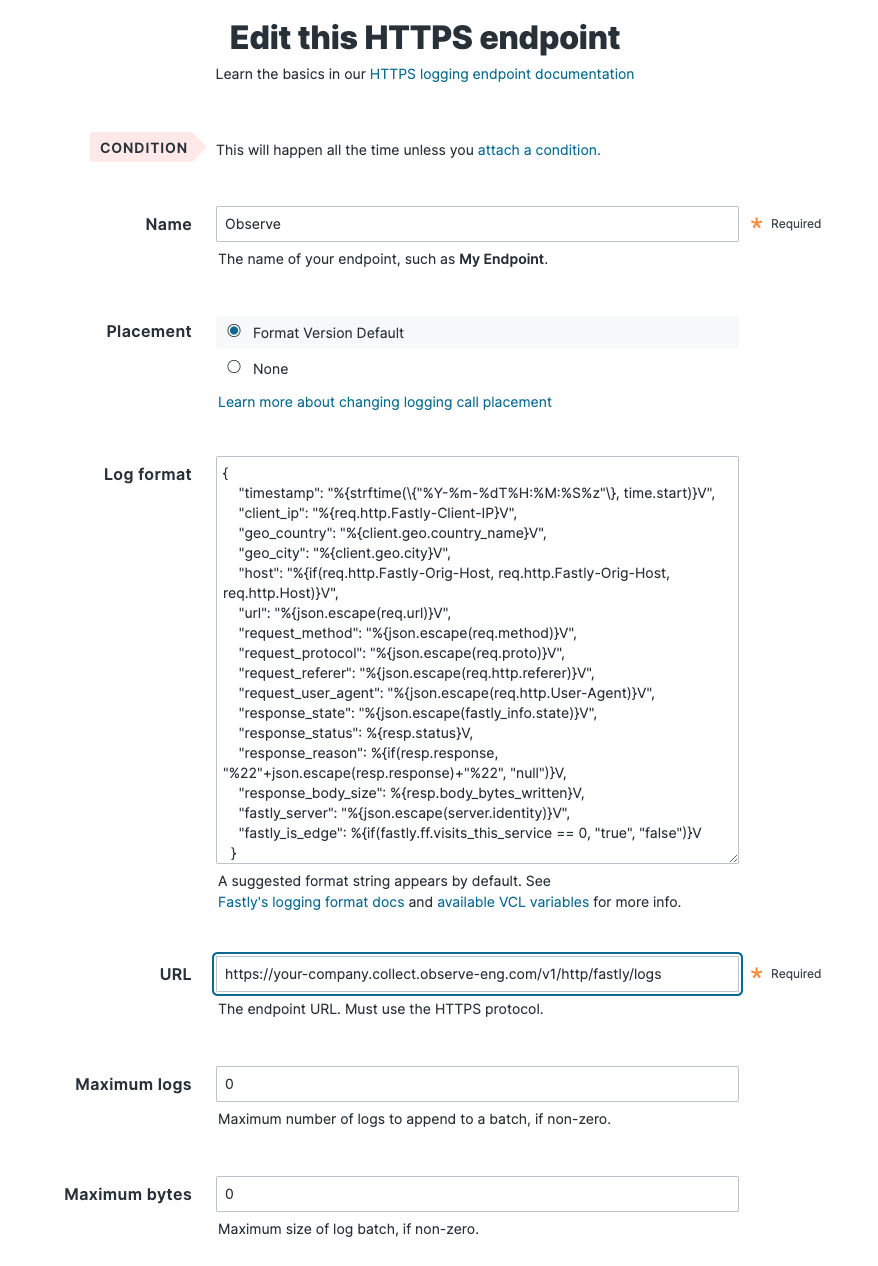
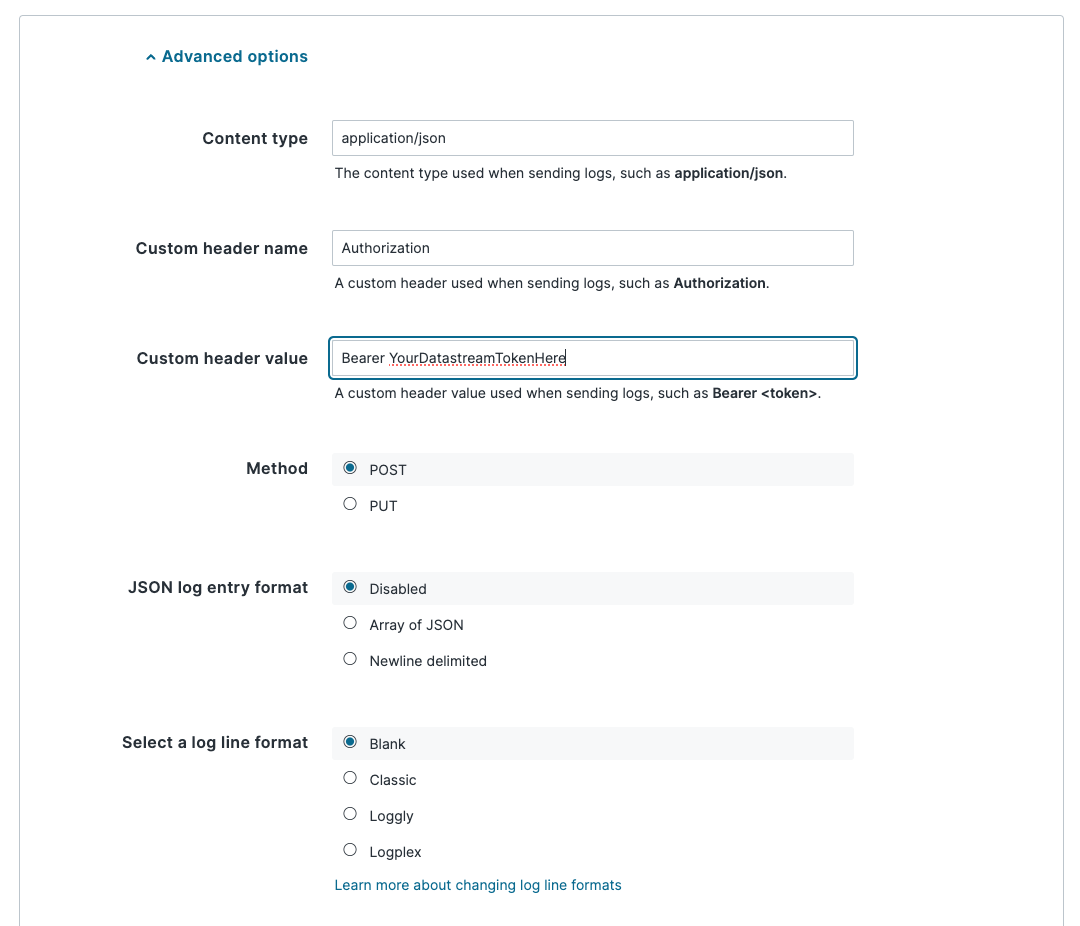
- Configure the following advanced settings:
- Content type:
application/json - Custom header name:
Authorization - Custom header value:
${OBSERVE_TOKEN?} - Method:
POST
Then save the configuration. Fastly should start sending logs to the Observe HTTP ingestion endpoint and within a few minutes you should see data start to populate in the datastream and datasets.
Configure the Poller
Pollers periodically request data from the Fastly API, allowing ingestion of additional Fastly service metadata. In order to set up a Poller, you'll need to first configure API credentials in Fastly.
- After logging into Fastly, from the top right account dropdown menu, select Account.
- In the left hand navigation bar under Personal Profile, select API Tokens.
- Click Create Token in the top right. Re-enter your password if necessary on the next page.
- Configure the following settings:
- Type:
Automation token - Role:
User - Scope:
Read-only access - Access:
All services on ${ACCOUNT_NAME} - Expiration:
Never expire
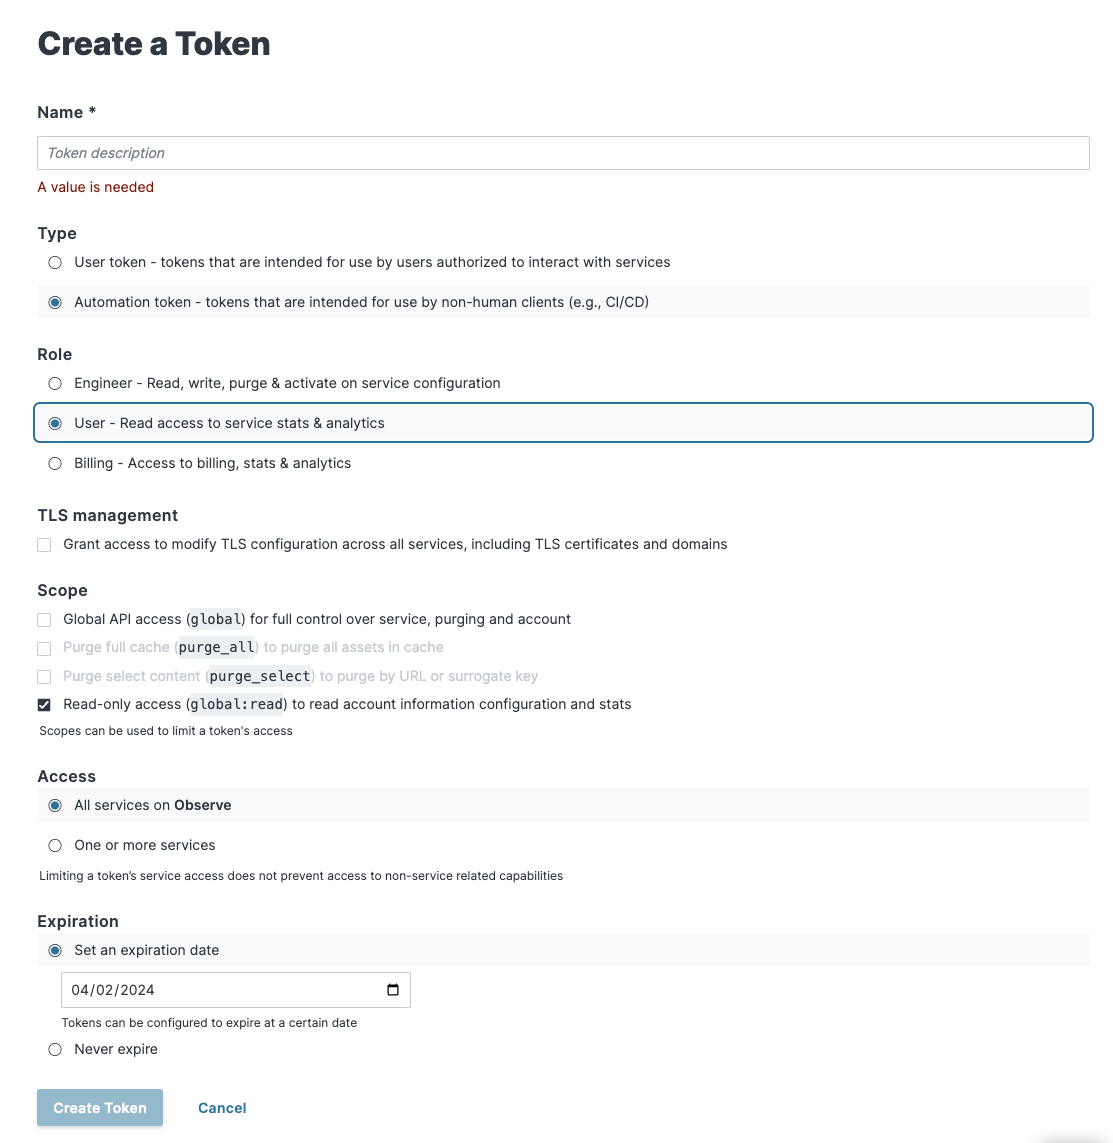
Then create the token. Make sure to copy the token and store it securely before moving on.
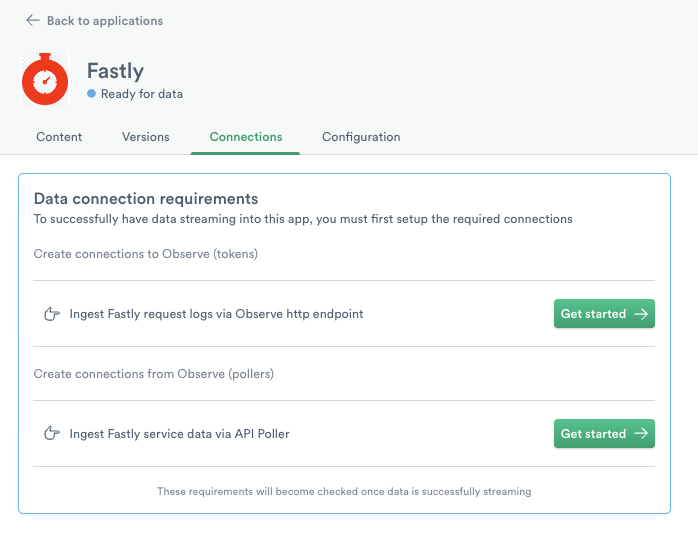
- With the token we can now set up the API Poller connection. In Observe, select Data & integrations > Applications in the left hand navigation bar.
- Find and select the Fastly app.
- Click Manage and then Connections.
- Find the API Poller connection and click Get started.
- Configure the following settings:
- Fastly Token:
${FASTLY_API_TOKEN} - Interval Duration:
10m0s
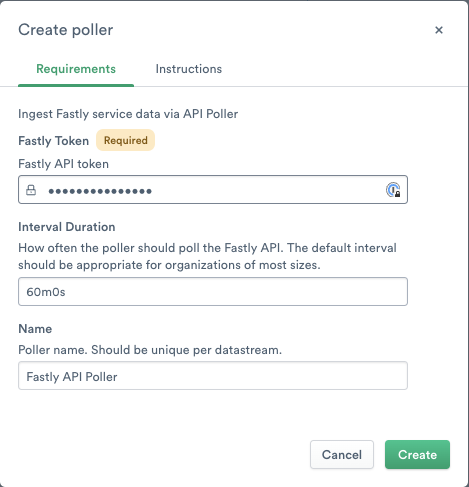
Then create the new poller. Once created, you should start to see data populate in the Service dataset.
Updated 4 months ago