Data export
Overview
Observe provides industry leading retention, but there are scenarios where you may wish to move data in Observe to an AWS S3 bucket that is owned by your organization. You can use Observe’s Data Export feature to move data automatically from a Dataset to an S3 bucket.
Data Export is a good fit for the following scenarios:
You need to retain data for compliance purposes, but it does not need to be searchable.
You need to share subsets of Observe data to other teams.
Provide portability of your data post-ingestion.
When using Data Export, be aware of the following prerequisites:
The S3 bucket must be in the same region as your Observe tenant.
Exports will have an up to 2 hour delay from event arrival.
You can only export data from Event Datasets (e.g. logs).
Export Jobs
To create an export job, navigate to the Account Settings page of your Observe tenant and select the Data export option from the left-nav. Export jobs support exporting in either NDJSON format (gzip compression) or Parquet format (snappy compression). All export job names must be unique.
Each export job begins exporting data from approximately 24 hours prior to job creation, and will continue to export new data indefinitely, until the job has an error or is deleted.
Configuring your S3 Bucket for Data Export
To use the Data Export feature, you must ensure the following:
Your bucket must be in the same AWS region as your Observe tenant.
Your bucket policy must allow Observe to access your bucket.
Bucket Region
Your bucket must be in the same region as your Observe tenant. When creating a job, the Observe UI modal will display the AWS region that your bucket must be located in.
To view the region your bucket is in, navigate to the bucket page in the Amazon S3 UI. Click on the Properties tab. The bucket region is listed under AWS Region in the Bucket overview section, as shown in Figure 1.
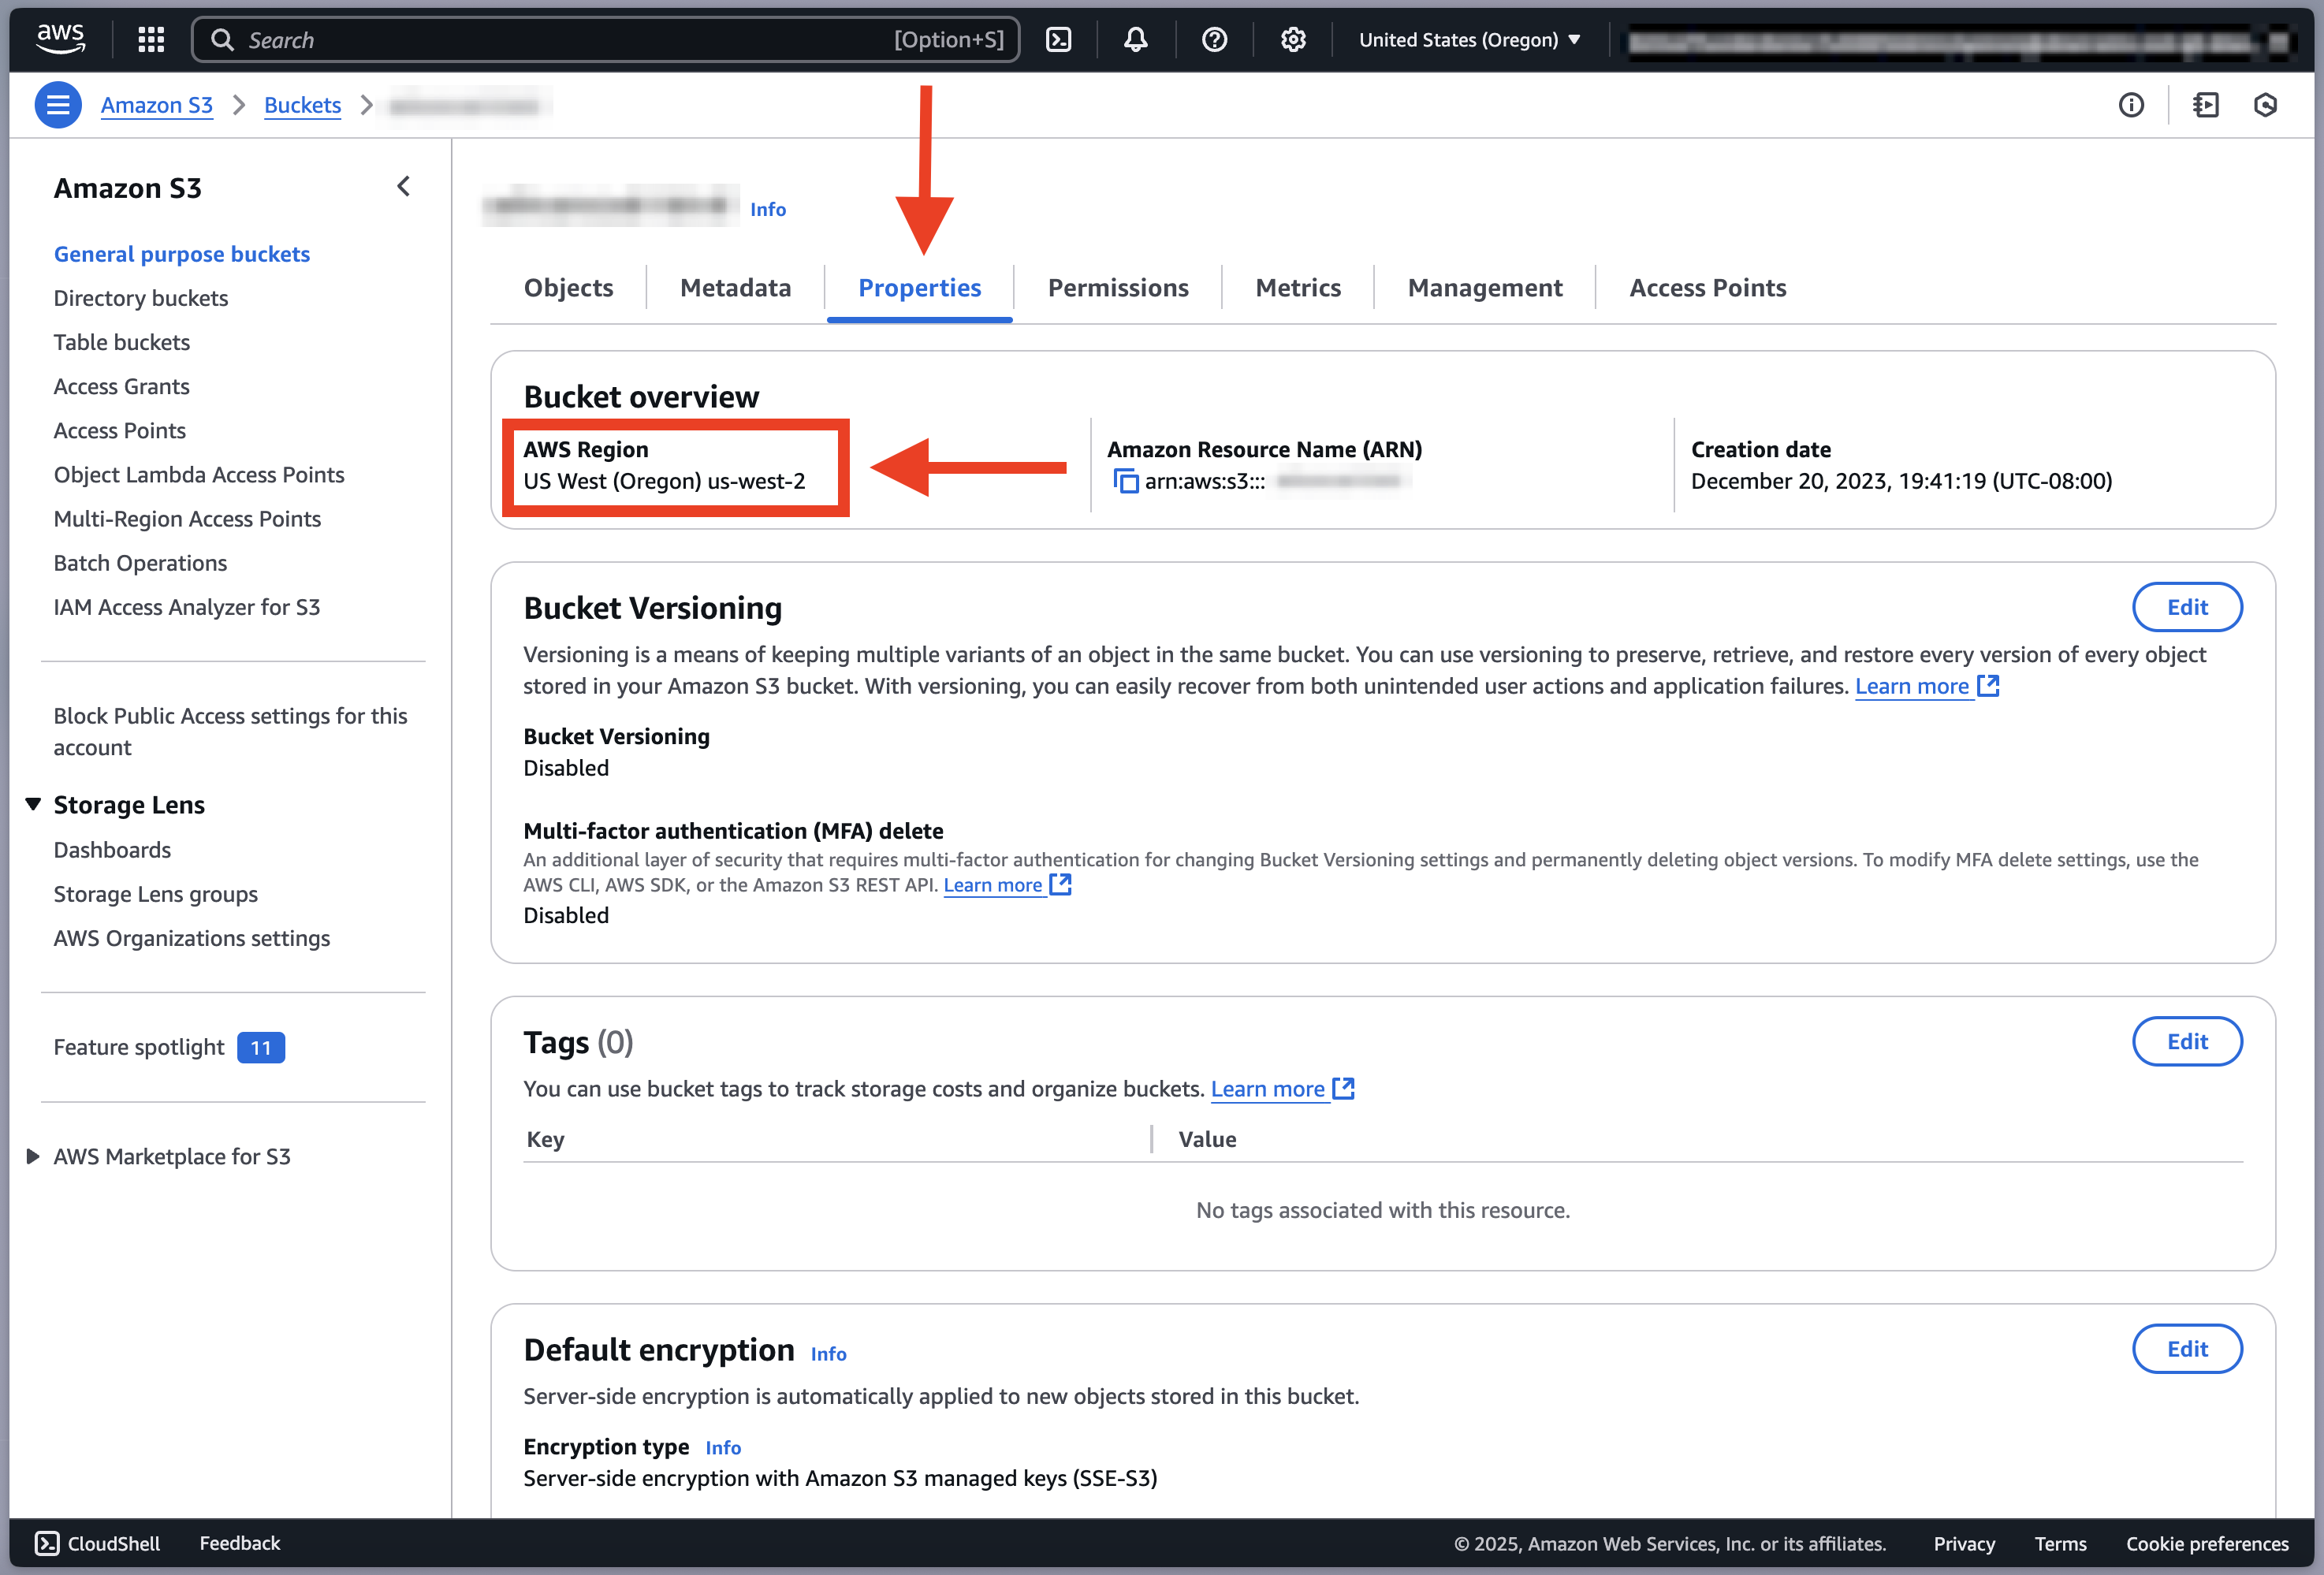
Figure 1 - View bucket region
If your bucket is not in the supported region, we recommend creating a new bucket.
On the Create bucket page in the Amazon S3 UI, the region of the bucket can be configured by selecting from the drop-down menu at the top of the screen, as shown in Figure 2.
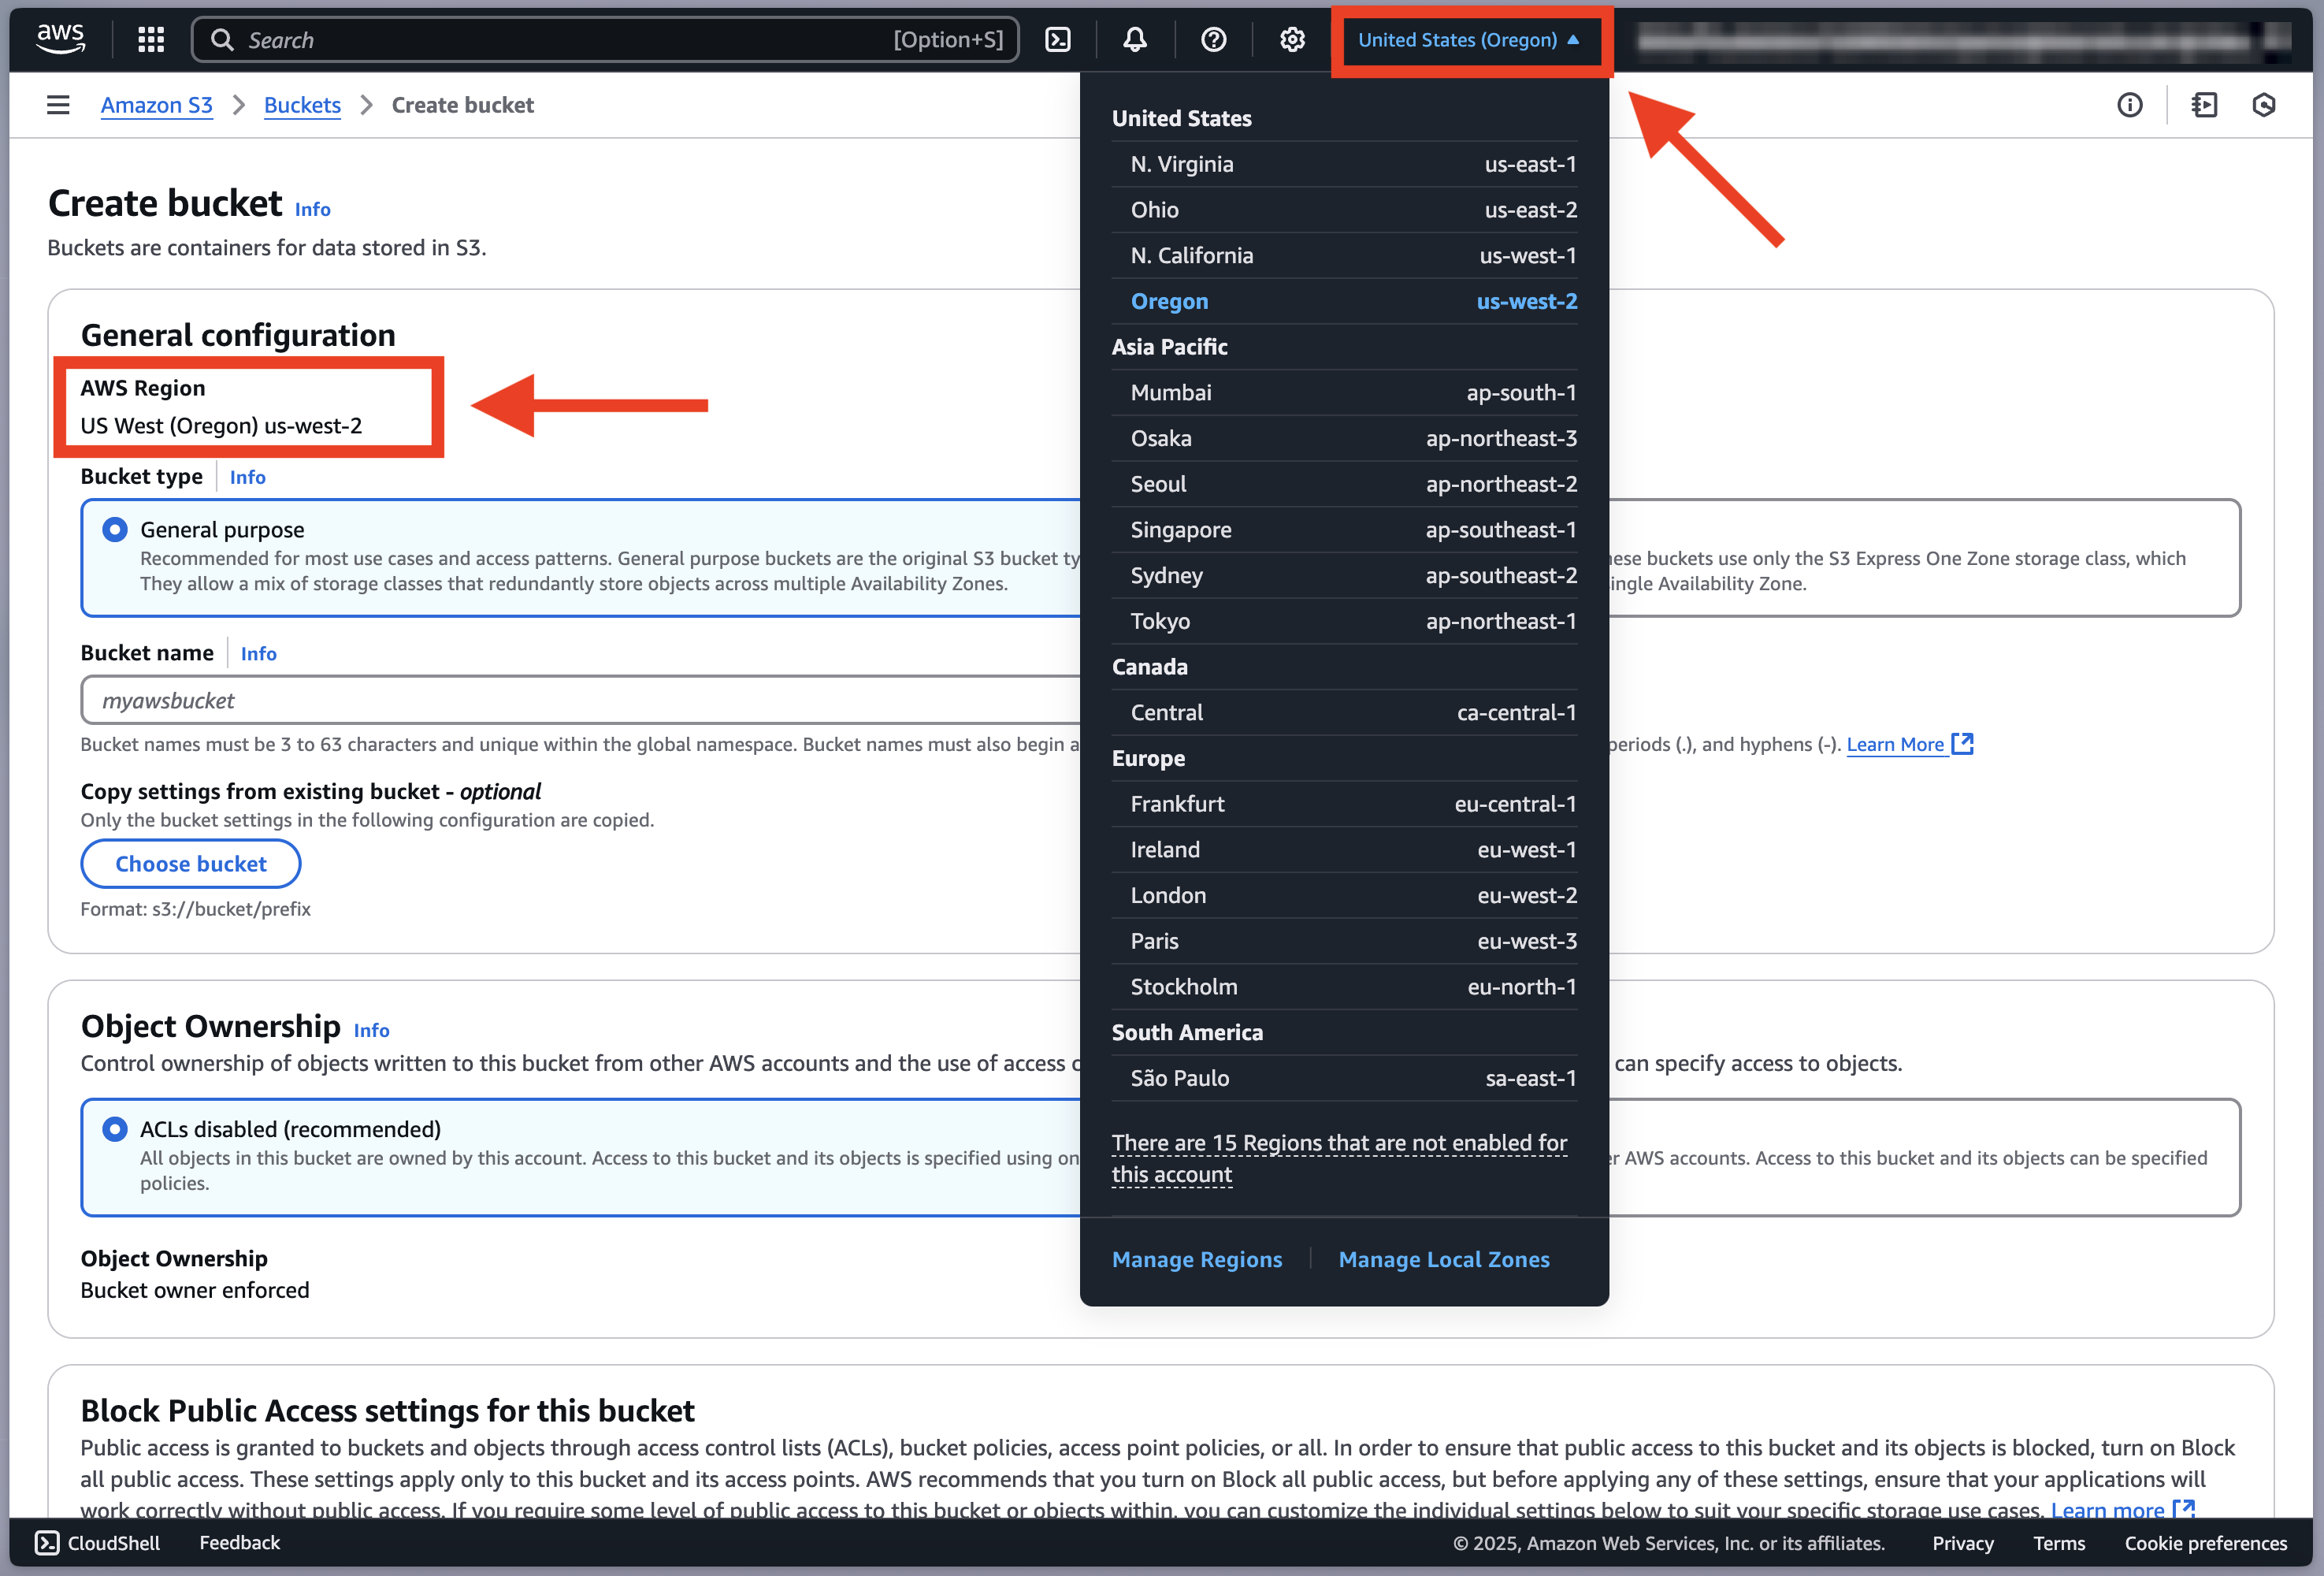
Figure 2 - Create bucket, choose region
Bucket Policy
You must configure your bucket policy so that Observe can export data to it. The Observe UI will generate a valid bucket policy for you. Copy that policy.
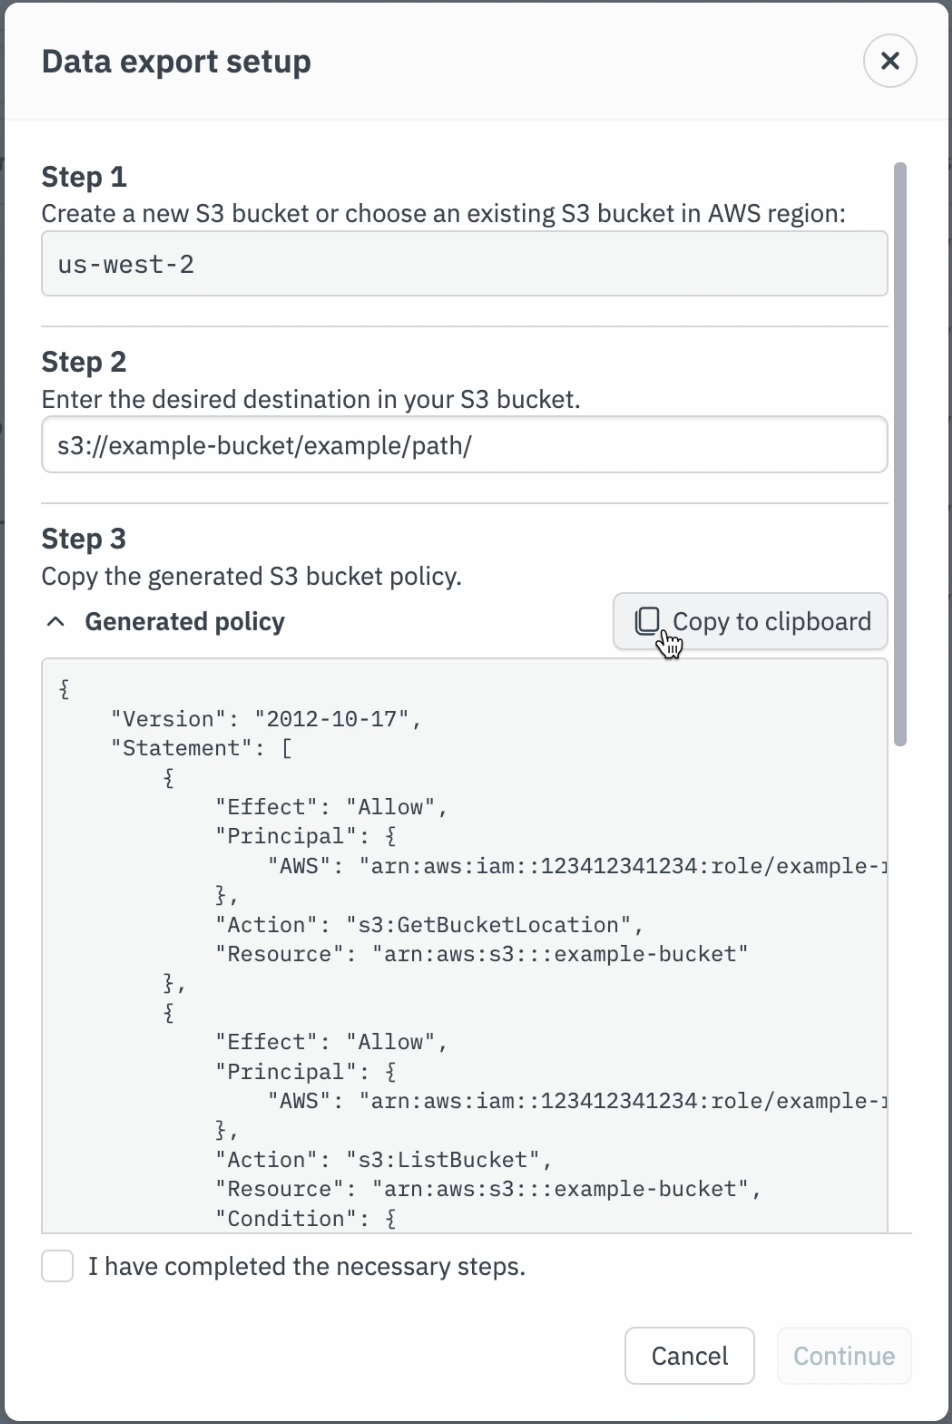
Figure 3 - Generated bucket policy
Accessing your bucket policy (via Observe UI)
The Observe UI will generate a link to the bucket policy editor in the AWS Console, provided you have entered a valid S3 bucket path.
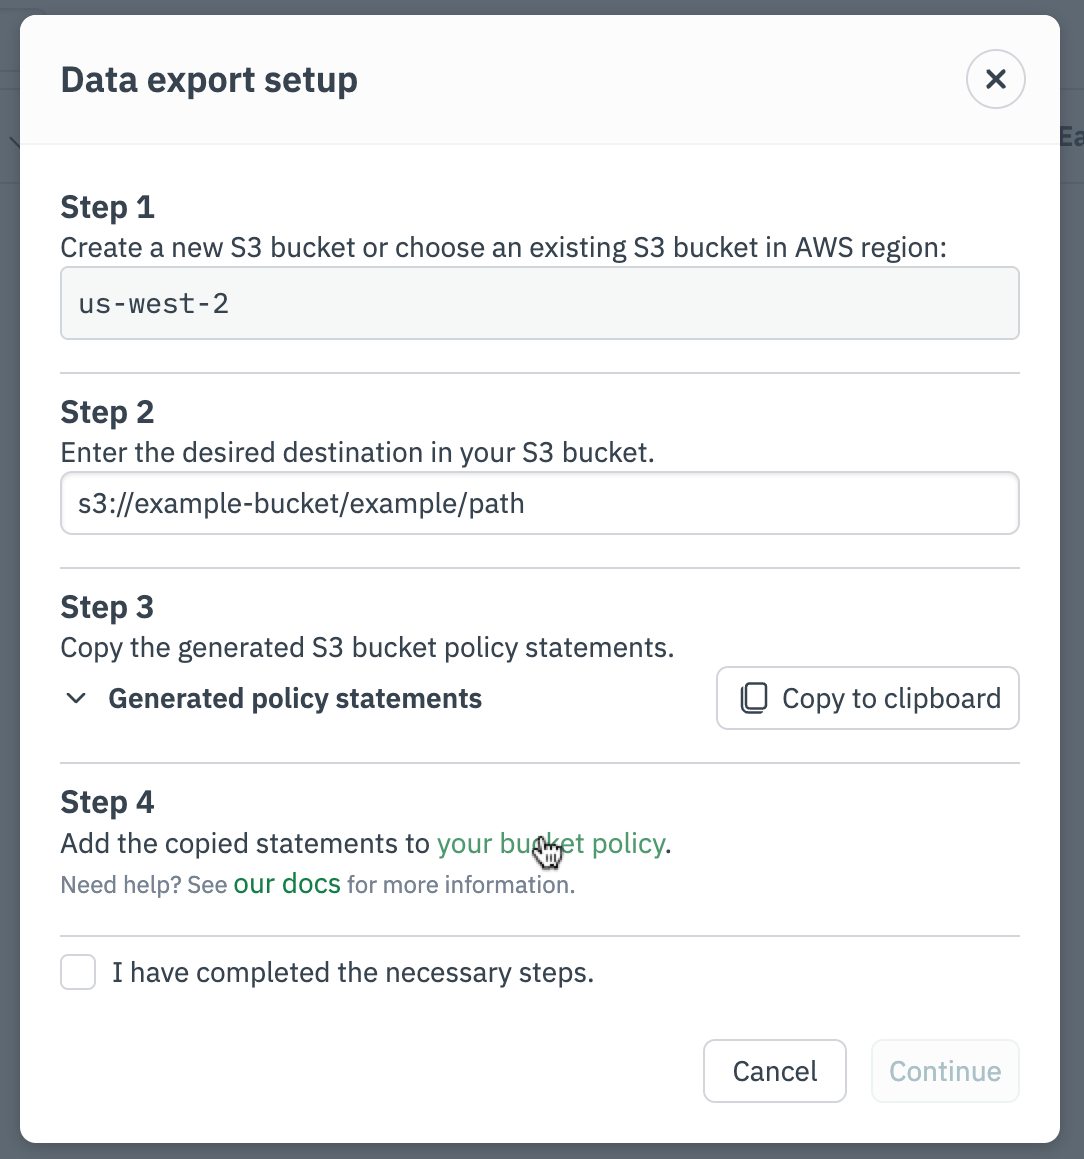
Figure 4 - Edit bucket policy link
Accessing your bucket policy (via AWS Console)
Alternatively, you can navigate to the bucket page in the Amazon S3 UI. Click on the Permissions tab. Under Bucket policy, click Edit.
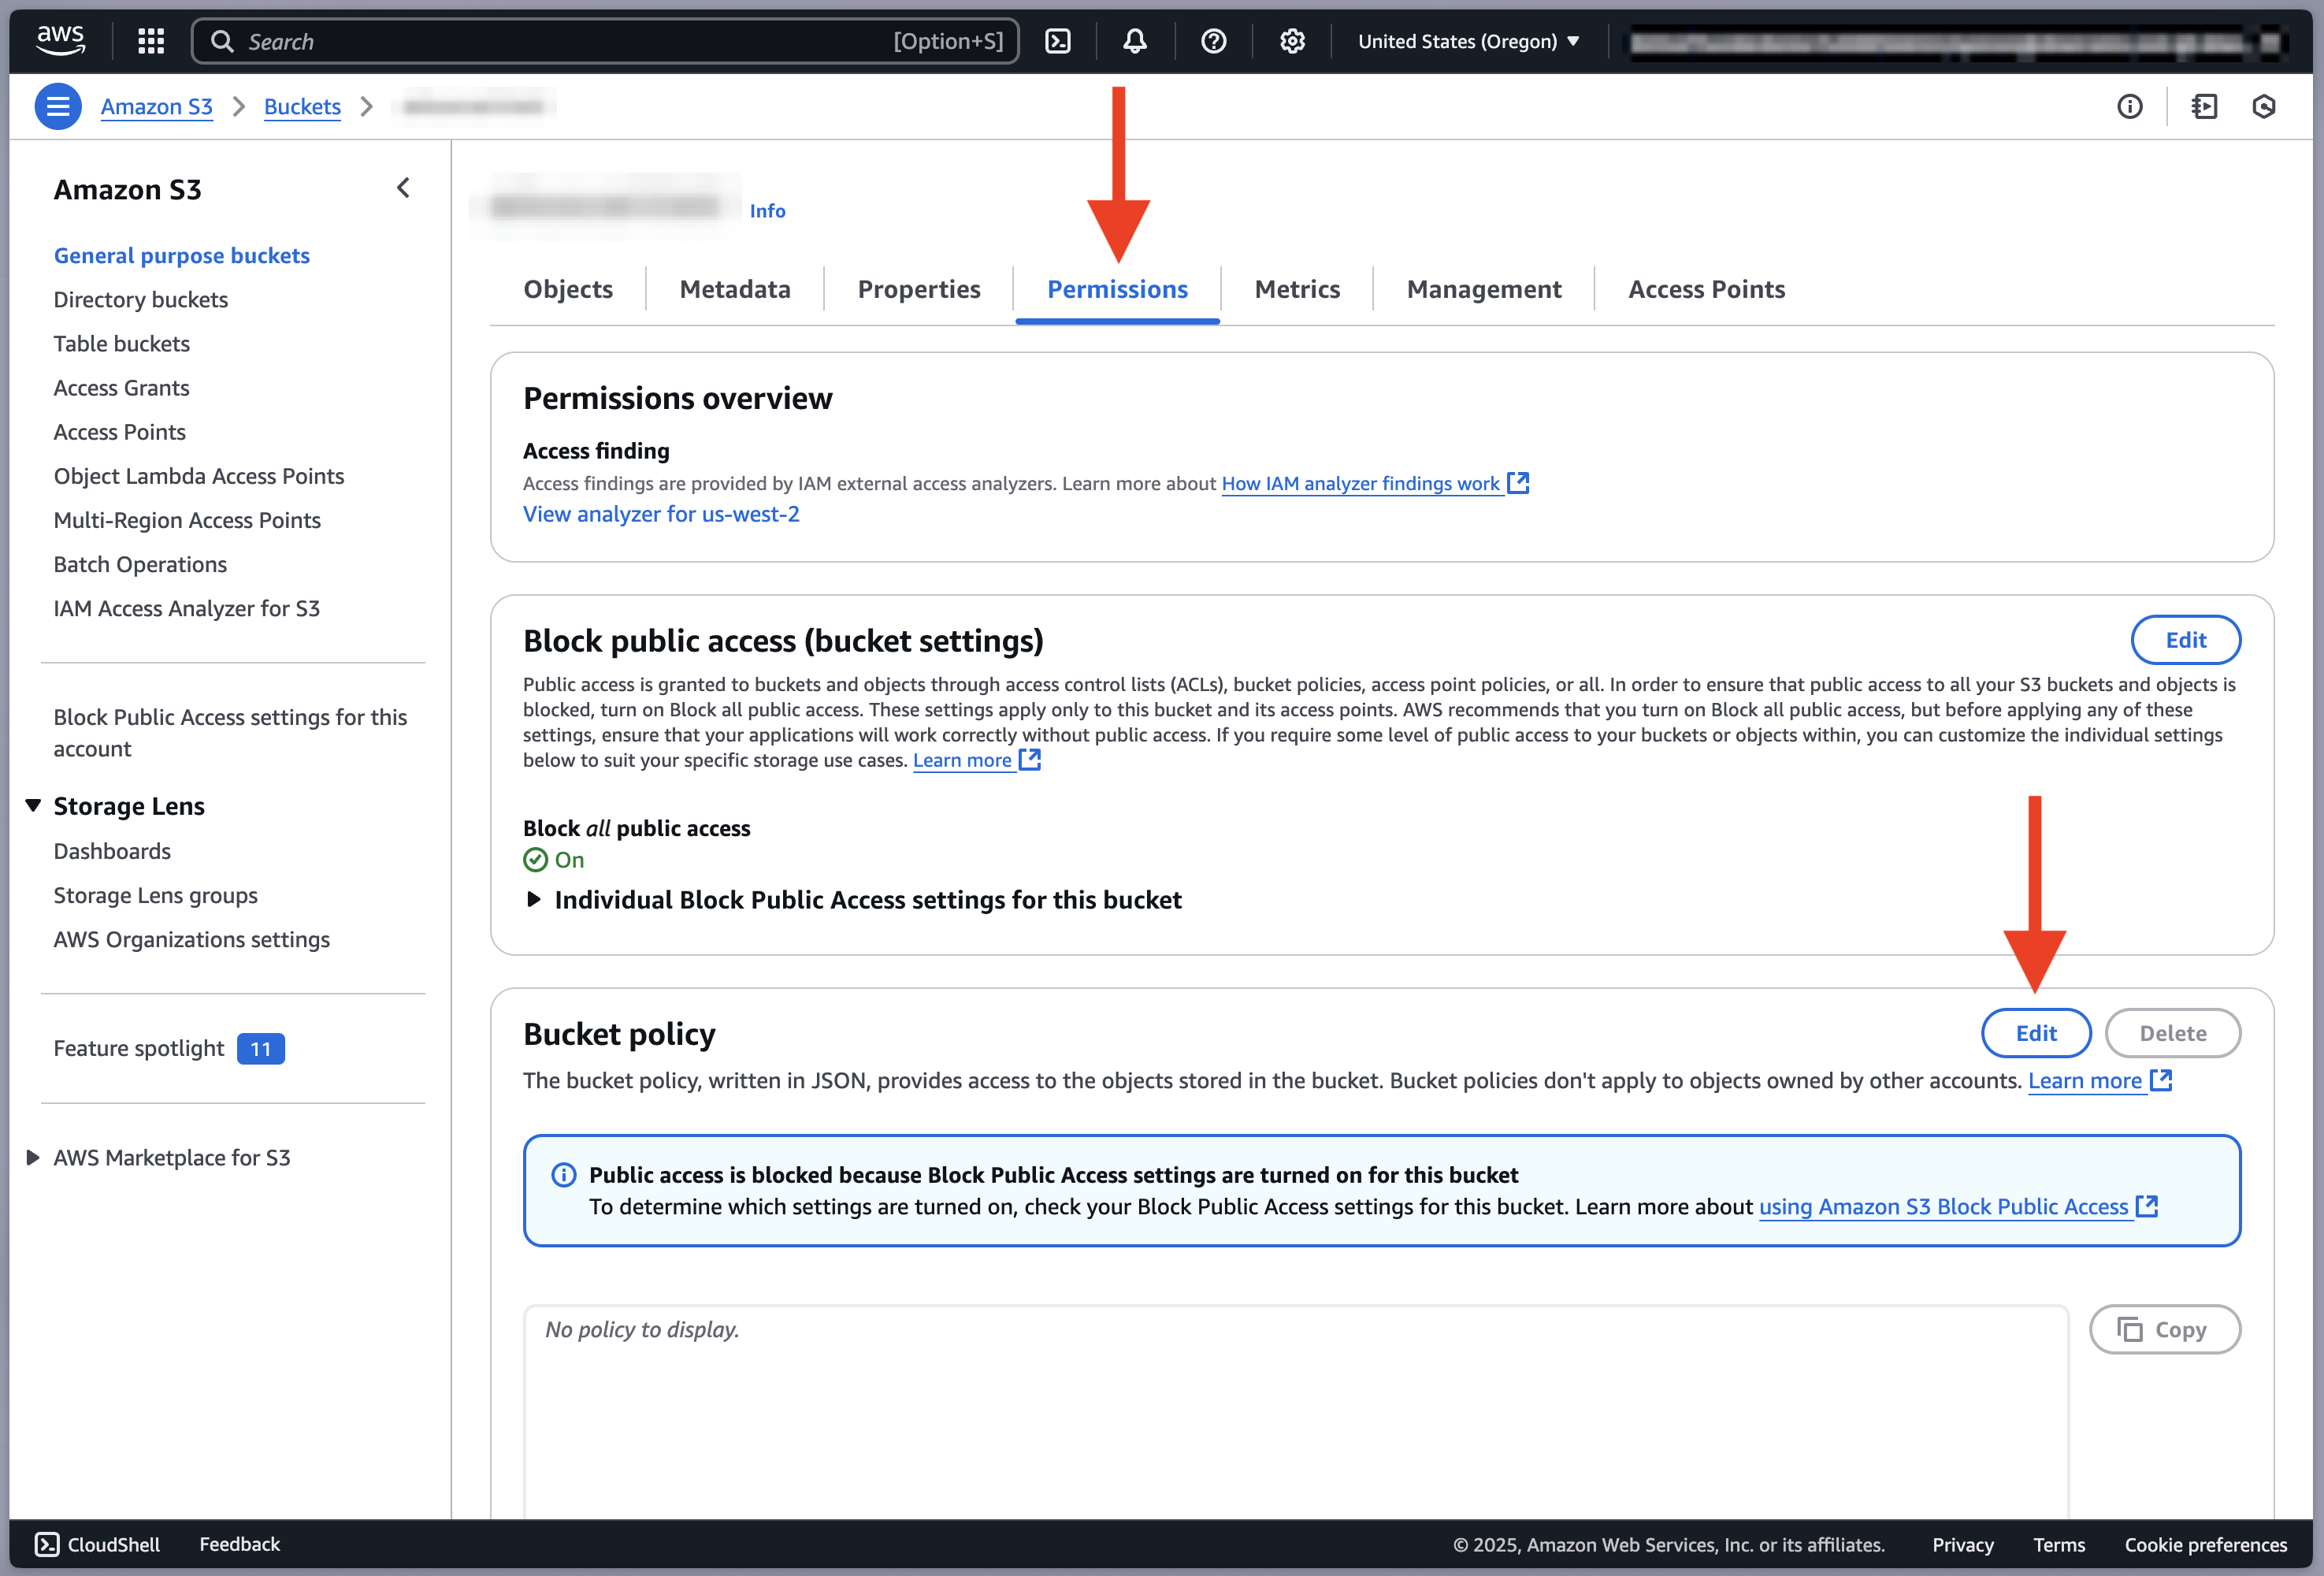
Figure 5 - Edit bucket policy
Setting your bucket policy
Simply paste the policy you copied and click “Save changes”.
If your bucket already has a policy, you can append the statements of the generated policy to the “Statement” clause of your existing policy. When you are done, click “Save changes”.
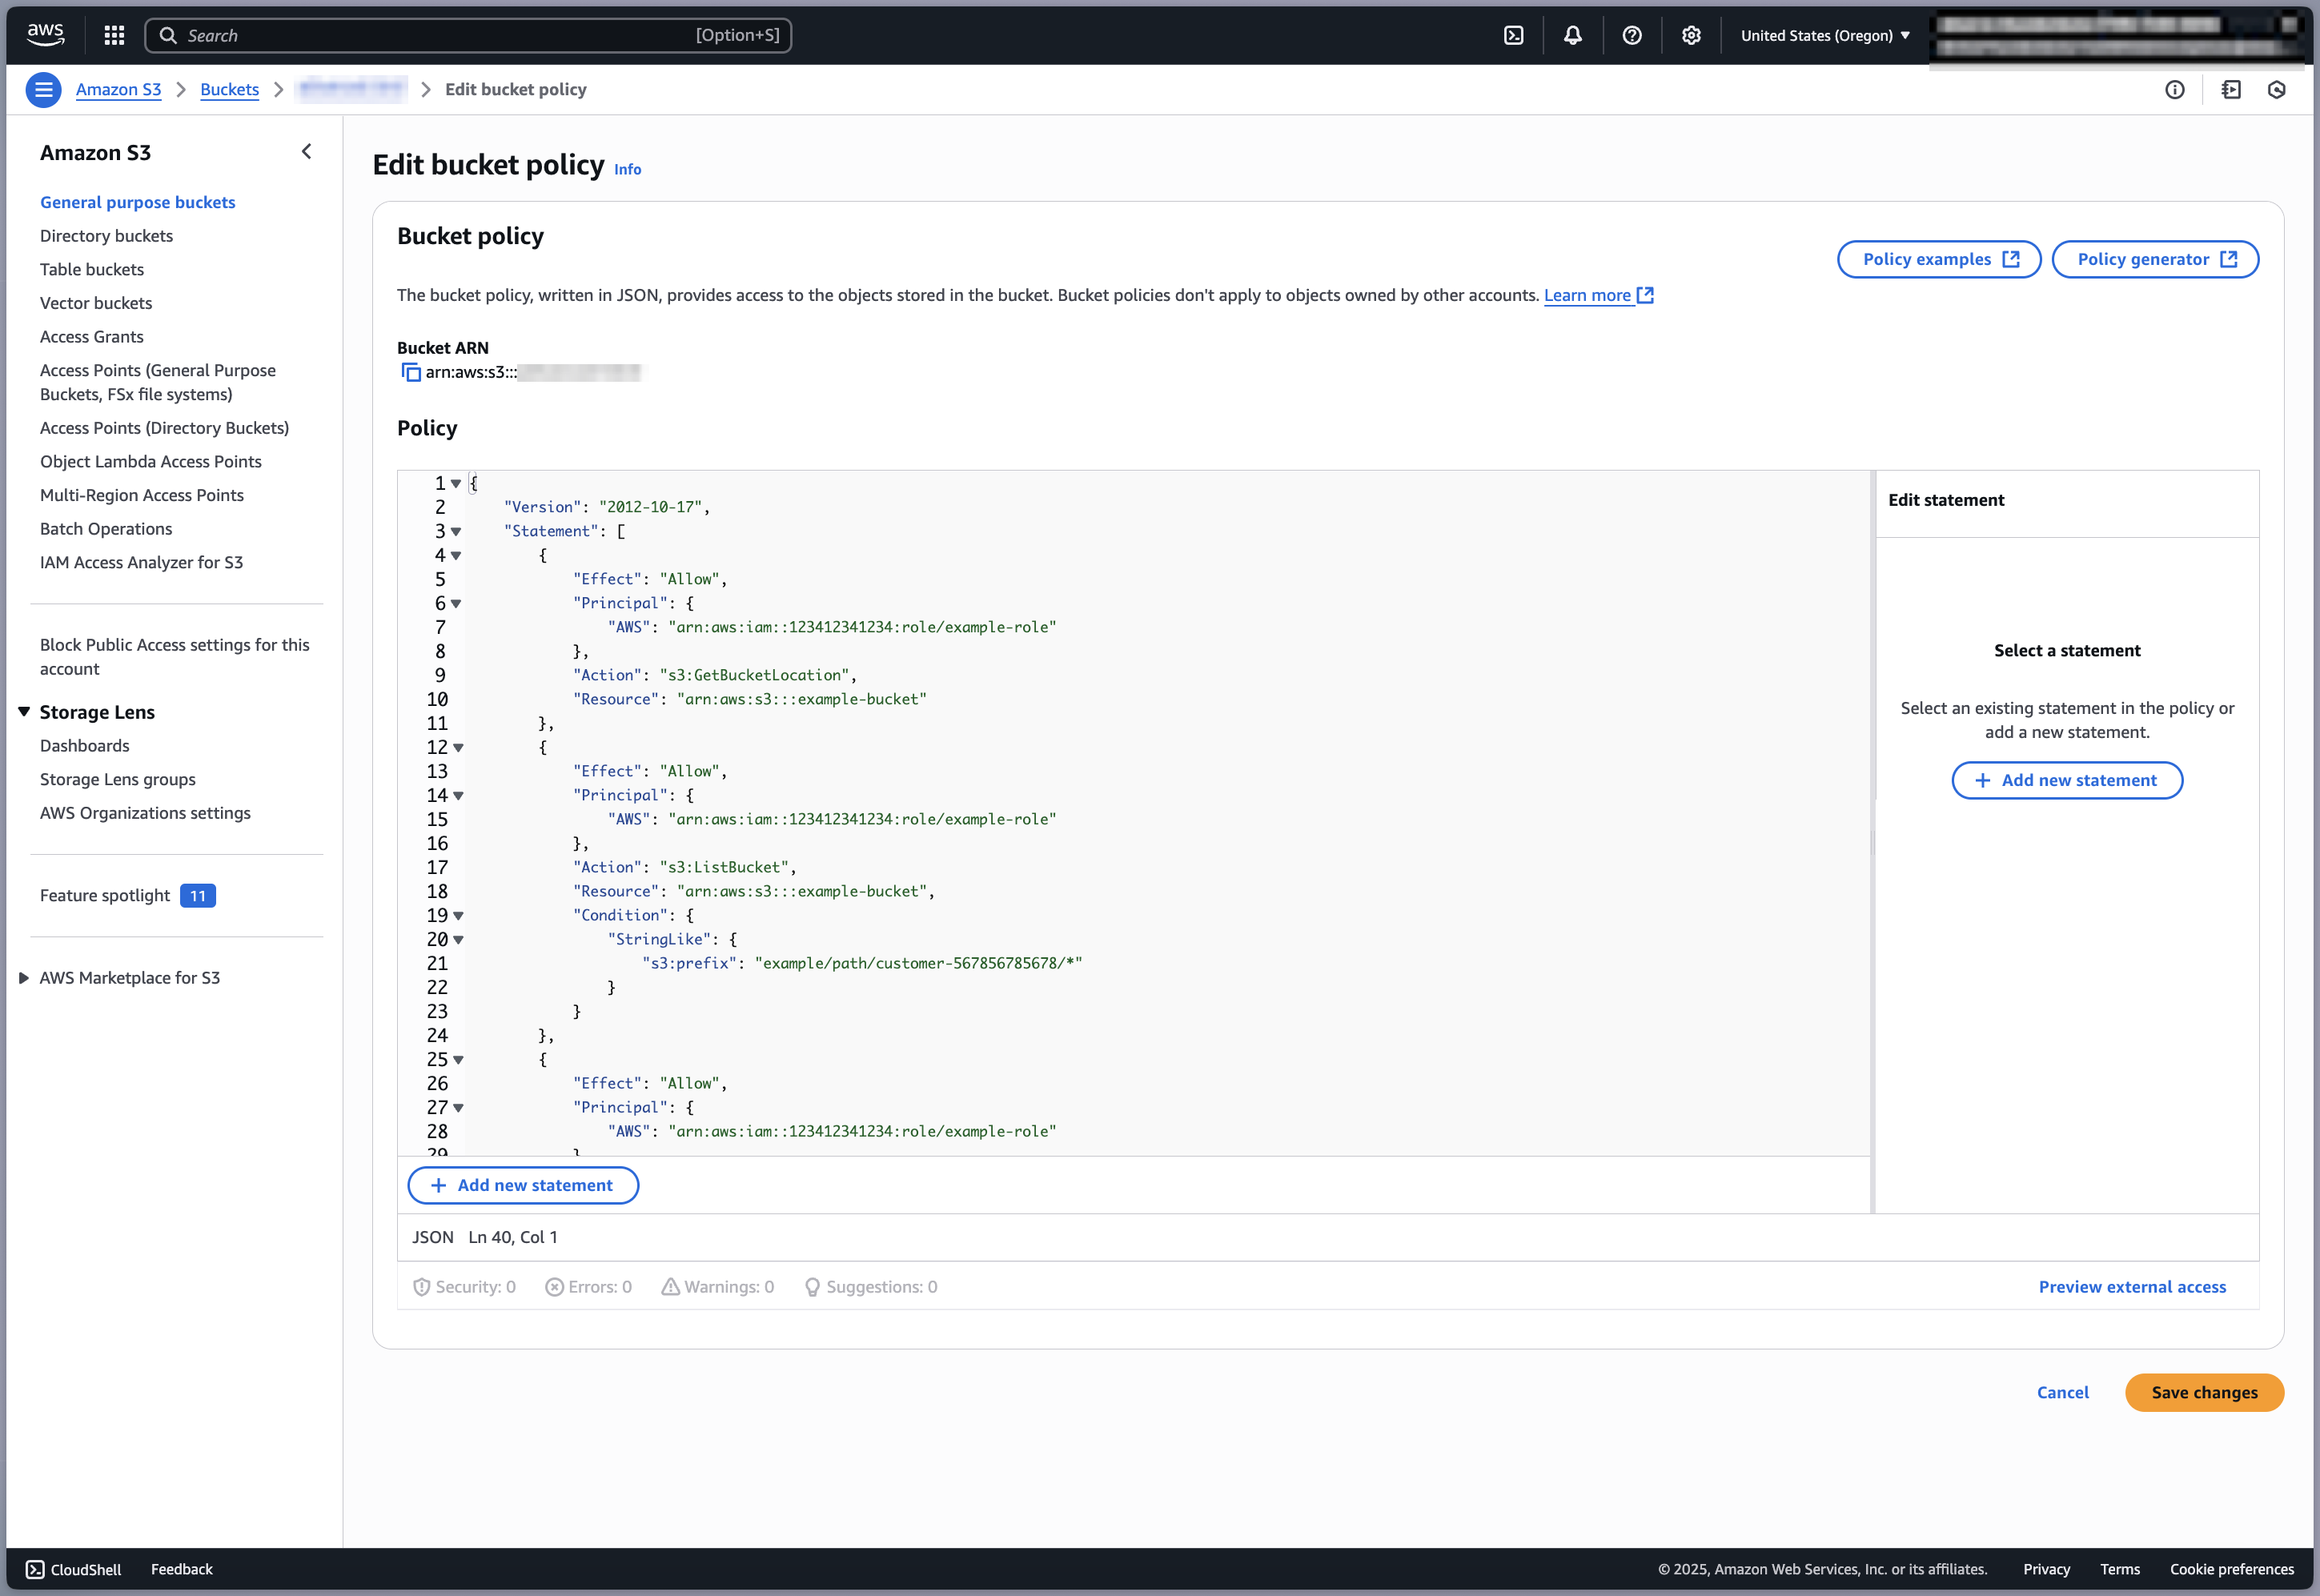
Figure 6 - Finished bucket policy
Export Job Details
All export jobs have the following attributes:
State: Initializing, Active, or Failed. You can hover over the Failed state to learn more about the status or failure reason.Job/Description: The name and description of the export job.Dataset: The name of the dataset you are exporting.Destination: The S3 bucket to which you are exporting your data.Earliest timestamp,Latest timestamp: These describe the time range of data that has been exported by the job.Created by: The name of the user who created the export job, and the export job creation date.
Once a data export job is created, the resulting folder structure that Observe will create is:
/<observe_customerId>/<observe_jobId>/YYYY/MM/DD/HH_MI_SS/data_<observe_queryid>_0_0_0.ndjson.gz|snappy.parquet
Depending on the format you selected for the export job, it will either end in ndjson.gz (JSON) or snappy.parquet (Parquet).
Export Job State
Export jobs can be in one of three states: Initializing, Active, or Failed. After creation or retry, jobs begin in the Initializing state and typically transition to Active or Failed within a few seconds.
Hovering over the state pill will provide additional details as to why the export job has failed. For example, if your export job fails due to a misconfigured bucket policy, you can update the bucket policy and then retry the job.

Figure 7 - Failed export job
Export Job Deletion
Export jobs can be deleted by hovering over the row of the job you want to delete, and clicking the trash-can icon on the right-hand side. You will be presented with a confirmation dialog. Note that deleting an export job does not delete data that has already been exported.

Figure 8 - Delete export job