Install Host Monitoring on MacOS
Installing the Host Monitoring Agents
The following sample command installs osquery, Fluent Bit, and Telegraf for MacOS. Replace
OBSERVE_CUSTOMER, OBSERVE_TOKEN, MY_DATA_CENTER, and MY_APP_GROUP
with appropriate values and run on each host. For full details, see Configuration script for MacOS.
bash <(curl -sSL "https://raw.githubusercontent.com/observeinc/mac-host-configuration-scripts/main/observe_configure_mac_script.sh") -- -s --customer_id OBSERVE_CUSTOMER --ingest_token OBSERVE_TOKEN --observe_host_name https://OBSERVE_CUSTOMER.collect.observeinc.com/ --config_files_clean TRUE --datacenter MY_DATA_CENTER --appgroup MY_APP_GROUP
For details on installing and configuring osquery, Fluent Bit, and Telegraf individually, select the desired package.
Installing osquery
To install the latest version of osquery on Apple MacOS:
Download the latest installer for Mac from the Osquery Downloads page
Launch the PKG and follow the instructions on the screen.
Osquery configuration
Configure osquery using the following in /var/osquery/osquery.conf
Linux or Mac osquery.conf - Set the osquery flags using the following in
/etc/osquery/osquery.flagsLinux or Mac osquery.flags - Once the config is written, open a Terminal window and run the following command to restart the osquery service:
sudo osqueryctl restart
Installing Fluent Bit
Note
TD-Agent-bit and Fluent Bit are alternate distributions of the same open source project with somewhat different default configurations and operating system support. The Observe scripts should use the best choice for the target operating system.
The Observe configuration for Fluent Bit on MacOS enables the collection of system logs and osquery snapshots. Adjust as necessary for your environment using the fluent-bit.conf file.
Install the latest version of Fluent Bit on MacOS using the following steps:
Compile from source from the Fluent Bit Downloads Page or use Homebrew.
Use the plist file from the Observe Mac configuration script to install fluent-bit as a service.
Fluent Bit Configuration
The following assumes that Fluent Bit is installed by Homebrew in the default location of /opt/homebrew/bin/fluent-bit.
Configure Fluent Bit using the following in /etc/fluent-bit/, replacing OBSERVE_CUSTOMER and OBSERVE_TOKEN with your ID and token.
Next, create a service with the following commands in a Terminal window:
sudo mv fluent-bit.plist /Library/LaunchDaemons/
sudo launchctl -w /Library/LaunchDaemons/fluent-bit.plist
Installing Telegraf
The Observe MacOS configuration for Telegraf collects metrics for CPU usage, disk usage, disk I/O, network usage, kernel messages, memory usage, process execution, swap usage, and system messages. Adjust as necessary for your environment using the telegraf.conf file.
Configure Telegraf using the following in /opt/homebrew/etc/telegraf.conf, replacing OBSERVE_CUSTOMER and OBSERVE_TOKEN with your ID and token. Also change datacenter and host to your desired values in [global_tags].
Restart the service with
brew services telegraf restart
Confirm Sending Data to Observe
To test that the forwarders send data to Observe, look for /telegraf and /fluentbit in the EXTRA field of the associated data stream:
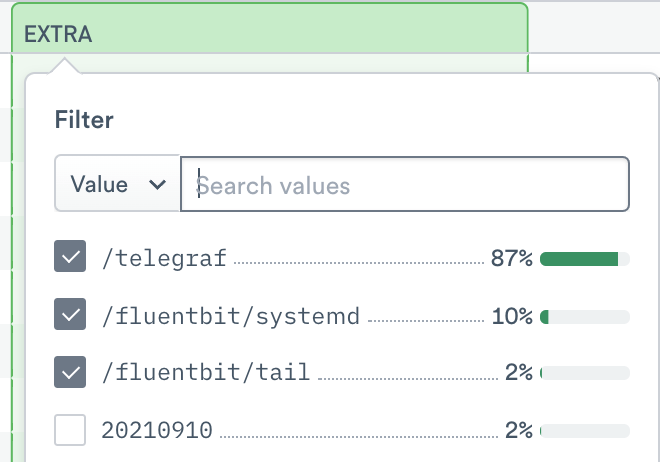
Figure 1 - Filtering the Extra Column
You can also check the status of the services on your hosts:
brew services info telegraf
sudo osqueryctl status
sudo launchctl list fluent-bit
FAQ
Why do I need to enter my password when I run the installation script?
The agents are run as services and MacOS requires you to use sudo to install them as services.
Why do I not osquery results when I manually run fluent-bit without sudo?
OSQuery by default makes root the owner of the log files it rights. If fluent-bit is not with sudo and you are not a root user, the files will be inaccessible.