Install the GitHub app
What type of data does the GitHub app ingest?
The GitHub app collects data from the following sources:
- GitHub webhooks that generate data for action runs and commits as well as real-time updates for Pull Requests, releases, and repositories.
- The Observe poller for GitHub that periodically collects metadata about issues, organizations, users, pull requests, releases, and repositories, as well as historical data for open Pull Requests and issues.
The following sections describe how to ingest data, install, and configure the collectors. For more about exploring this data, see GitHub.
Setup
Follow the instructions in Observe apps to install the GitHub app.
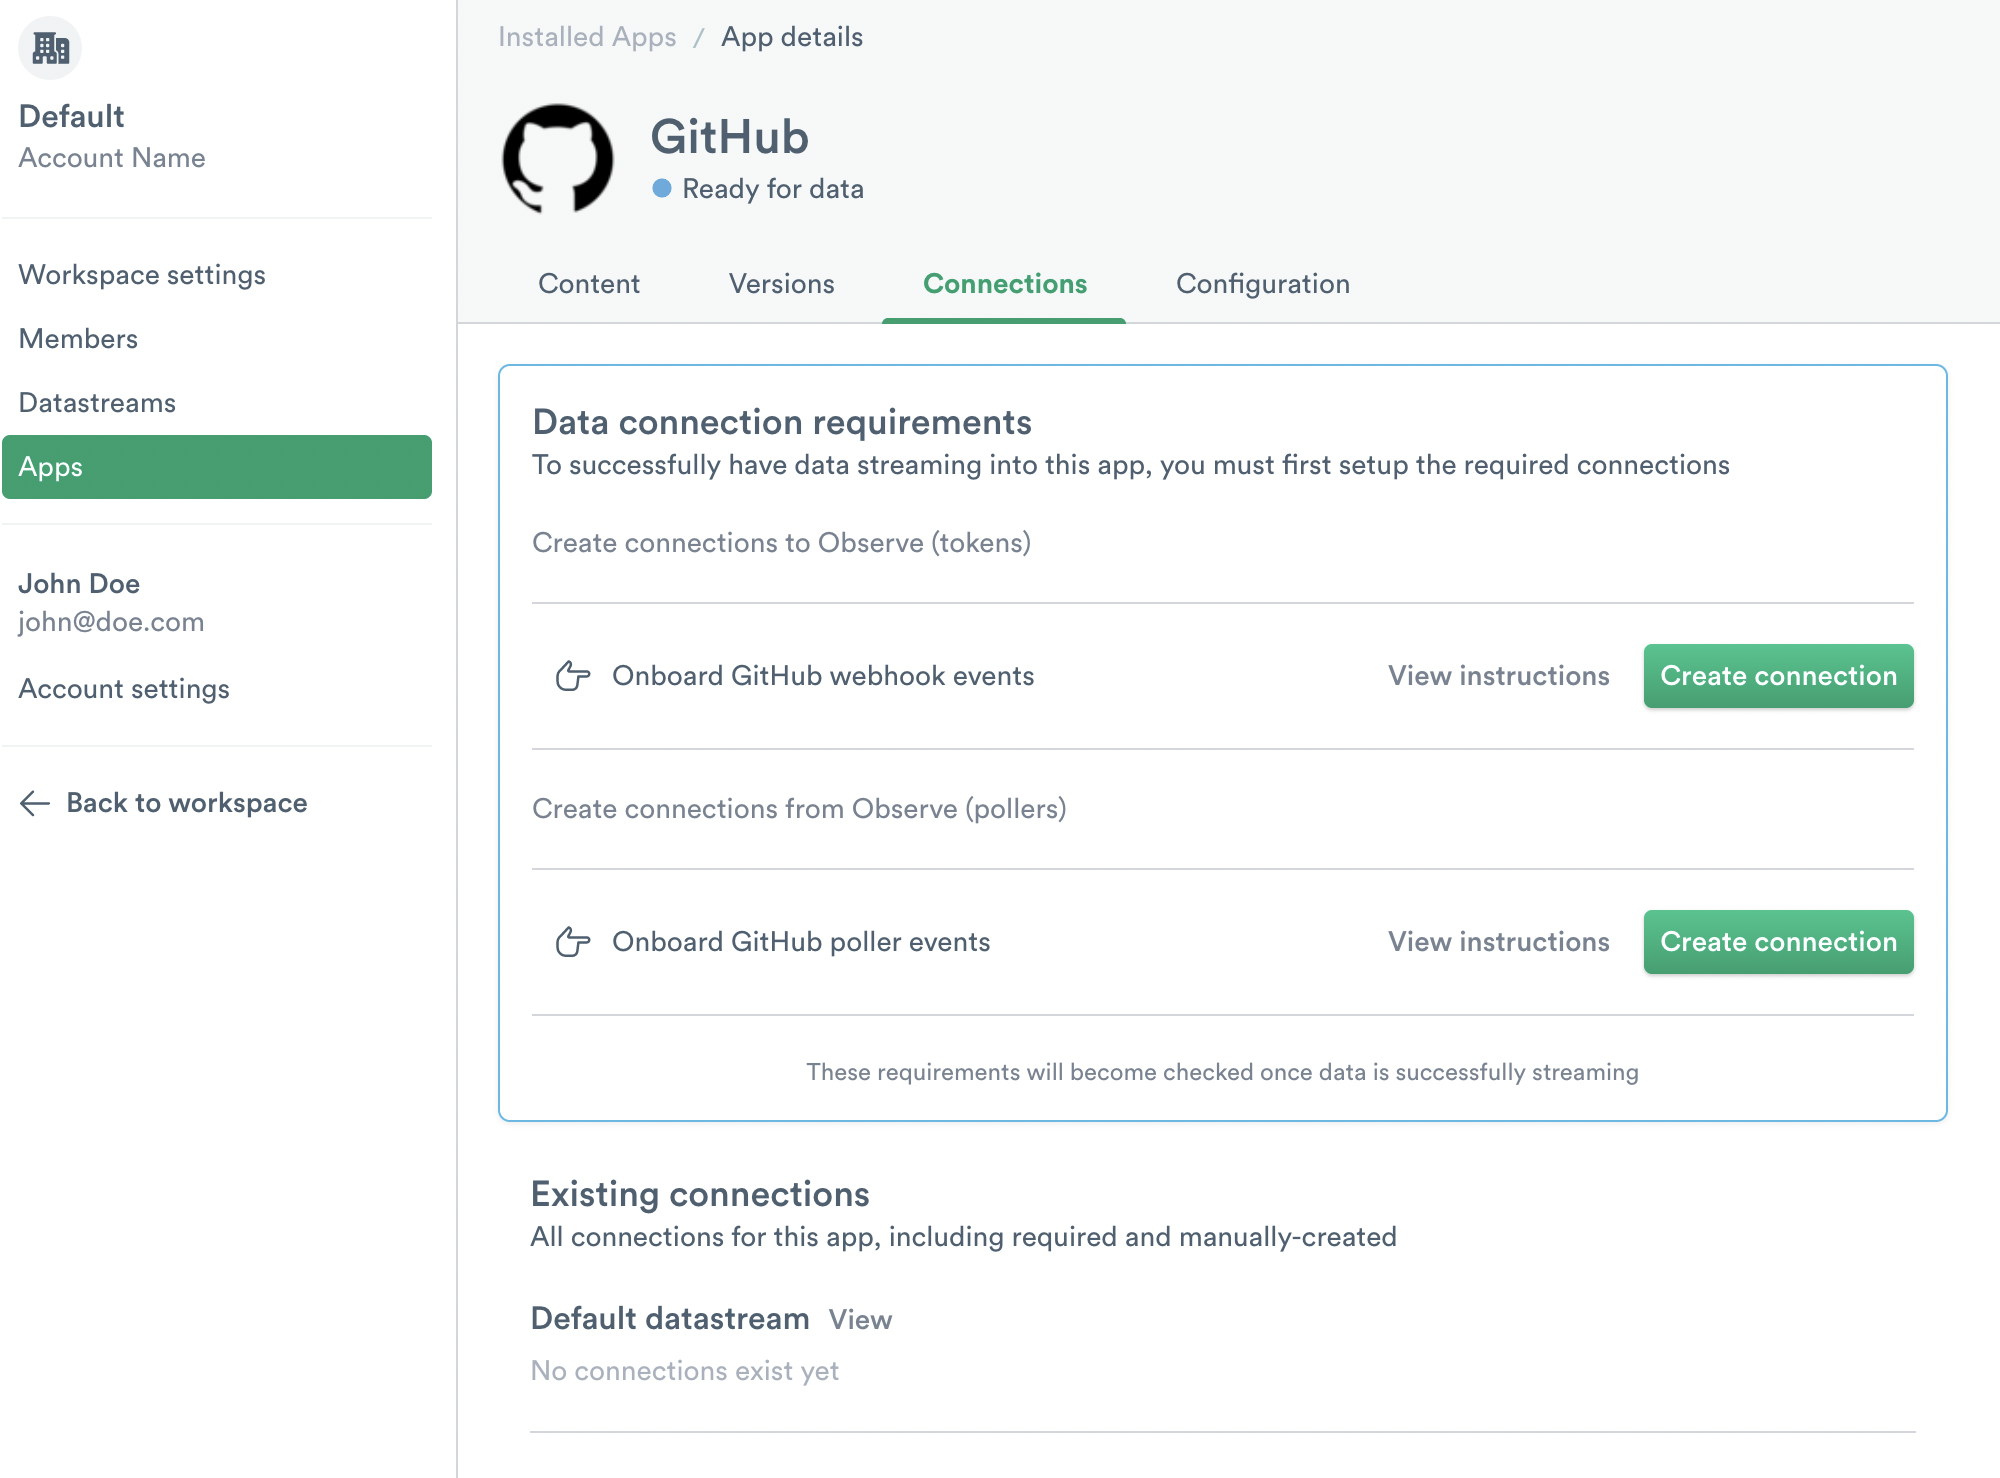
After you install the GitHub app, go to GitHub and configure the webhook and poller. Click Create connection for each task to begin.
Configure the webhook
On GitHub, set up a Webhook linked to your GitHub organization. As new activity happens, the Webhook pushes data to Observe. Observe ingests data for these GitHub sources:
- Activity Dashboard
- Action Run Dataset
- Administration Dashboard
- Commit Dataset
- Issues Dataset
- Pull Request Dataset
To configure the Webhook, navigate to your organization's home page on GitHub and click Settings.
If you don't see the Settings tab, you may not have administrative permissions for your organization. Contact an organization administrator to confirm your permissions.
-
On the Settings menu, click on Webhooks.
-
Click Add webhook. You may need to authenticate to access the Webhook configuration page.
-
Configure the following settings:
-
Payload URL:
https://${OBSERVE_TOKEN?}@${OBSERVE_CUSTOMER?}.collect.${OBSERVE_DOMAIN?}/v1/http/github -
Content type:
application/json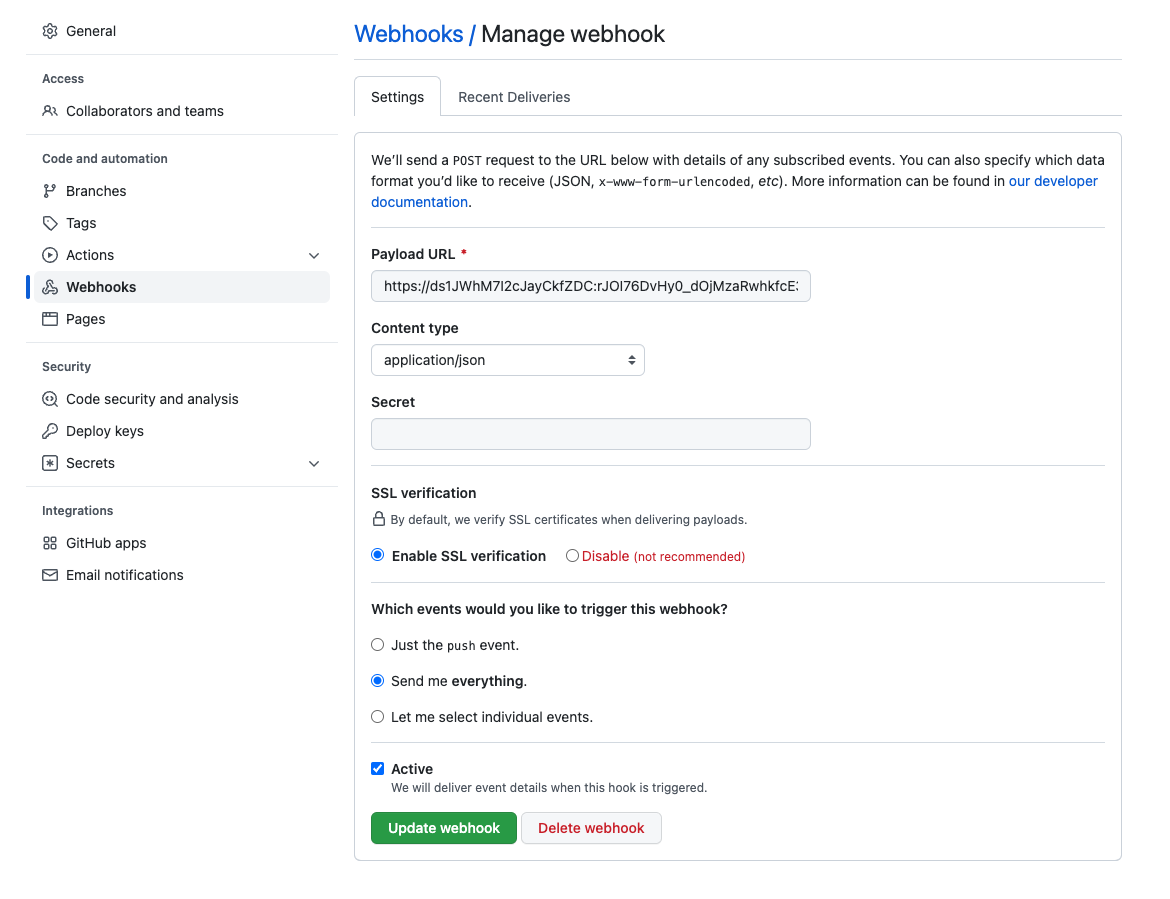
- Click Add webhook to save your configuration.
For more about GitHub Webhooks, see Creating webhooks in the GitHub documentation.
-
Configure the GitHub poller
Pollers periodically request data from the GitHub API, allowing ingestion of existing details without relying on a triggering event. The poller ingests data from these sources:
- Administration Dashboard
- Issues Dataset
- Organization Dataset
- Pull Request Dataset
- Release Dataset
- Repository Dataset
- User Dataset
To create a GitHub API token, use the following steps:
-
Log into GitHub as the user you want to generate a token.
-
Go to the Personal access token page and click on Generate new token in the top right then Generate new token (classic).
-
In the New personal access token (classic) dialog, add a name for the token under Note and set an expiration date suitable for your organization's token rotation policies.
-
Define the scope for the token then click Generate token. Use the following scope to ingest all required data into Observe:
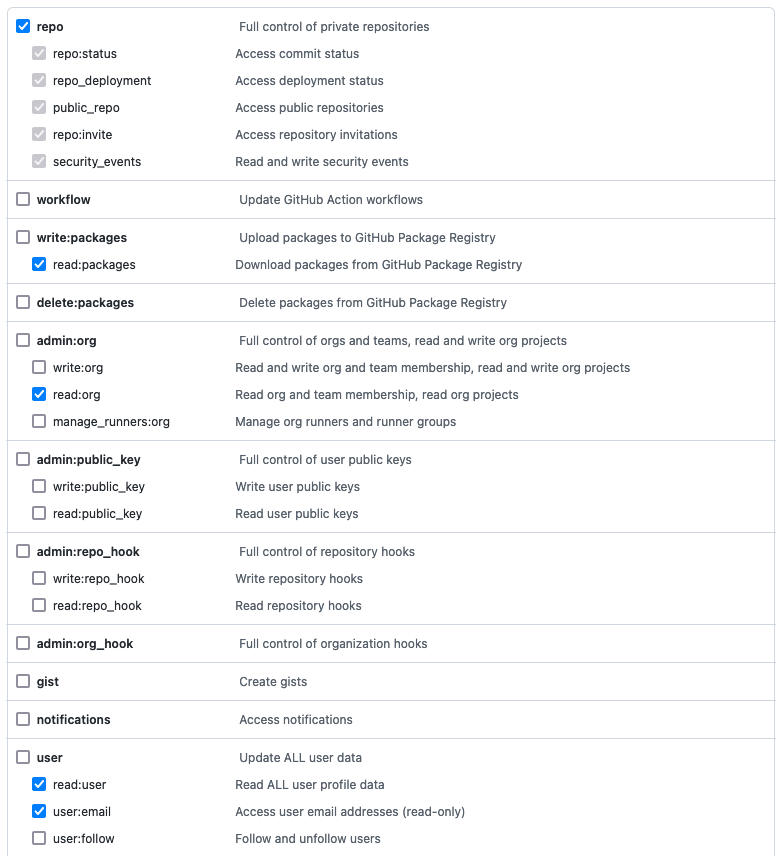
Note that Observe only reads from GitHub.
In Observe, configure the GitHub Poller to collect and ingest data:
-
In the GitHub app, go to the Connections tab.
-
Under Data connection requirements, in the Onboard GitHub poller event section, click Create connection.
-
In the Create poller dialog, configure the following settings:
- For GitHub Org, enter the name of your GitHub organization.
- For GitHub Token, enter a GitHub API token associated with your GitHub account.

You have now configured the GitHub app and can send your GitHub data to Observe.