Get started with OPAL
Follow this tutorial to learn how to use the Observe Processing and Analysis Language (OPAL) to shape your data into business-focused information.
Scenario
As the owner of a chain of Grab and Go stores, you want business information from your Point of Sale (PoS) to track sales data. From your PoS logs, you can extract data about the following information:
- When items are purchased (Timestamp)
- Employee Name
- Employee ID
- Activity Performed
- Store Number
- Store Name
- City
- State
You can shape this data using OPAL to answer these questions:
- Most activity at a store
- Employee who handled each transaction
- Register ID for the transaction
In this tutorial, you learn to shape and model your data using OPAL, the language used by Observe to perform database tasks.
Ingest data into Observe
Before working with OPAL, you must ingest your data into Observe using a Datastream and an Ingest Token. Use the following steps to start your ingestion process:
- Log into your Observe instance, and click Datastreams.
- Click Create Datastream.
- Enter IntroductionToOPAL as the Name.
- (Optional) Enter a short description of the Datastream.
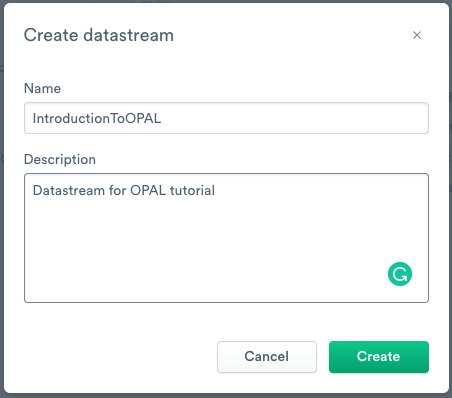
- Click Create.
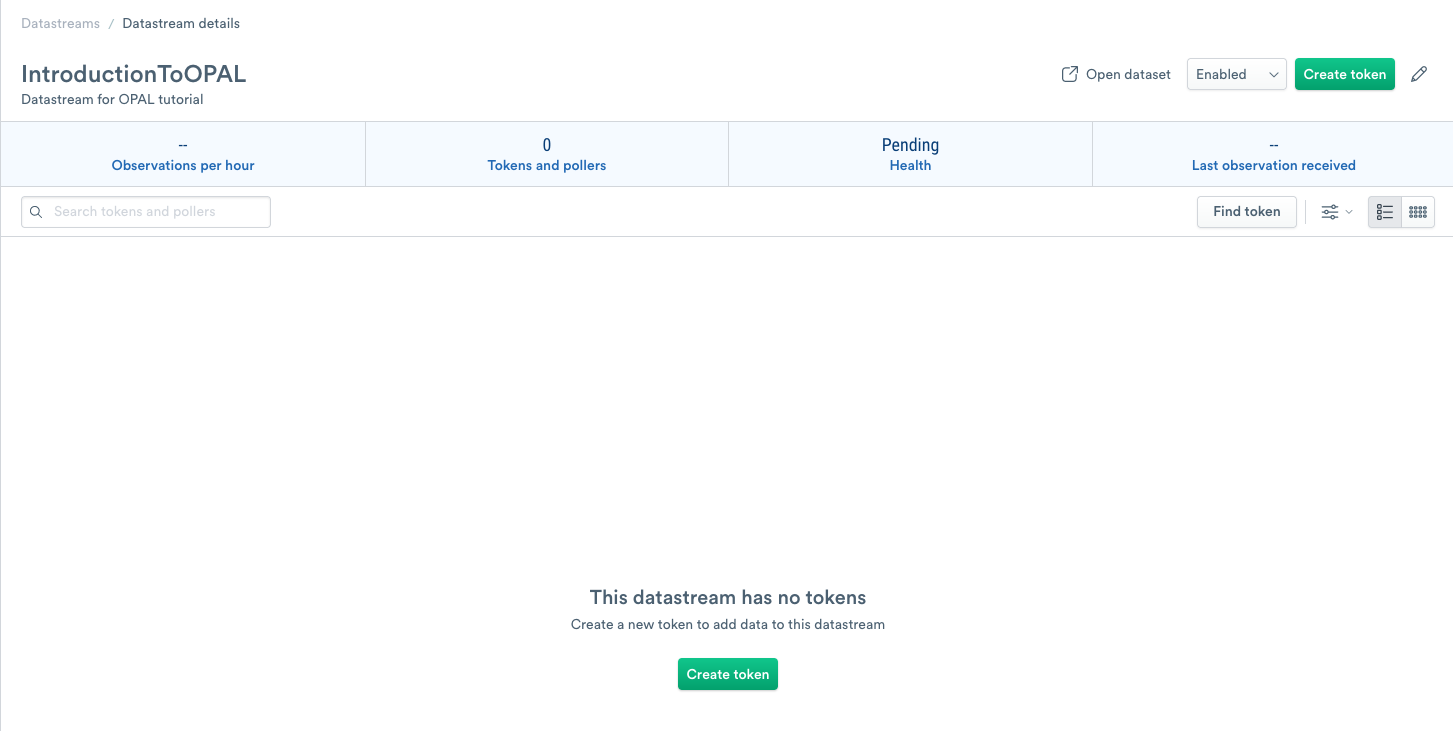
Add an ingest token to your datastream
To allow data into your Datastream, you must create a unique ingest token. Use the following steps to create an ingest token:
- To add a new ingest token, click Create token.
- Enter IntroductionToOPALToken as the name.
- (Optional) Enter a short description of the ingest token.
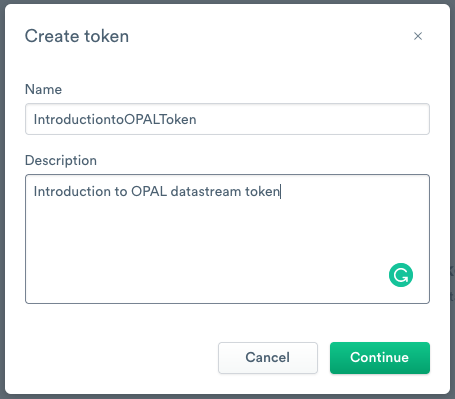
- Click Continue.
- You receive a confirmation message confirming the creation of your token creation and the token value.
- Click Copy to clipboard to copy the token value and then save it in a secure location.
NoteYou can only view the token once in the confirmation message. If you don’t copy and paste the token into a secure location, and you lose the token, you have to create a new one.
- Once you copy it into a secure location, select the confirmation checkbox, and then click Continue.
- After you click Continue, Observe displays setup instructions for using the new ingest token.
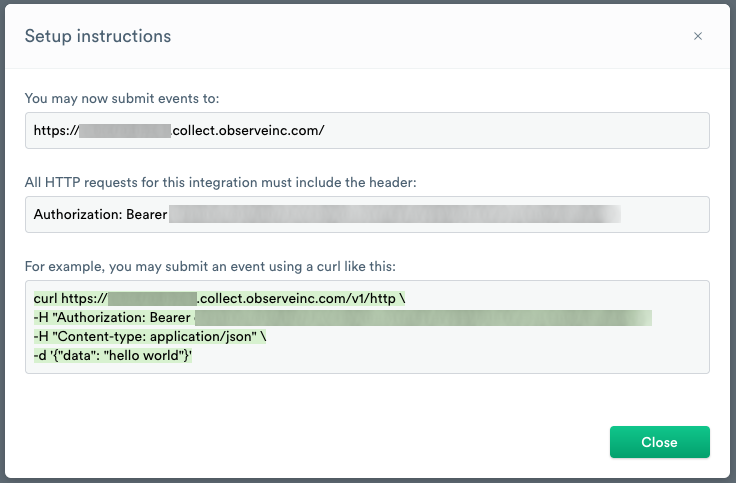
The URL https://{customerID}.collect.observeinc.com/ displays your customer ID and URL for ingesting data.
NoteSome Observe instances may optionally use a name instead of Customer ID; if this is the case for your instance, contact your Observe data engineer to discuss implementation. A stem name will work as is, but a DNS redirect name may require client configuration.
HTTP requests must include your customer ID and ingest token information.
You can view the setup instructions on your Datastream’s About tab.
Use cURL to ingest data into the tutorial datastream
This tutorial uses three log files containing point-of-sales (PoS) data that you must send to your Observe instance. Download all three files from GItHub.
After you download the files, put them in the following locations:
- macOS -
home/<yourusername> - Windows -
C:\Users\<yourusername
You can send this data to the v1/http endpoint using cURL. See Endpoints for more details.
The path component of the URL is encoded as a tag. Query parameters also encoded as tags. To accomplish this, add the path, OPAL101, and the query parameter, version. Keep this information in mind for use later in the tutorial.
Copy and paste the following cURL to ingest the log data from the three log files into the Datastream. Replace ${CustomerID} with your Customer ID, such as 123456789012.
curl "https://${CustomerID}.collect.observeinc.com/v1/http/OPAL101?version=version1" \
-H "Authorization: Bearer {token_value}" \
-H "Content-type: text/plain" \
--data-binary @./PoSActivity1.logcurl "https://${CustomerID}.collect.observeinc.com/v1/http/OPAL101?version=version2" \
-H "Authorization: Bearer {token_value}" \
-H "Content-type: text/plain" \
--data-binary @./PoSActivity2.logcurl "https://${CustomerID}.collect.observeinc.com/v1/http/OPAL101?version=version3" \
-H "Authorization: Bearer {token_value}" \
-H "Content-type: text/plain" \
--data-binary @./PoSActivity3.logEach cURL command returns {"ok":true} when successful. After ingesting the data, you should see the data in the Datastream, IntroductionToOPAL.

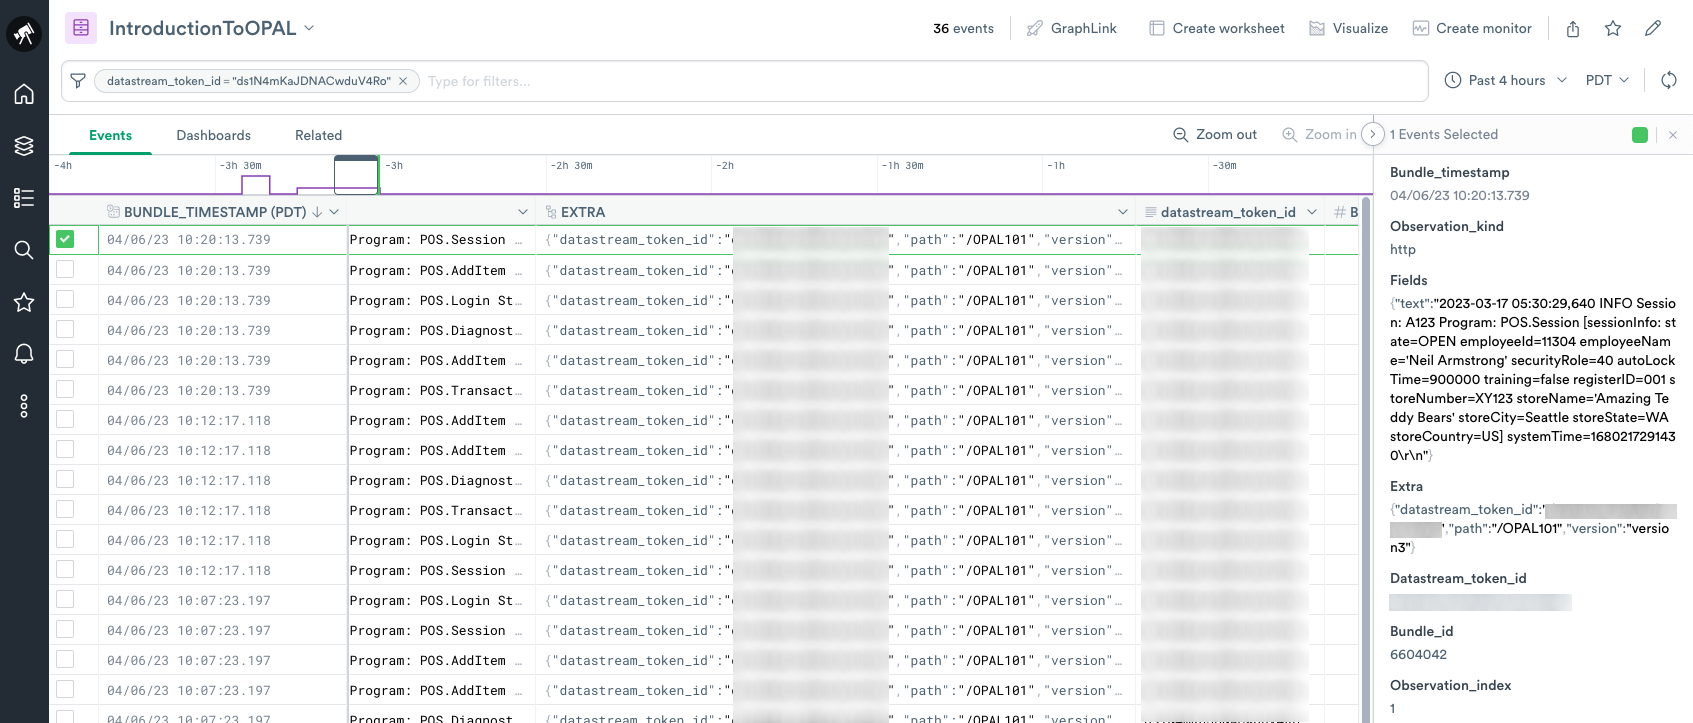
- Click Open dataset to view the ingested data.
- Select a row to display details for that log event.
Shape data with OPAL
Use OPAL to shape the raw log data. Shaping data means transforming the raw data into structured, usable datasets for analysis, dashboards, or alerts.
Create a Worksheet for your Dataset
To create a Worksheet to start modeling your data, click Create Worksheet at the top of your IntroductionToOPAL Dataset. A Worksheet contains similarities to most spreadsheet applications. It uses column headings, columns, and rows to logically group your data.
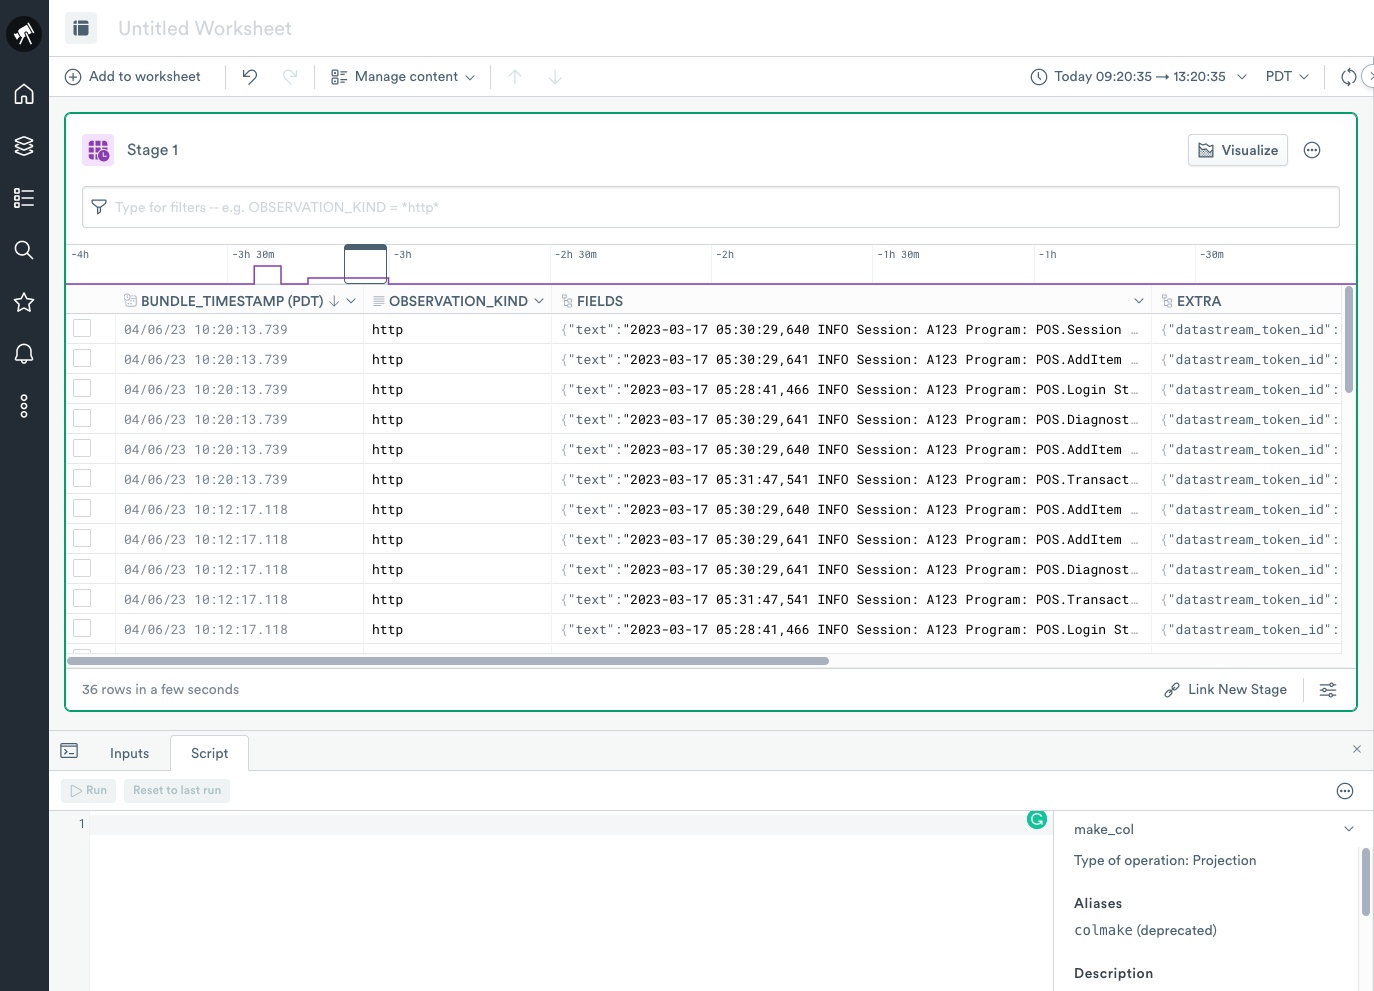
To begin modeling using OPAL, open the OPAL console located just under the Worksheet.
Use OPAL to shape your data
What you will do in this section:
- Use
make_colto extract columns - Use
filterto filter the Dataset - Use
make_colandtrimto extract and format columns - Use
extract_regexand regular expressions to extract columns - Use
parse_timestampto convert a column to a timestamp - Use
from_millisecondsto convert timestamp columns - Use
parse_kvsto extract from columns - Use
pick_colto select the columns you want to display
Use make_col to extract columns
make_col to extract columnsFirst, let’s experiment with semi-structured data. Semi-structured data can consist of data such as emails, comma-separated values, JSON, etc.
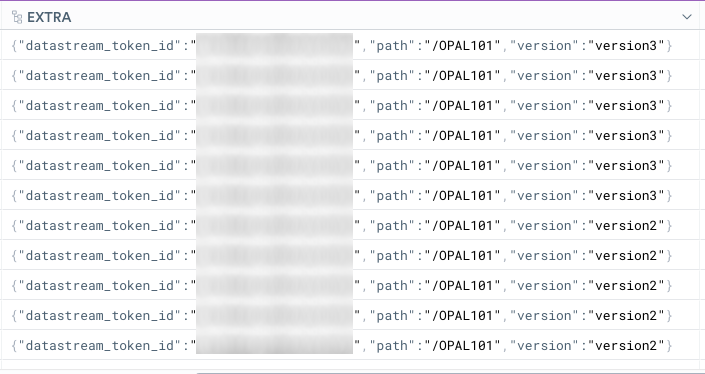
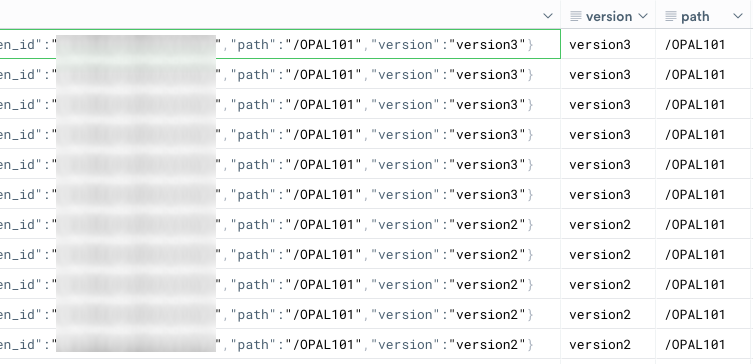
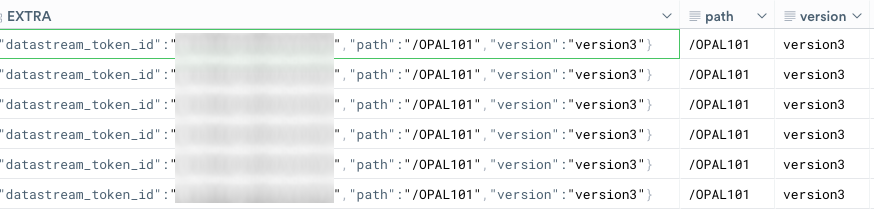
When you ingested the data into Observe, you added a custom path and query string parameter to the HTTP ingestion endpoint. You can find these in the Extra column:
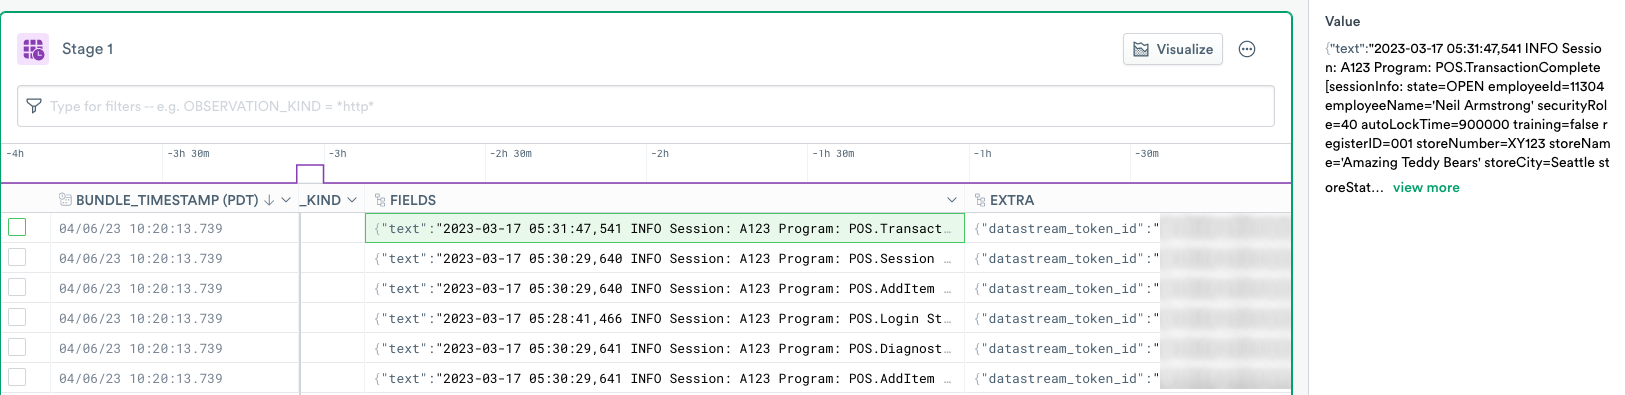
When you double-click on any incoming row cell in the Extra column, the Inspect window displays the following:
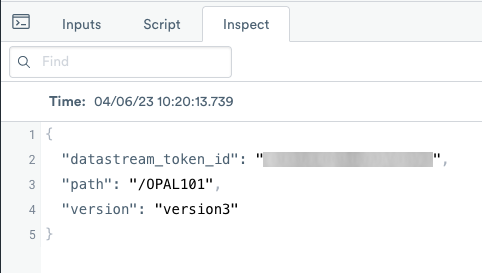
The data in the Extra column shows that the data has a JSON object format. You can manipulate this data using the make_col projection operation.
Enter the following code in the OPAL console and click Run:
Let’s look at the components of the OPAL expression and understand each one:
make_col path:string(EXTRA.path)
//^^^^^^                         Make Column verb
//       ^^^^                    The name of the resulting column ("path")
//            ^^^^^^             Casting of the value in the expression to "string" data type
//                   ^^^^^^^^^^^ The fully qualified path to the desired value in "EXTRA" column
                                 ("EXTRA.path")
Note that the make_col verb can evaluate multiple expressions at once and span multiple lines in the code editor.
The following OPAL expression combines both expressions into a single operation but provides the same output as the previous expression:
Use filter to filter the Dataset
filter to filter the DatasetNext, let’s look at filtering using the OPAL language in Observe.
In the previous section, you extracted two columns, path and version, contained in the Extra column and converted them to strings. Now, learn to use columns with explicit equality filters.
Copy the following code, and paste it into your OPAL console. Click Run at the top of the OPAL console.
Now you have filtered the incoming dataset to display just one of the ingested log files.
Let’s understand the components of the expression:
filter path = "/OPAL101"
//^^^^                      Filter verb
//     ^^^^                 Column to compare ("path")
//	        ^               Predicate ("=")
//	           ^^^^^^^^     Value to compare
But you want to evaluate all of the data, so remove the filter version = "version3" line of OPAL and click Run to revert back to all input versions.
Remember that you removed the OPAL expression version:string(EXTRA.version) so that you can model all versions of the data.
Use make_col and trim to extract and format columns
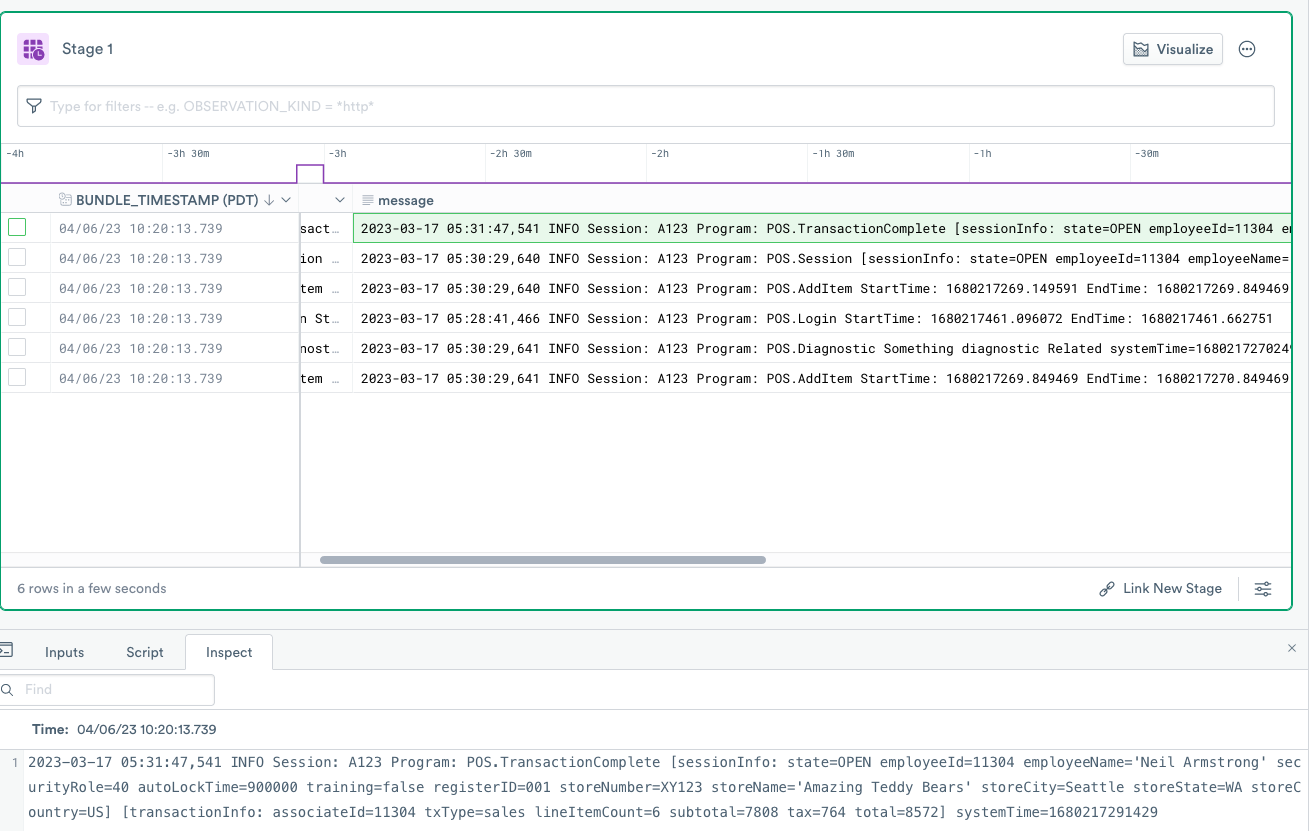
make_col and trim to extract and format columnsThis section reviews how multiple functions can be combined together to extract and clean data. The contents of the ingested log files can be found in the Fields column, specifically in the text property. Double-click on any row in the Fields column to review the data in the Inspect window:
The value details reveal line breaks at the end of each line,\r\n:
{
  "text": "2023-03-17 05:31:47,541 INFO Session: A123 Program: POS.TransactionComplete [sessionInfo: state=OPEN employeeId=11304 employeeName=Neil Armstrong securityRole=40 autoLockTime=900000 training=false registerID=001 storeNumber=XY123 storeName=[Amazing Teddy Bears] storeCity=Seattle storeState=WA storeCountry=US] [transactionInfo: associateId=11304 txType=sales lineItemCount=6 subtotal=7808 tax=764 total=8572] systemTime=1680217291429\r\n"
}
Enter the following OPAL expression and click Run at the top of the OPAL console:
This expression applies the trim function in addition to the string value extracted from the column and removes carriage returns and line feed characters.
The new message column displays the following information without unnecessary characters.
Here’s the explanation of the trim expression:
make_col message:trim(string(FIELDS.text), "\r\n")
//^^^^^^                                          Make Column verb
//       ^^^^^^^                                  The name of the resulting column ("path")
//               ^^^^                             Trim function to remove characters from
                                                  enclosed values
//                                          ^^^^  Characters that Trim function should remove
//                    ^^^^^^                      Casting of the value in the expression to
                                                  "string" data type
//                           ^^^^^^^^^^^          The fully qualified path to the desired
                                                  value in "FIELDS" column ("FIELDS.text")
Use extract_regex and regular expressions to extract columns
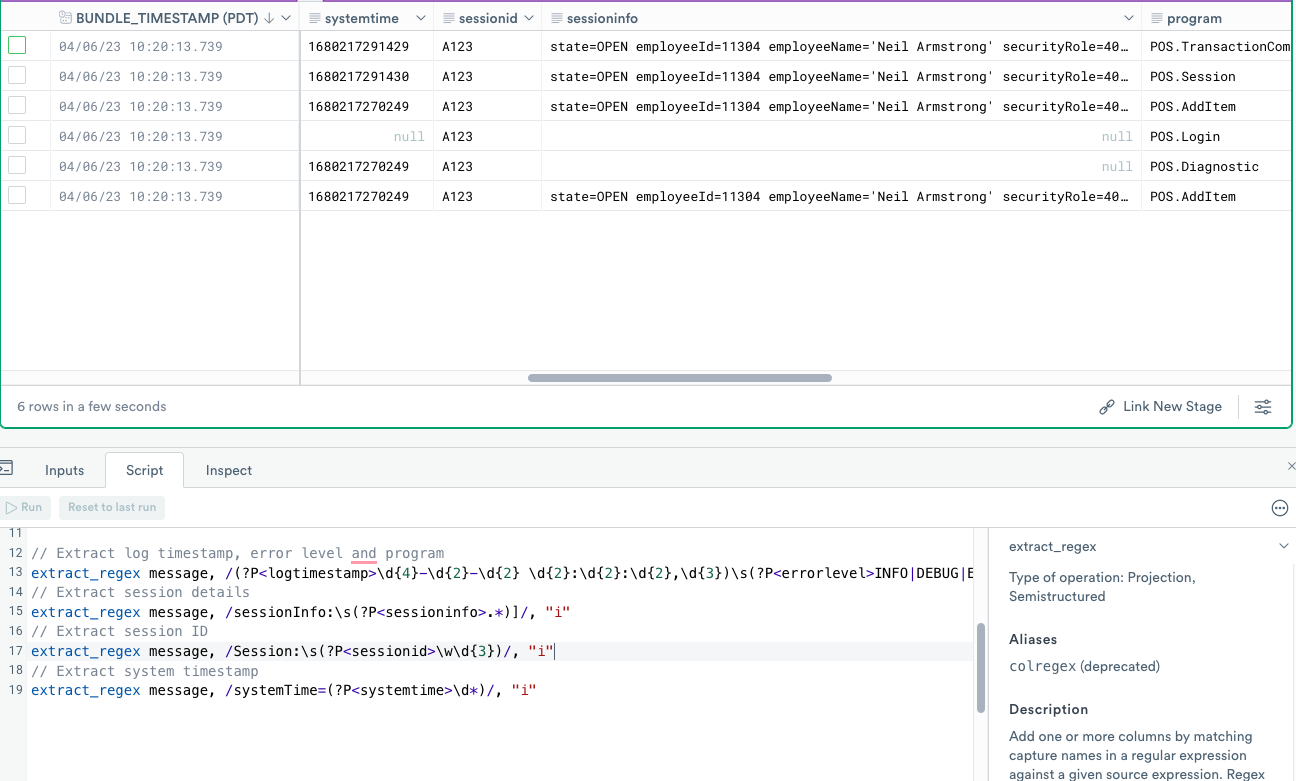
extract_regex and regular expressions to extract columnsNext, create columns using regular expressions.
The message column appears to contain interesting business data about your stores. Using the extract_regex verb, you can easily convert that unstructured string into structured data.
Enter the following code in the OPAL console, and click Run.
The new logtimestamp, errorlevel, program, sessioninfo, sessionid, and systemtime columns now display in the Worksheet.
Below is a description of the expression components:
| Expression component | Description |
|---|---|
extract_regex | Extract columns with regular expressions verb. |
message | The column to be parsed. |
/(?P<logtimestamp>\d{4}-\d{2}-\d{2} \d{2}:\d{2}:\d{2},\d{3}) | Named capture group called logtimestamp capturing sequence of numbers like "2023-03-17 05:31:47,541". |
\s | Space character. |
(?P<errorlevel>INFO|DEBUG|ERROR|WARN) | Named capture group called errorlevel capturing values from the list of "INFO", "DEBUG", "ERROR" and "WARN". |
.* | Any character. |
Program:\s | Exact match of Program followed by a space. |
(?P<program>\w*\.\w*) | Named capture group called program capturing two strings separated by period. |
"i" | Modifiers, in this case specifying case-insensitive parsing. |
Use parse_timestamp to convert a column to a timestamp
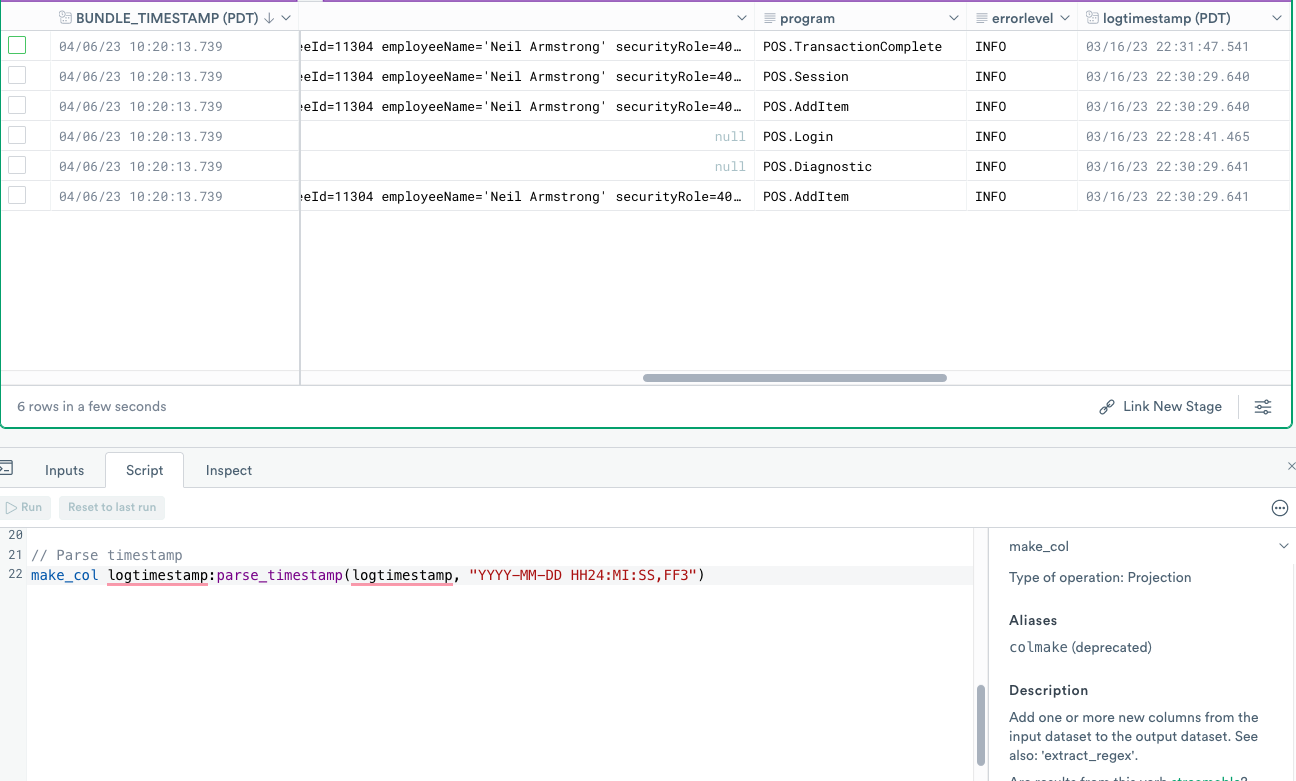
parse_timestamp to convert a column to a timestampYour next step converts parsed values from their default string representation to more appropriate types of values.
OPAL uses parse_isotime to parse the ISO 8601 timestamp format, but the example data doesn’t appear to be ISO 8601 timestamp format. However, you can easily parse the timestamp with the parse_timestamp function.
Enter the following expression into the OPAL console, and click Run.
The logtimestamp column of the string type already exists, but now you have overwritten it using the new logtimestamp column of timestamp type.
Below is a description of the expression components:
| Expression component | Description |
|---|---|
make_col | Make column verb. |
logtimestamp | The name of the resulting column (logtimestamp). |
parsetimestamp | Function to parse the timestamp. |
(logtimestamp | The name of the source column (also logtimestamp). |
"YYYY-MM-DD HH24:MI:SS,FF3" | Format of the timestamp using Snowflake's time format specifiers. |
Use from_milliseconds to convert timestamp columns
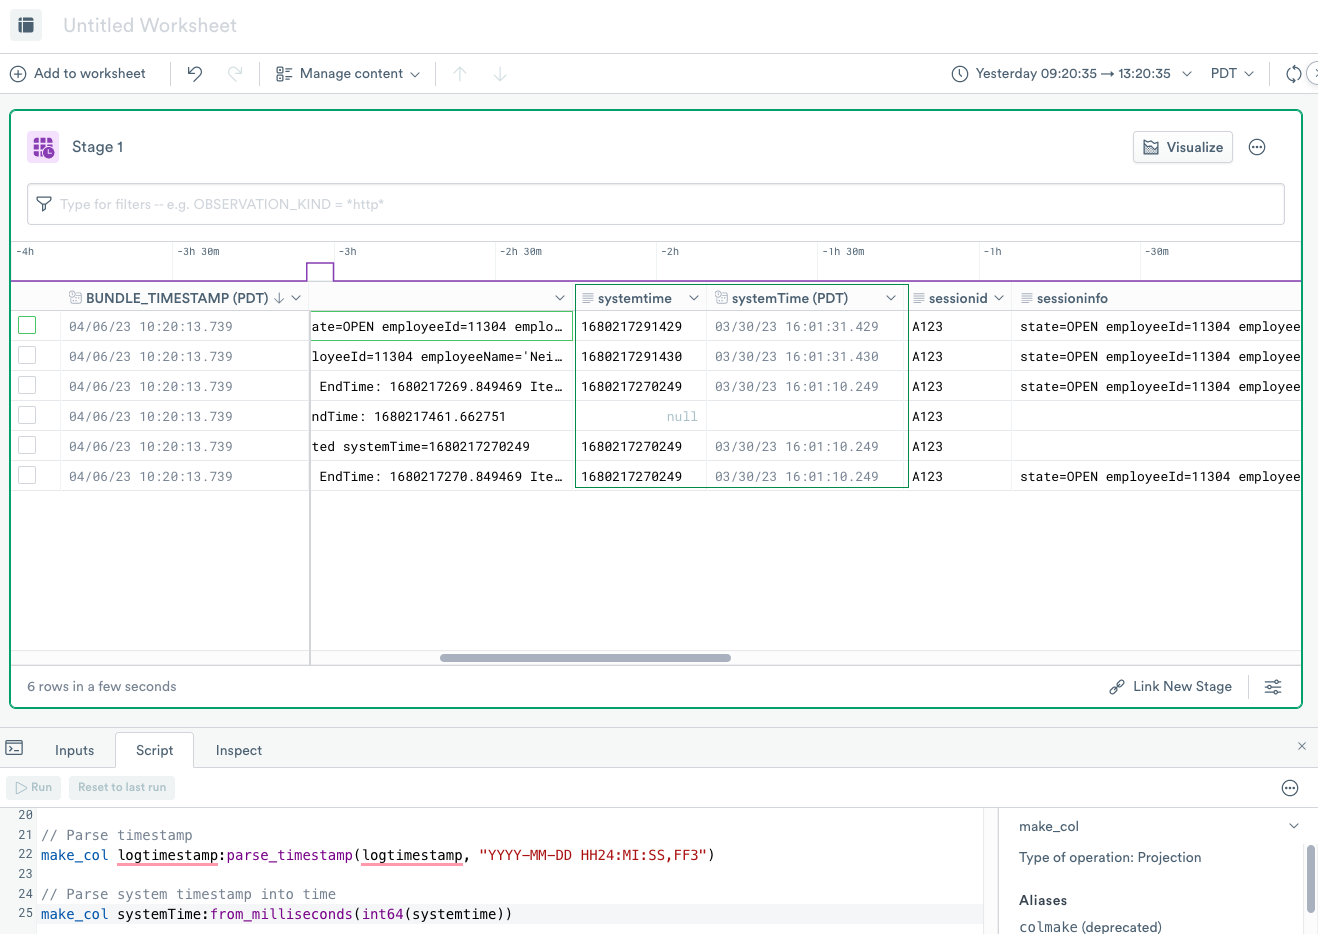
from_milliseconds to convert timestamp columnsOPAL provides full support for Unix timestamps with from_nanoseconds, from_milliseconds, and from_seconds functions. Let’s explore these a little more.
Enter the following expression into the OPAL console, and click Run.
OPAL column names are case-sensitive. Therefore, the example produces a new column systemTime, distinct and different from systemtime even though they only differ by case:
Below is a description of the expression components:
make_col systemTime:from_milliseconds(int64(systemtime))
// ^^^^^                                                Make Column verb
//       ^^^^^^^^^^                                     The name of the resulting column
                                                        ("systemTime" with capital "T")
//                                          ^^^^^^^^^^  The name of the source column
                                                        ("systemtime" with lower "t")
//                  ^^^^^^^^^^^^^^^^^                   Convert time from unix Milliseconds function
//                                    ^^^^^^            Convert string to 64-bit integer
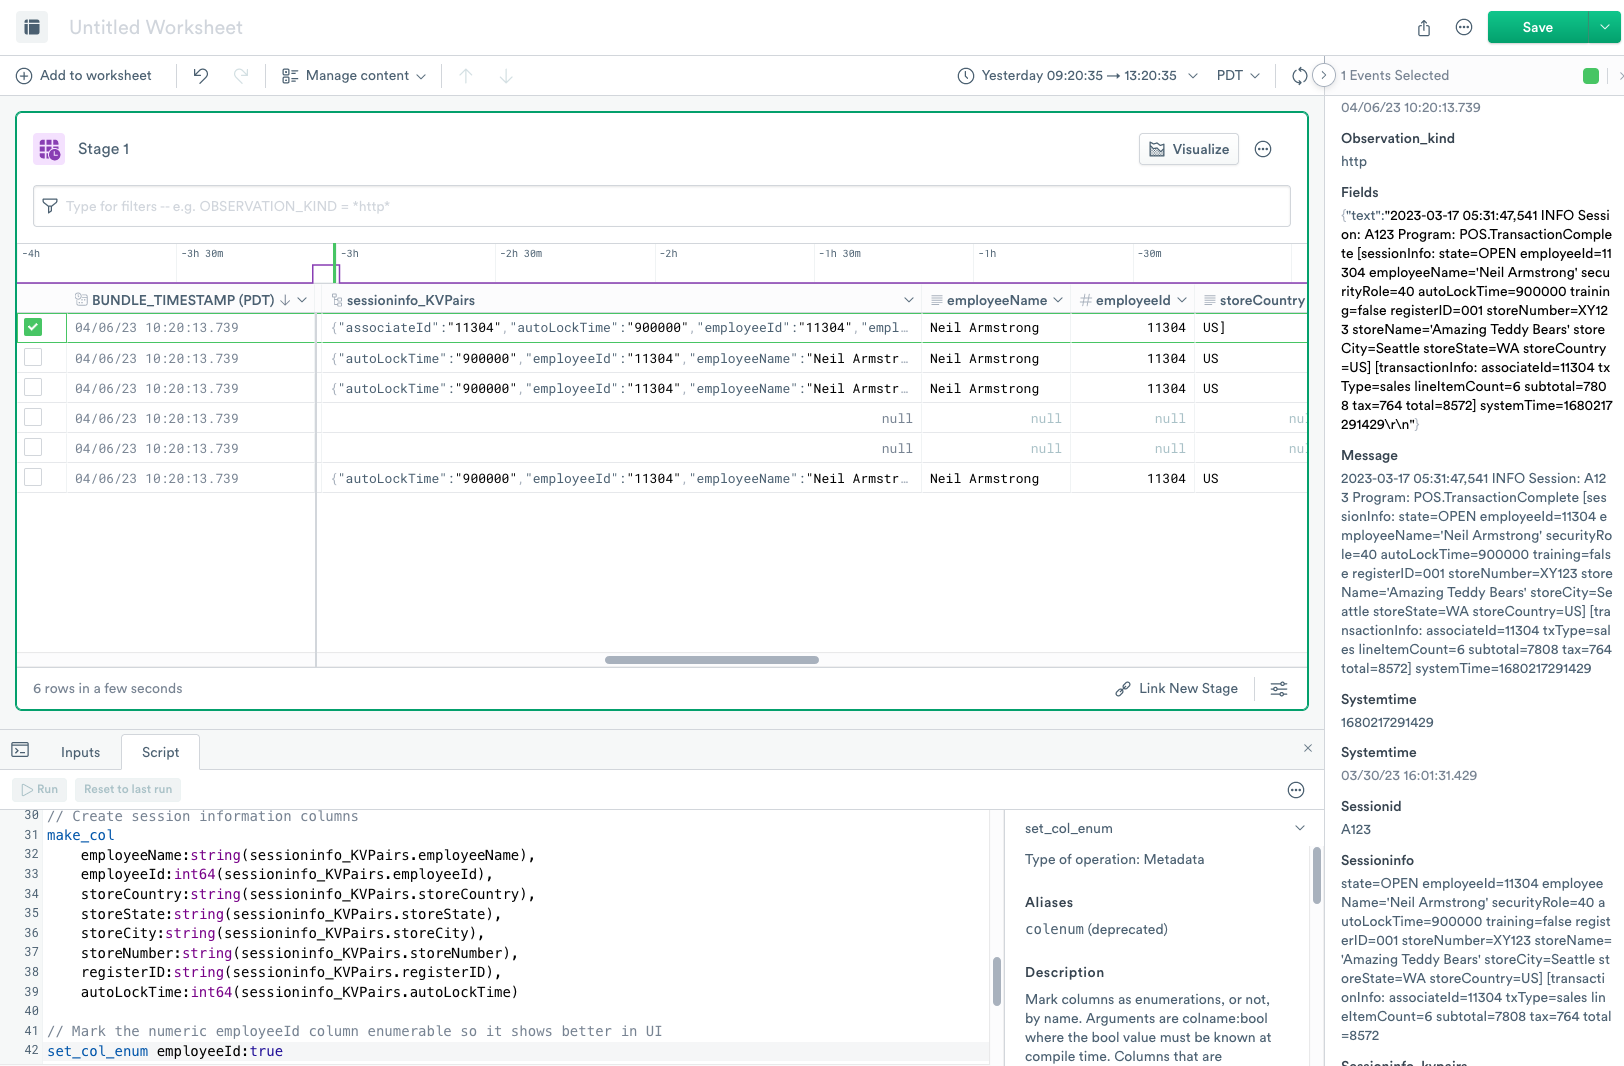
Use parse_kvs to extract from columns
parse_kvs to extract from columnsOPAL simplifies many common parsing challenges, including key/value pair parsing using the parse_kvs function.
Enter the following expression into the OPAL console, and click Run.
The parse_kvs function splits incoming data from commonly used delimiters, and you can easily add your own delimiters, and produces a column with an object with key/value pair properties.
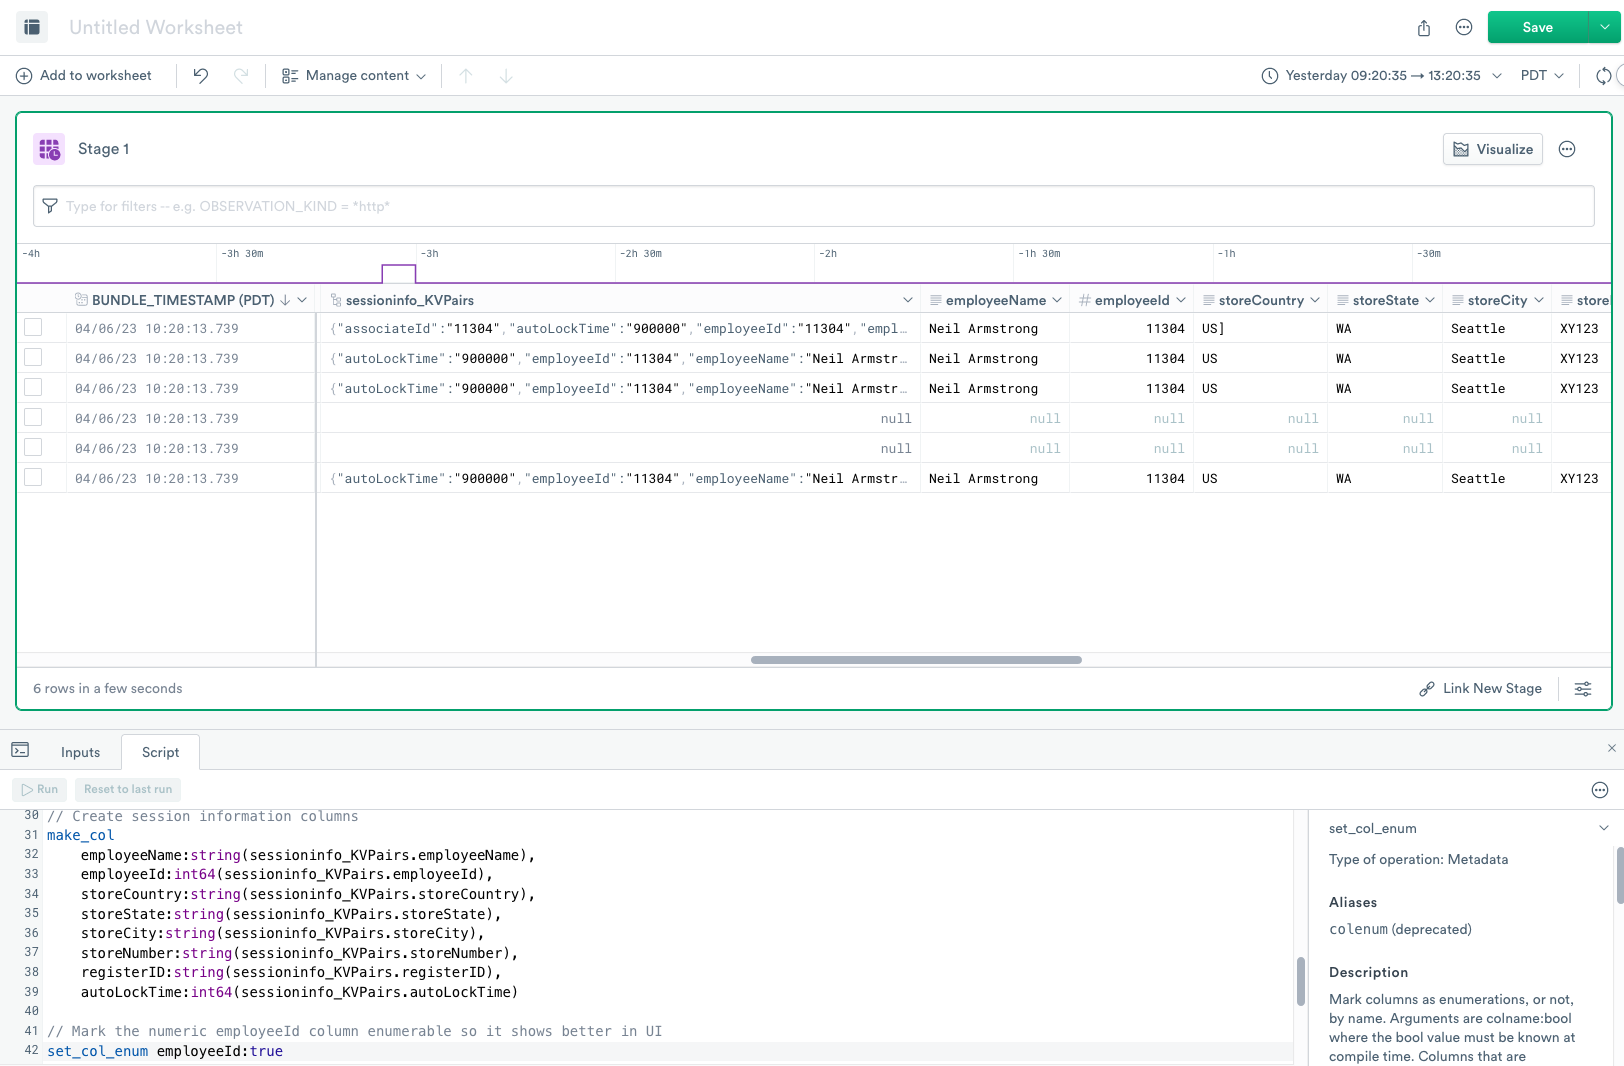
The OPAL expression creates additional columns using the now familiar make_col verb.
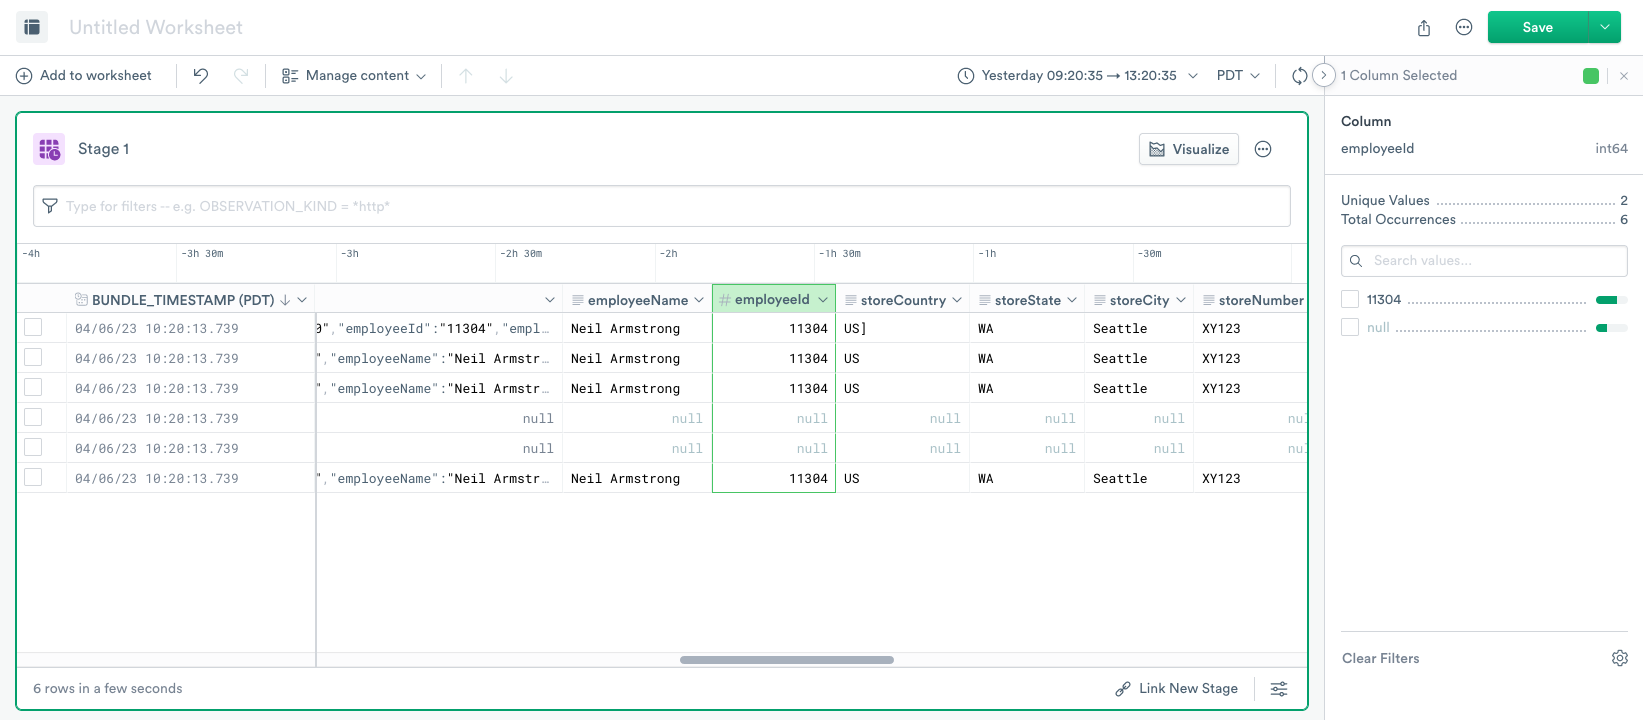
When you click on the header of the numeric columns, such as autoLockTime, the right panel displays a Range Selector:
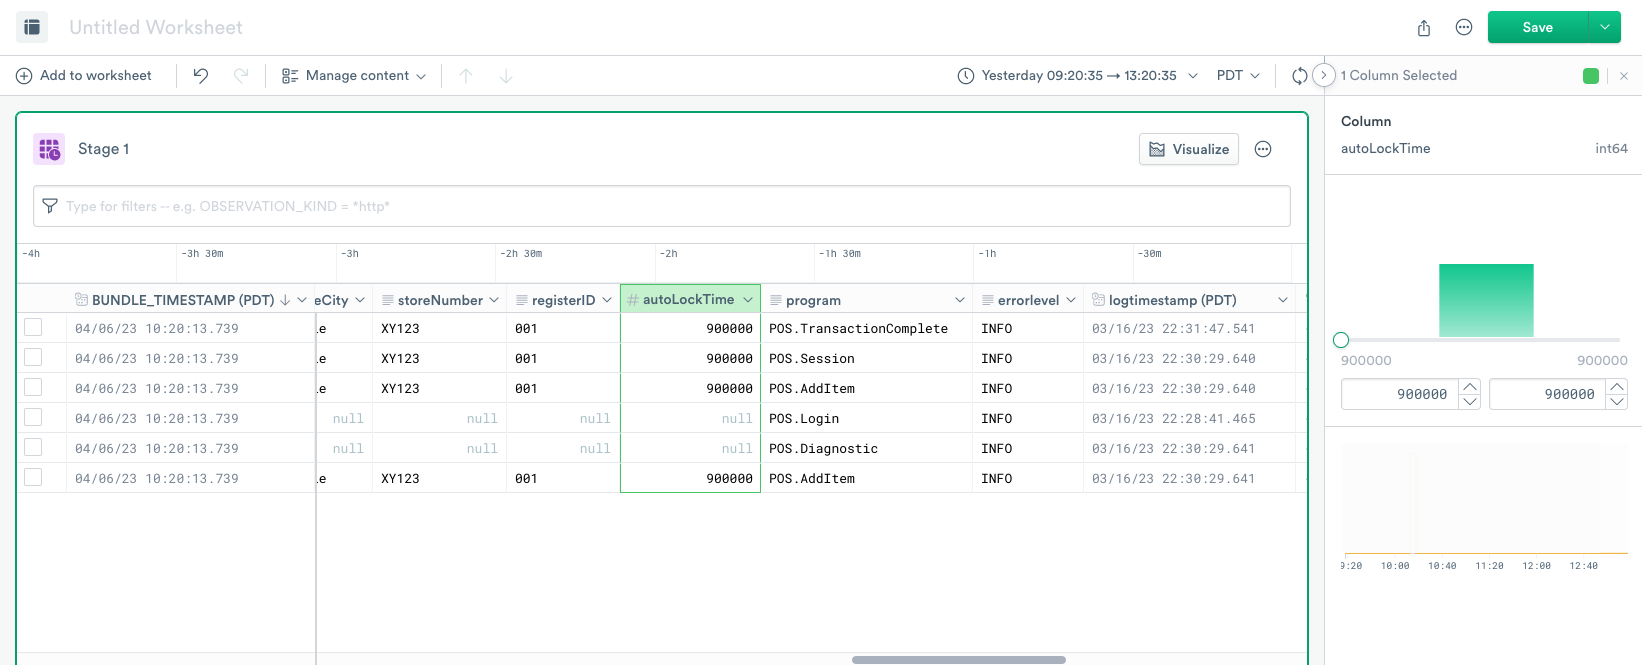
But although a column employeeId is numeric, you want to enumerate all the possible values instead of showing the numeric range. Use the set_col_enum verb to mark a column as enumeration, and the right panel displays the enumeration of all the values.
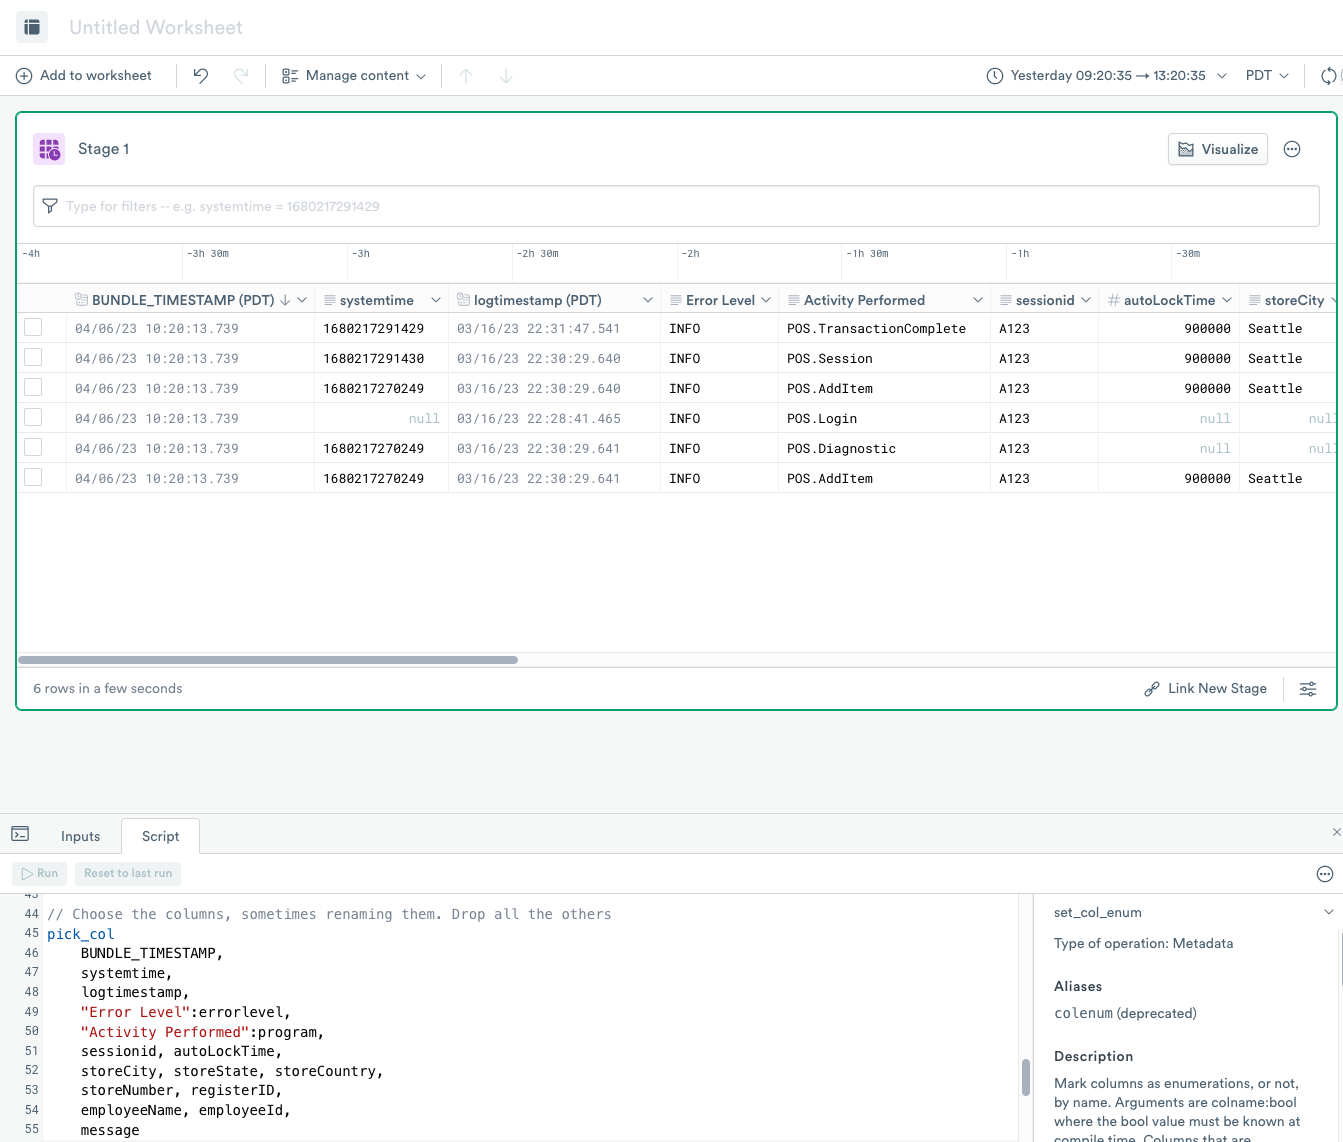
Use pick_col to select the columns you want to display
pick_col to select the columns you want to displayYou’ve created a lot of intermediate columns so far in this tutorial. Now you can use the pick_col verb to choose the columns you want to see as the final result and optionally rename them.
Enter the following expression into the OPAL console, and click Run.
This example selects just the columns you want and in the exact sequence you want. The expression uses the column binding expression to rename the errorLevel column to Error Level and the program column to Activity Performed.
Create visualizations for sales data
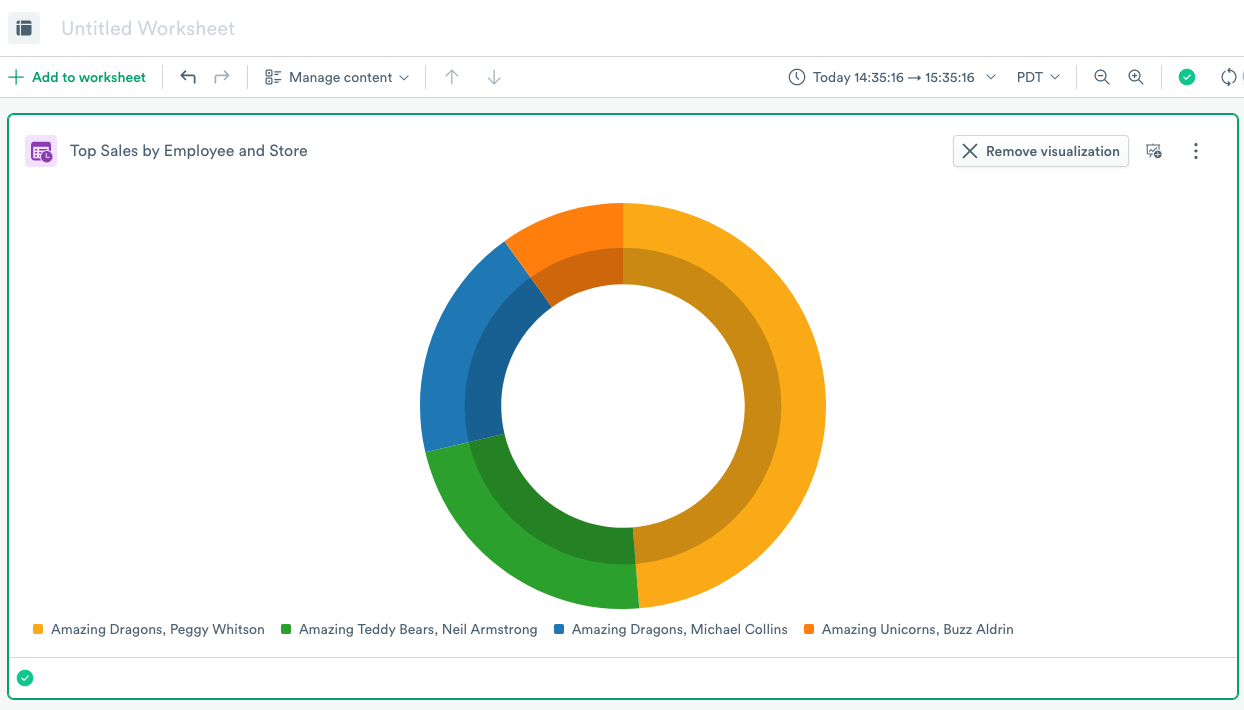
Next, you want to view the sales data for each store by employee to see which store has the top salespeople.
Add the following OPAL to your OPAL console:
You can now view your stores by sales transactions by clicking Visualize and selecting Visualization > Type > Pie Chart:
To visualize the data as a Line Chart, select Line Chart and click Apply:
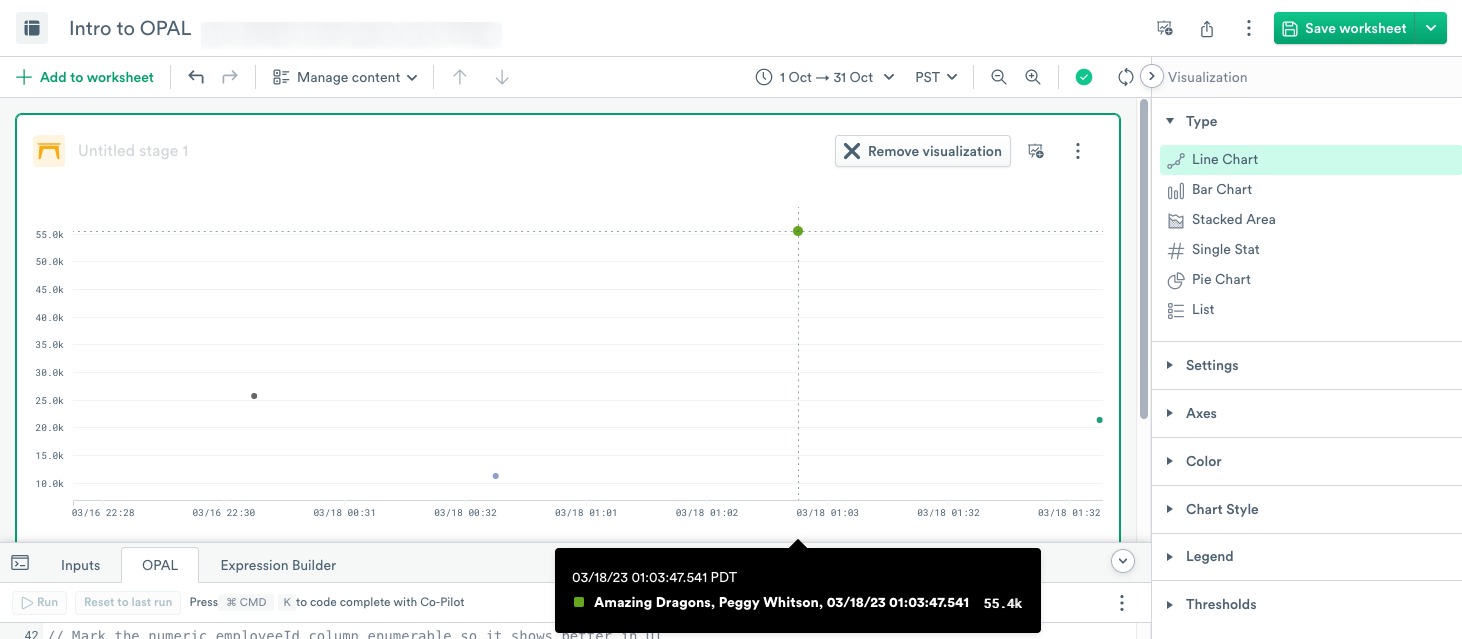
Move your cursor over a data point to display information about it.
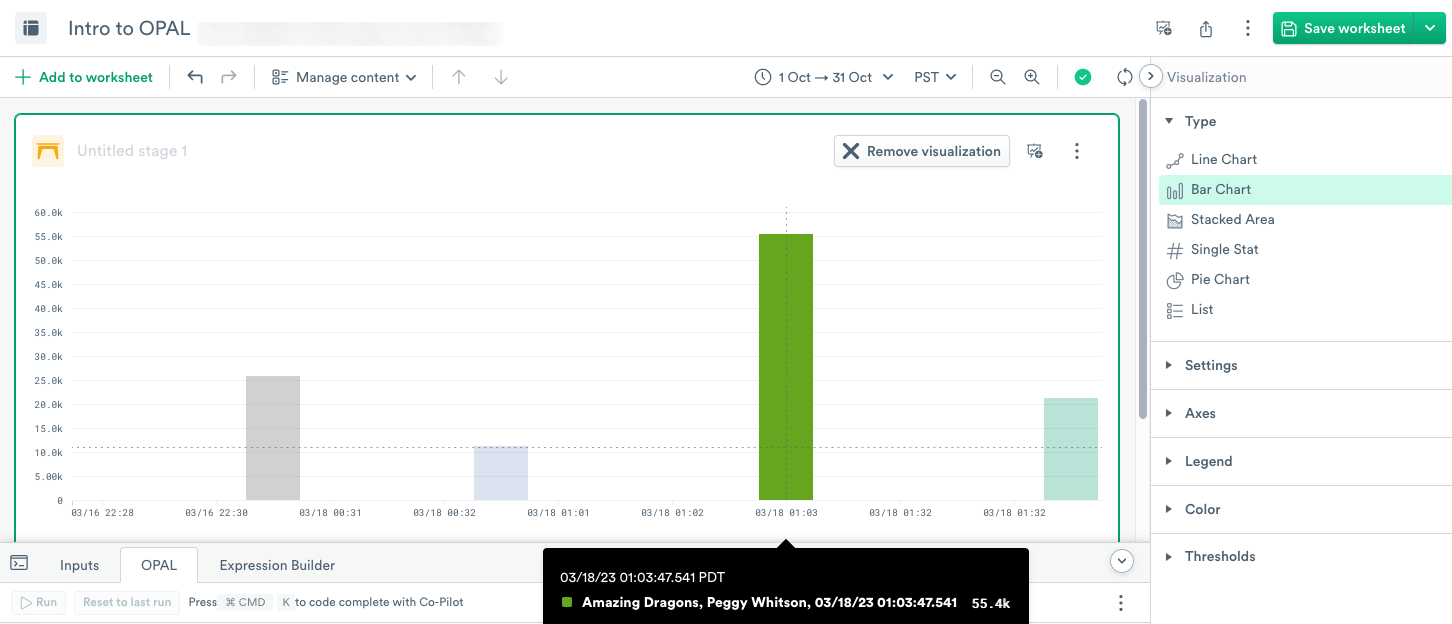
To visualize the data as a Bar Chart, select Bar Chart and click Apply:
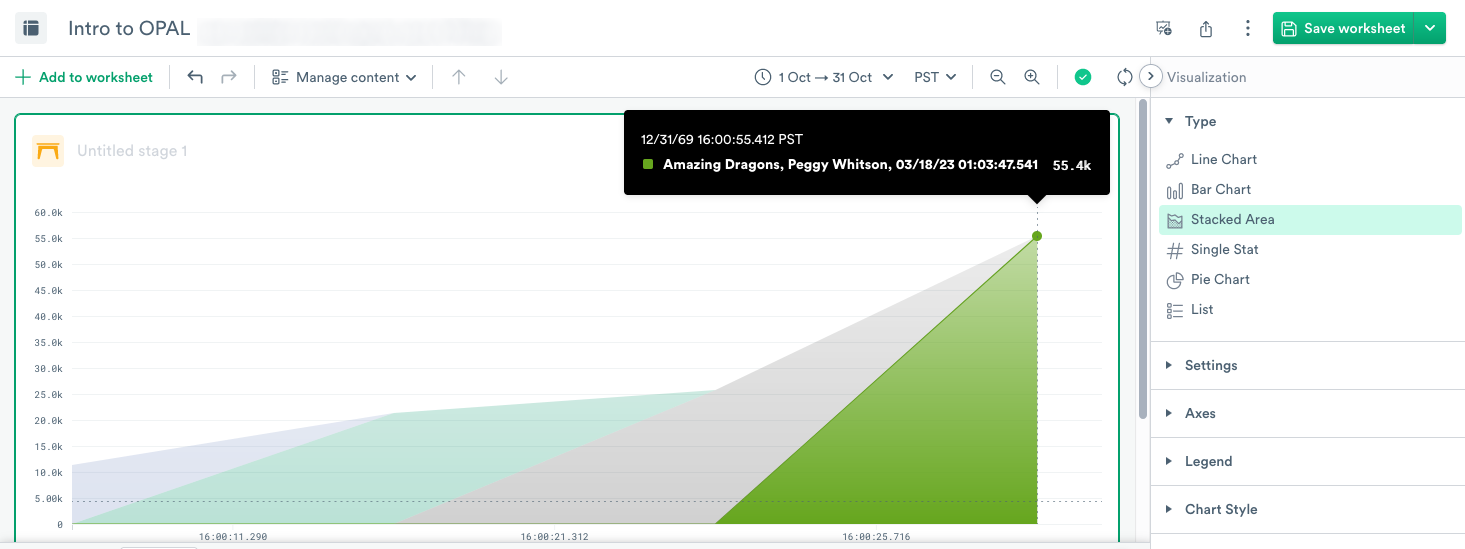
To visualize the data as a Stacked Area, select Stacked Area and click Apply.
To visualize the data as a Single Stat, select Single Stat, and then under Settings, select A_transaction_total_sum. Click Apply.
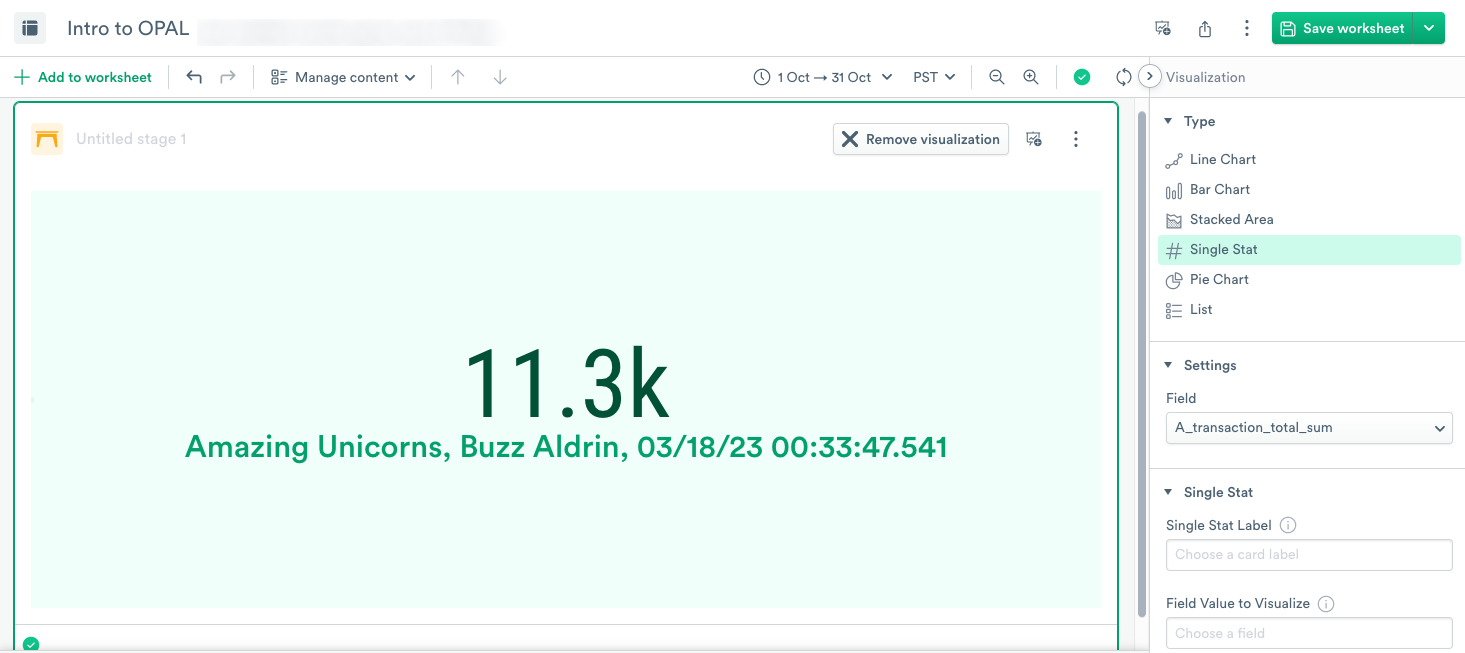
Use the Visualization type that best presents your data to your team.
Tutorial wrap-up
To wrap up the tutorial, enter a name for your Worksheet, such as OPAL101 Tutorial, and click Save.
When you review the column message, you can see the PoS activity including Login StartTime, sessionInfo, AddItem, and TransactionComplete. This data helps you understand the number of transactions per day, who transacted the sale, and when the transaction finished.
Complete OPAL script used in this tutorial
Below is the complete OPAL script used in this tutorial:
Key takeaways from this tutorial
In this tutorial, you learned how to perform the following tasks:
- Create a Datastream to ingest data.
- Create an Ingest Token for the Datastream.
- Use cURL to ingest your PoS log files into Observe.
- Create a Worksheet from your Dataset.
- Use OPAL to shape your data.
Updated 6 months ago