Install the GitLab app
The GitLab app collects data from two sources:
- GitLab webhooks generate real-time data for issues, merge requests, jobs, pipelines, and commits.
- The Observe poller for GitLab periodically collects metadata about issues, groups, users, merge requests, runners, and projects.
Use the following sections to install and configure the collectors to send data to Observe. For more about exploring this data, see GitLab.
Setup
Follow the instructions in Install an app to install the GitLab app.
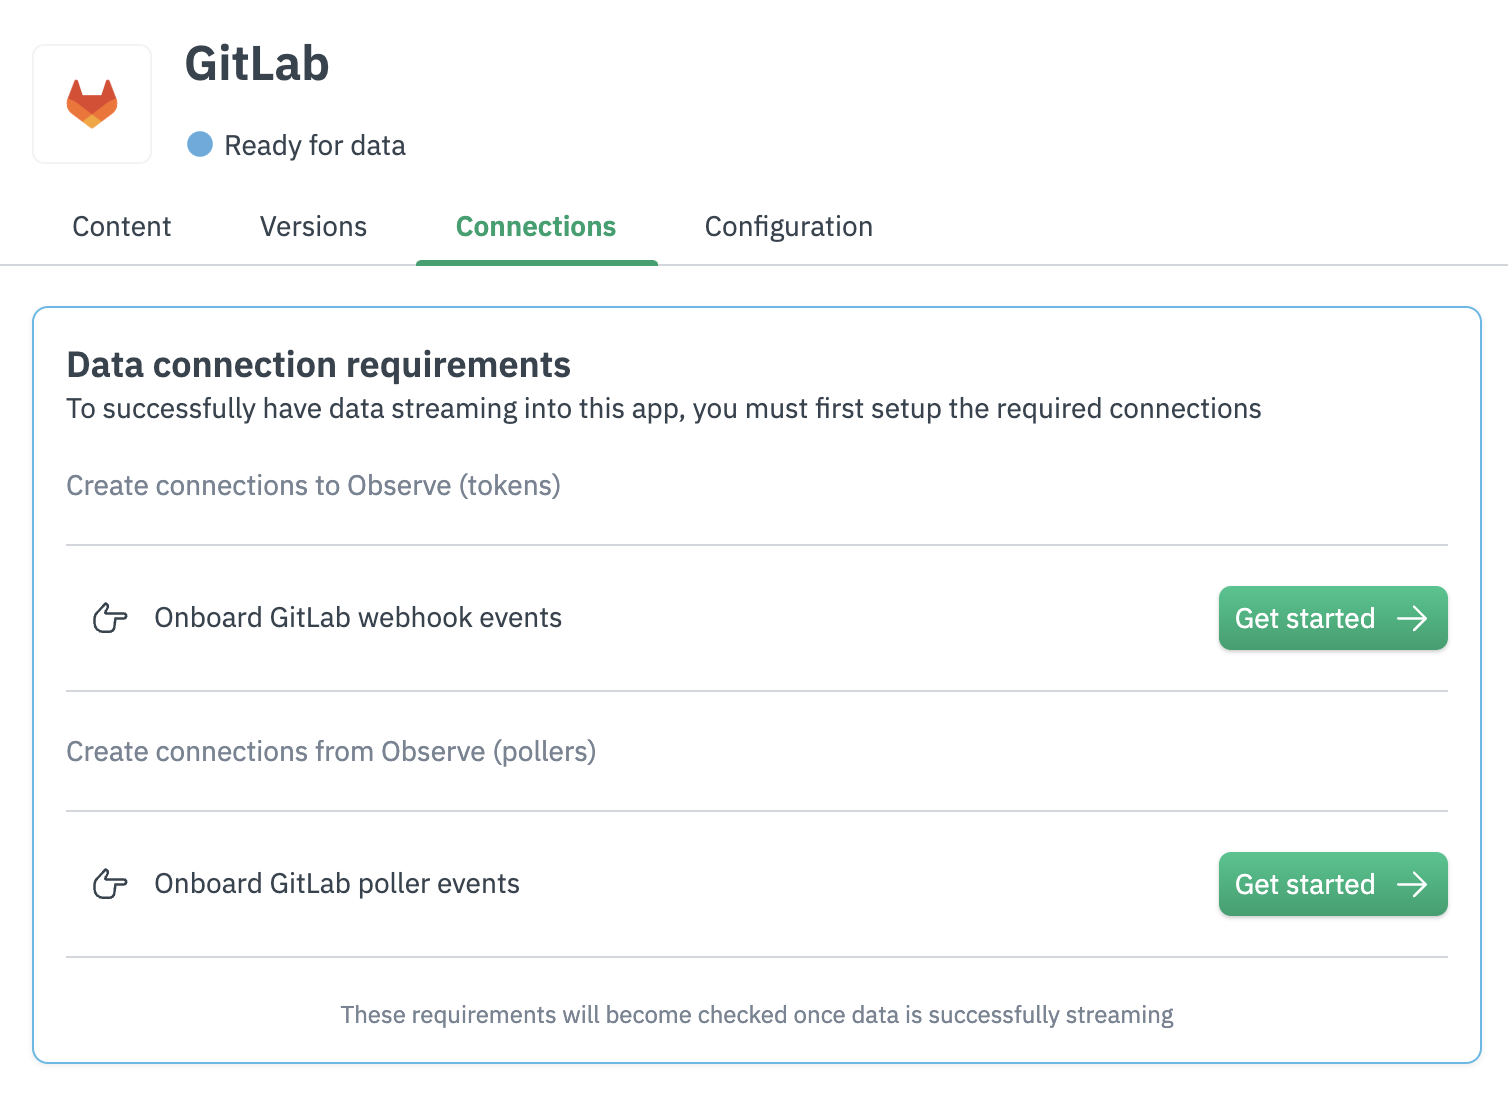
After you install the GItLab app, go to GitLab and configure the webhook and poller. Click Get started for each task to begin.
Webhook configuration
A webhook linked to your GitLab group pushes data to Observe as new activity happens. The GitLab app ingests data for these sources:
- Activity Dashboard
- Administration Dashboard
- Commit Dataset
- Issue Dataset
- Job Dataset
- Merge Request Dataset
- Pipeline Dataset
To configure the webhook:
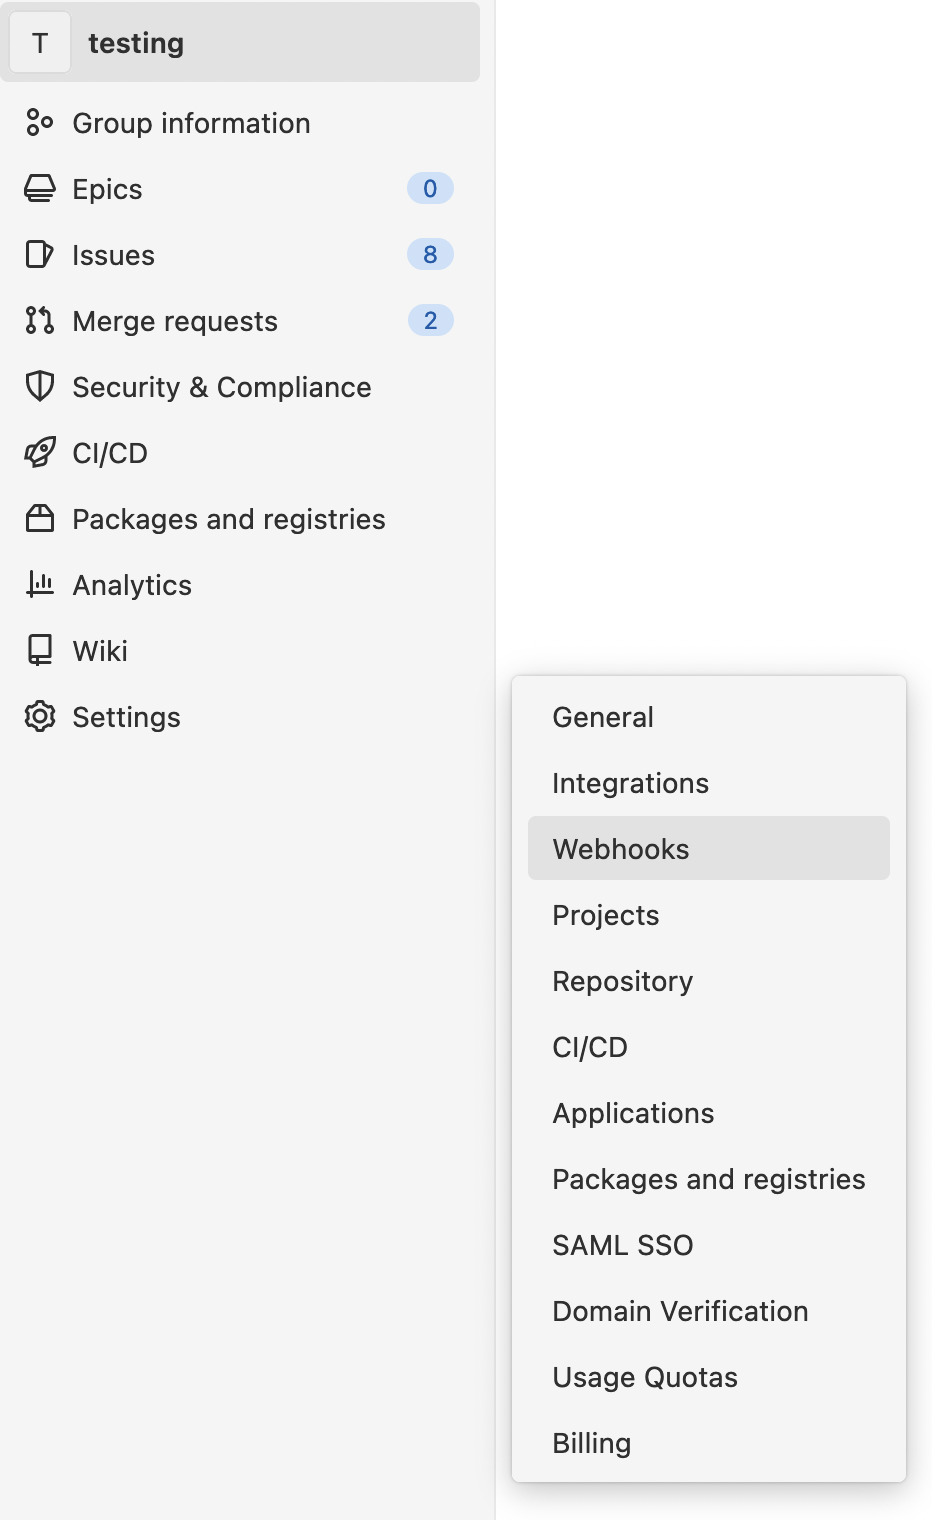
- Navigate to the home page of your group on GitLab.
- Hover over Settings in the left toolbar and click Webhooks.
If you don't see the Settings tab, you may not have administrative permissions for your organization. Contact a group administrator to confirm your permissions.
- In the Settings menu, click Webhooks.
- Configure the following settings:
- URL:
https://${OBSERVE_TOKEN?}@${OBSERVE_CUSTOMER?}.collect.${OBSERVE_DOMAIN?}/v1/http/gitlab- Choose
Mask portions of URLand mask theOBSERVE_TOKEN
- Choose
- Triggers:
- Push events
- All branches
- Comments
- Confidential comments
- Issues events
- Confidential issues events
- Merge request events
- Job events
- Pipeline events
- Deployment events
- Push events
- Select Enable SSL verification
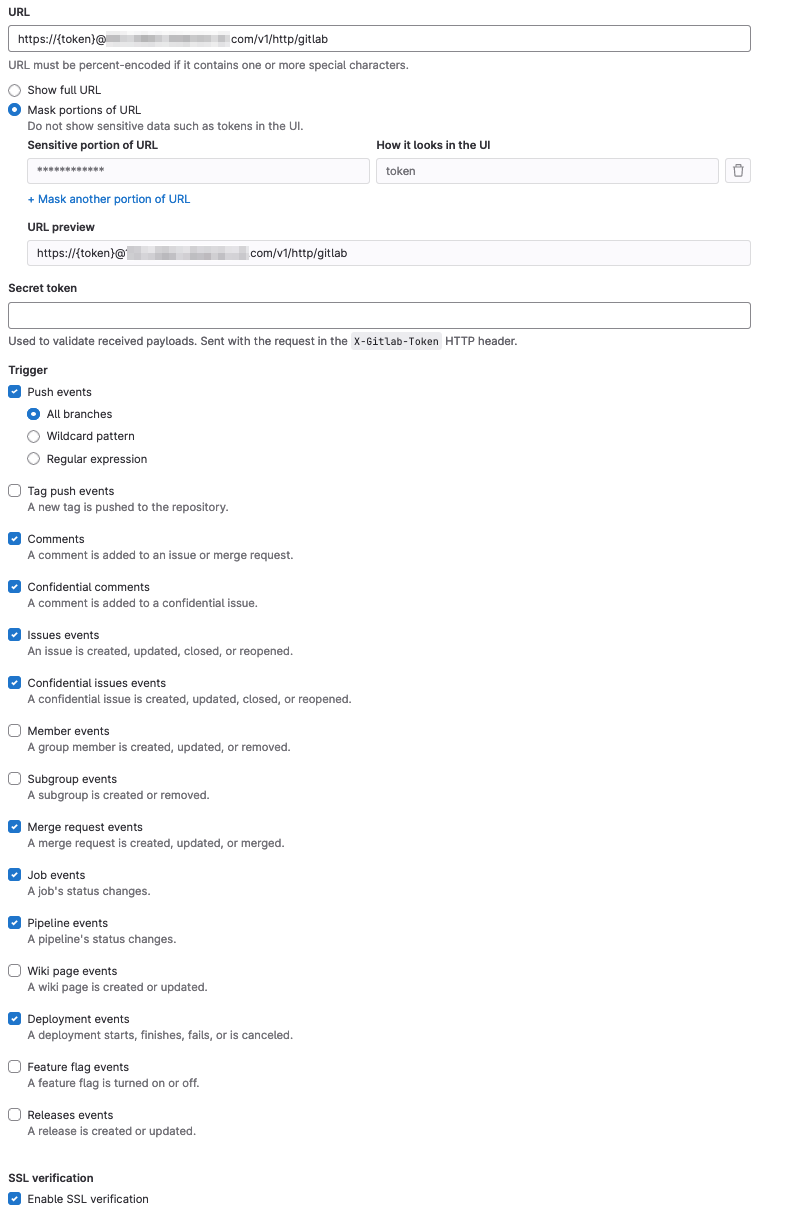
- Click Add webhook to save your configuration.
For more about GitLab webhooks, see Creating webhooks in the GitLab documentation.
Configure the GitLab poller
Pollers periodically request data from the GitLab API, allowing ingestion of existing details without a triggering event. The Observe GitLab poller ingests data about these sources:
- Administration Dashboard
- Issue Dataset
- Group Dataset
- Merge Request Dataset
- Runner Dataset
- Project Dataset
To configure the GitLab poller:
- In the GitLab app, go to the Connections tab.
- Under Data connection requirements, in the Onboard GitLab poller event section, click Create connection.
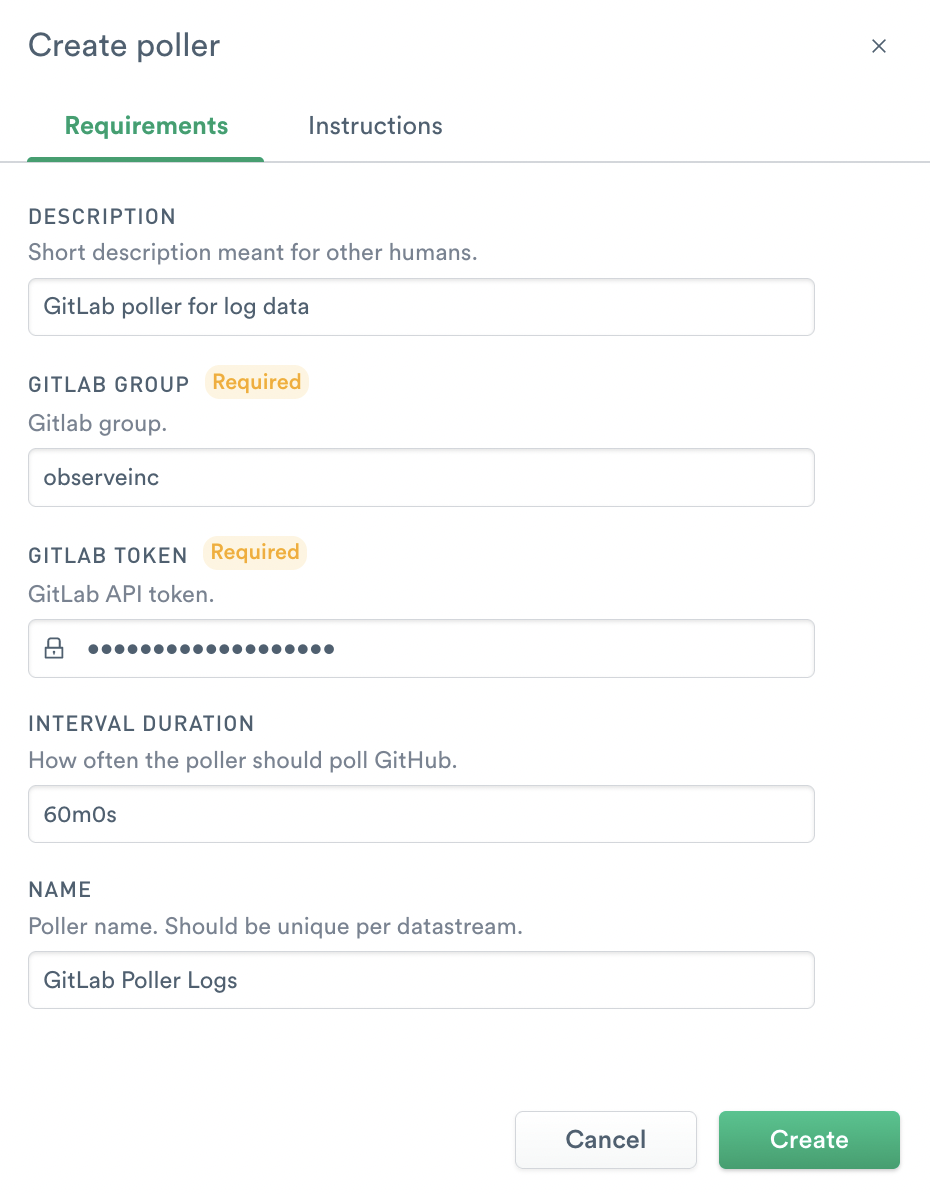
- In the Create poller dialog, configure the following settings:
- For GitLab Group, enter the name of your GitLab group.
- For GitLab Token, create a GitLab group access API token associated with the GitLab group dedicated to poller data, and paste the token into Observe.
Your GitLab API token must have the following permissions using the Maintainer role:
- read_api
- read_user
- read_repository
- read_registry
You have now configured the GitLab app to send GitLab data to Observe.
Updated 5 months ago