Customize alert messages
Note
This document refers to the legacy alerting system, known as Monitors v1. See Monitors and Alerts for the updated version (v2). Note that all v1 Monitors will continue to function and are not deprecated. We advise users to create new monitors via the updated version.
About Alert Templates
In addition to recipients, Shared actions also define the contents of alert messages through a Mustache template.
You may replace the default message with a custom HTML email or JSON payload template. Some variables are nested inside sections containing multiple values. See Template syntax for more about accessing items inside a section.
The following tables describe the available variables. Note that some types of information may be accessible in multiple ways. You may find it helpful to navigate this page with the Table of Contents in the right sidebar.
Monitors
Common Monitor Variables
Monitor variables contain details of the Monitor, such as the triggering condition and notification threshold. Every Monitor includes the following basic elements:
Monitor element |
Variable name |
Example |
|---|---|---|
ID |
|
“1234567890” |
Name |
|
“Test monitor” |
Description |
|
“Send a Separate Informational Notification when Any of the data triggers” |
Condition to trigger on |
|
“Check all of the data where count of CONTAINER_ID is greater than 100 in the last 10m0s” |
URL |
|
Link to the Edit Monitor page for this Monitor |
The monitor.notifyWhenDetails variables contain information about the notification configuration, such as a single or separate notification.
Monitor element |
Variable name |
Example |
|---|---|---|
Condition details |
|
Section containing details of why the monitor triggered notifications to be sent |
Any or all groups |
|
“Any” |
Importance |
|
“Informational” |
Single or separate |
|
“Separate” |
In addition to the text description in monitor.triggerWhen, the monitor.triggerWhenDetails variables contain more information about the triggering condition.
Monitor element |
Variable name |
Example |
|---|---|---|
Condition details |
|
Section containing the details of the triggering condition |
Duration |
|
How long the condition has been occurring: “10m0s” |
Field to check |
|
“CONTAINER_ID” |
Grouping type |
|
“None” |
Group by fields |
|
The fields to group notifications by: “deviceId” |
Kind |
|
Type of monitor: Count, Promote, Text Value (Facet), Threshold (Metric) |
Variables by Type of Monitor
Most types of Monitors have additional values for details specific to that type.
For Count Monitors:
Monitor element |
Variable name |
Example |
|---|---|---|
Threshold value |
|
“is greater than 100” |
For Text Value (Facet) Monitors:
Monitor element |
Variable name |
Example |
|---|---|---|
Continuity |
|
“all the time” |
Triggering text value |
|
The triggering value to check for in the specified field: “active” |
Threshold (Metric) monitors:
Monitor element |
Variable name |
Example |
|---|---|---|
Threshold value |
|
“is greater than 1000” |
Notifications
Common Notification Variables
Notification variables contain details of the notification, such as when the alert was triggered and the resources or values that triggered it. Every monitor includes the following basic notification elements:
Notification element |
Variable name |
Example |
|---|---|---|
Description |
|
Value from description field for Promotion monitors, text describing trigger for others: “count of CONTAINER_ID is greater than 100 in the last 10m0s” |
Recipient email |
|
Email address, for email notifications: “user@example.com” |
Kind |
|
For Promotion monitors, value from the field configured as the Notification Kind. Same as |
Triggered at |
|
“2021-01-29T01:33:46Z” |
URL |
|
Link to this notification in Observe. |
Alert |
|
Uniquely identifies a particular alert, including reminders and closures. |
Has resources? T/F |
|
If this notification includes triggering resources: |
Has values? T/F |
|
If this notification includes triggering values: |
Is ended? T/F |
|
If |
Variables for Triggering Resources
If the notification includes resources, the details are available in multiple formats. Choose the one most appropriate for displaying resources in your alert. (See Template syntax for more about working with sections.)
Both resourcesByLinkType and resourcesWithLinkType are ordered by the link name, also called the label. The label represents the foreign key relationship created by linking datasets. For example, a logGroup field linked to a Cloudwatch Log Group resource creates a linked column, in this example called Log Group in the event table. The values in that Log Group column are the individual name items, for example “/aws/lambda/ObserveCollection”.
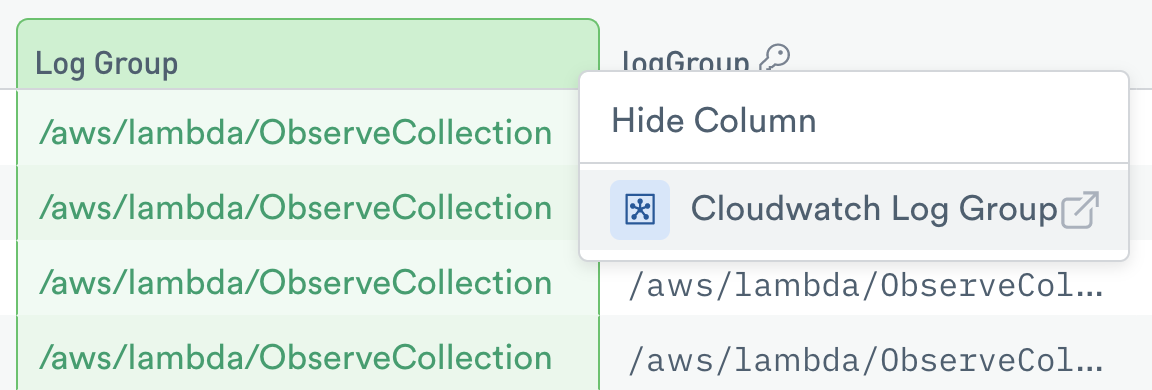
Figure 1 - Log Group Column
The resourcesByLinkType section contains resources grouped by the link name, also called the label. For each label, there is a list of all the items of that type. This is useful when you look for a specific item you expect in the data, as you need to know the label.
Notification element |
Variable name |
Example |
|---|---|---|
Resources by link type |
|
Section containing resources by type |
Resource name |
|
“Chris R. User” |
Resource URL |
|
Resource URL |
The resourcesWithLinkType section also groups items by label, each containing a list of instances of that type. This is more convenient for presenting resources arranged into sections.
Notification element |
Variable name |
Example |
|---|---|---|
Resource link type |
|
Section containing link types with their instances |
Resource link type |
|
“User”, “Container” |
Instances of this type |
|
List of resources, with |
The notification.resources section contains an unordered list of resources. This can be useful for displaying a list of items in a webhook payload.
Notification element |
Variable name |
Example |
|---|---|---|
All triggering resources |
|
Section containing all triggering resources |
Resource name |
|
Resource name |
Resource URL |
|
Resource URL |
Examples
Using resourcesByLinkType:
Access values for a link type in this section by appending the label to #notification.resourcesByLinkType. Then specify the desired item, available values are name and url. This example displays the name for each User resource.
Template:
{{#notification.hasResources}}
  {{#notification.resourcesByLinkType.User}}
    {{name}}
  {{/notification.resourcesByLinkType.User}}
{{/notification.hasResources}}
Sample data:
"resourcesByLinkType": {
  "Cluster": [
    {
      "name": "k8s.example.com",
      "url": "https://..."
    }
  ],
  "User": [
    {
      "name": "Chris R. User",
      "url": "https://..."
    }
  ]
}
Using resourcesWithLinkType:
This example displays a list of url and name values for each link type.
Template:
{{#notification.hasResources}}
  {{#notification.resourcesWithLinkType}}
    <tr>
      <th>{{linkType}}</th>
    </tr>
    {{#instances}}
      <tr>
        <td class="resource-value">
          <a href="{{url}}">{{name}}</a>
        </td>
      </tr>
    {{/instances}}
  {{/notification.resourcesWithLinkType}}
{{/notification.hasResources}}
Sample data:
"resourcesWithLinkType": [
  {
    "linkType": "Cluster",
    "instances": [
      {
        "name": "k8s.example.com",
        "url": "https://..."
      }
    ]
  },
  {
    "linkType": "User",
    "instances": [
      {
        "name": "Chris R. User",
        "url": "https://..."
      }
    ]
  }
]
Using notification.resources:
This example iterates over the list of items in the resources section and displays the value of name for each.
Template:
"Resources": "{{#notification.resources}}{{name}} {{/notification.resources}}"
Sample data:
"resources": [
  {
    "name": "k8s.example.com",
    "url": "https://..."
  },
  {
    "name": "Chris R. User",
    "url": "https://..."
  }
]
Variables for Triggering Values
Like resources, triggering values are also available in multiple formats. If notification.hasValues is true, these variables contain details of the values that triggered the notification.
The resourcesByFieldName section contains a list of name/value pairs for each resource. This is useful when you look for a specific item you expect in the data, as you need to know the field name.
Notification element |
Variable name |
Example |
|---|---|---|
Values by field name |
|
Section containing name/value pairs |
The resourcesWithFieldName section contains a list of resources grouped by the field name. This is helpful for presenting resources grouped by field.
Notification element |
Variable name |
Example |
|---|---|---|
Values with field name |
|
Section containing field names and values as individual items |
Field name |
|
“city” |
List of values for this field |
|
[“San Mateo”, “San Francisco”] |
The notification.values section contains two lists, one with field names and another with values for those fields. The two lists are in the same order; the first field in the fields list has a corresponding value in the first item in the values list. This is useful for constructing a two-dimensional table of the triggering values.
Notification element |
Variable name |
Example |
|---|---|---|
All triggering values |
|
Section containing all triggering values |
List of value fields |
|
List of fields |
List of value rows |
|
List of rows, in the same order as fields list |
Examples
Using valuesByFieldName:
Similar to resourcesByLinkType, access values in a notification.valuesByFieldName section by appending the desired label. Since this is a list, also append {{.}} to get the members. This example displays a list of userId values.
Template:
{{#notification.hasValues}}
  {{#notification.valuesByFieldName.userId}}{{.}}
  {{/notification.valuesByFieldName.userId}}
{{/notification.hasValues}}
Sample data:
"valuesByFieldName": {
  "MonitorName": ["An error occurred"],
  "userId": ["123"]
}
Using valuesWithFieldName
This HTML example displays a list of values for each field name as rows in a table.
Template:
{{#notification.hasValues}}
  {{#notification.valuesWithFieldName}}
    <tr>
      <th>{{fieldName}}</th>
    </tr>
    {{#values}}
      <tr>
        <td class="field-value">
          <span>{{.}}</span>
        </td>
      </tr>
    {{/values}}
  {{/notification.valuesWithFieldName}}
{{/notification.hasValues}}
Sample data:
"valuesWithFieldName": [
  {
    "fieldName": "userId",
    "values": ["123"]
  },
  {
    "fieldName": "MonitorName",
    "values": ["An error occurred"]
  }
]
Using notification.values:
This example displays the contents of the rows list.
Template:
"Values": "{{#notification.values.rows}}{{.}} {{/notification.values.rows}}",
Sample data:
"values": {
  "fields": [
    "userId",
    "MonitorName"
  ],
  "rows": [
    [
      "123",
      "An error occurred"
    ]
  ]
}
Template Syntax
Most variables contain string values, and these may be placed anywhere in your template. When an alert triggers, Observe replaces the template variables with values from the current alert.
Add the desired variables inside double braces, like this:
<**td class**="title">{{monitor.name}} at {{notification.startTime}}</td>
To add a comment, put the text inside a {{! }} element.
Example Webhook payload template
{
  {{! Display some basic info }}
  "Notification": "{{notification.kind}}",
  "Monitor": "{{monitor.name}}",
  "Trigger at": "{{notification.startTime}}",
  "Importance": "{{monitor.notifyWhenDetails.importance}}",
  "Trigger Condition": "{{monitor.triggerWhen}}",
  "Notification": "{{monitor.notifyWhen}}",
  "Description": "{{notification.description}}",
  "Resources": "{{#notification.resources}}{{name}} {{/notification.resources}}",
  "Values": "{{#notification.values.rows}}{{.}} {{/notification.values.rows}}",
  "URL": "{{{notification.url}}}"
}
notification.resources and notification.values.rows contain lists of the resources or threshold values that triggered the notification.
In the HTML example below, {{#notification.hasResources}} begins a template section. If notification.hasResources is True, the contents of this section are evaluated, displaying the list of resources, with their name and url. If False, the section is skipped. {{/notification.hasResources}} indicates the end of the section. Variables inside a {{#sectionName}} {{/sectionName}} conditional section are accessed directly by name, without a section prefix.
Example email body template:
{{#notification.hasResources}}
  {{#notification.resourcesWithLinkType}}
    <tr>
      <th>{{linkType}}</th>
    </tr>
    {{#instances}}
      <tr>
        <td class="resource-value">
          <a href="{{url}}">{{name}}</a>
        </td>
      </tr>
    {{/instances}}
  {{/notification.resourcesWithLinkType}}
{{/notification.hasResources}}
For more about template syntax, see the Mustache documentation.
Using Alert Status
Alerts can be one of three types: New, Reminder, or Ended. Mustache variables are set so that you can use a single template and show different content based on the type of alert. For example:
{{! this alert is a new alert }}
    {{#notification.isNew}}
        Content to support a new alert message
    {{/notification.isNew}}
{{! this alert is a reminder alert }}
    {{#notification.isReminder}}
        A reminder that this alert is still on-going
    {{/notification.isReminder}}
{{! this alert is an ended alert }}
    {{#notification.isEnded}}
        Notification that the alert has ended
    {{/notification.isEnded}}
Examples
Slack
Slack alerts use Block Kit and the Incoming Webhook URL for your Slack app.
Slack Incoming Webhook guidelines
A message may have up to 50 blocks.
A
textitem inside asectiontextfield may contain up to 3000 characters.Avoid
fieldsblocks inside asection, as they may only contain 10fields.textitems infieldblocks are limited to 2000 characters.
For more information, see the Slack layout block reference.
Basic Slack alert body example
{
  "blocks": [
    {
      {{! header is a large bold font }}
      "type": "header",
      "text": {
        "type": "plain_text",
        "text":  "Test Slack Alert at {{notification.startTime}}"
      }
    },
    {
      {{! section is plain text, can use markdown }}
      "type": "section",
      "text": {
        "type": "mrkdwn",
        "text": "*Monitor:*\n{{monitor.name}}"
      }
    },
    {
      {{! this is a comment }}
      "type": "section",
      "text": {
        "type": "mrkdwn",
        "text": "*Kind:*\n{{notification.kind}}"
      }
    },
    {
      {{! divider is a narrow horizontal line }}
      "type": "divider",
    },
    {
      {{! actions is for interactive elements, like a button }}
      "type": "actions",
      "elements": [
        {
          "type": "button",
          "text": {
            "type": "plain_text",
            "emoji": true,
            "text": "View Notification"
          },
          "style": "primary",
          "url": "{{notification.url}}"
        }
      ]
    }
  ]
}
More complex Slack alert body example
{
  "blocks": [
    {
      "type": "header",
      "text": {
        "type": "plain_text",
        "text":  "{{notification.kind}} at {{notification.startTime}}"
      }
    },
    {{#notification.hasResources}}
      {{#notification.resourcesWithLinkType}}
        {
          "type": "section",
          "text": {
            "type": "mrkdwn",
            "text": "*{{linkType}}:*\n{{#instances}}<{{url}}|{{name}}>\n{{/instances}}"
          }
        },
      {{/notification.resourcesWithLinkType}}
    {{/notification.hasResources}}
    {{#notification.hasValues}}
      {{#notification.valuesWithFieldName}}
        {
          "type": "section",
          "text": {
            "type": "mrkdwn",
            "text": "*{{fieldName}}:*\n{{#values}}{{.}}\n{{/values}}"
          }
        },
      {{/notification.valuesWithFieldName}}
    {{/notification.hasValues}}
    {
      "type": "section",
      "text": {
        "type": "mrkdwn",
        "text": "*Monitor:*\n{{monitor.name}}"
      }
    },
    {
      "type": "section",
      "text": {
        "type": "mrkdwn",
        "text": "*Description:*\n{{notification.description}}"
      }
    },
    {
      "type": "actions",
      "elements": [
        {
          "type": "button",
          "text": {
            "type": "plain_text",
            "emoji": true,
            "text": "View Notification"
          },
          "style": "primary",
          "url": "{{notification.url}}"
        }
      ]
    }
  ]
}
Microsoft Teams
Microsoft Teams alerts use an Incoming Webhook. For more details, see the Microsoft Teams documentation: Create and send messages
Microsoft Teams alert body example
{
  "@type": "MessageCard",
  "@context": "http://schema.org/extensions",
  "themeColor": "0076D7",
  "summary": "{{monitor.name}} triggered at {{notification.startTime}}",
  "sections": [{
    "activityTitle": "{{monitor.name}} triggered at {{notification.startTime}}",
    "activitySubtitle": "{{notification.description}}",
    "activityImage": "https://teamsnodesample.azurewebsites.net/static/img/image5.png",
    "facts": [{
      "name": "Assigned to",
      "value": "Unassigned"
    }, {
      "name": "Started at",
      "value": "{{notification.startTime}}"
    }, {
      "name": "Importance",
      "value": "{{monitor.notifyWhenDetails.importance}}"
    }],
    "markdown": true
  }],
   "potentialAction": [{
    "@type": "OpenUri",
    "name": "View Monitor",
    "targets": [{
      "os": "default",
      "uri": "{{notification.url}}"
    }]
  }]
}
OpsGenie
OpsGenie alerts are configured with a Webhook to the alerting API. This example uses mustache to automatically close the OpsGenie alert when the Observe condition is no longer true.
OpsGenie alert body example
Action->Settings->URL:
https://api.opsgenie.com/v2/alerts{{#notification.isEnded}}/{{notification.uuid}}/close?identifierType=alias{{/notification.isEnded}}
Action->Settings->Set message->Edit message body:
{{#notification.isNew}}
{{! BEGIN of block that is only included for new alerts }}
{
    "Notification": "{{notification.kind}}",
    "Monitor": "{{monitor.name}}",
    "Monitor Comment": "{{monitor.comment}}; notification.status={{notification.status}}",
    "Trigger at": "{{notification.startTime}}",
    "Importance": "{{monitor.notifyWhenDetails.importance}}",
    "Trigger Condition": "{{monitor.triggerWhen}}",
    "Notification Condition": "{{monitor.notifyWhen}}",
    "Description": "{{notification.description}}",
    "URL": "{{{notification.url}}}",
    "message": "An example alert message\n{{monitor.comment}}",
    "alias": "{{notification.uuid}}",
    "responders":[
        {{! use OpsGenie team and user identifiers here }}
        {"id":"4513b7ea-3b91-438f-b7e4-e3e54af9147c", "type":"team"},
        {"name":"NOC", "type":"team"},
        {"id":"bb4d9938-c3c2-455d-aaab-727aa701c0d8", "type":"user"},
        {"username":"trinity@opsgenie.com", "type":"user"},
        {"id":"aee8a0de-c80f-4515-a232-501c0bc9d715", "type":"escalation"},
        {"name":"Nightwatch Escalation", "type":"escalation"},
        {"id":"80564037-1984-4f38-b98e-8a1f662df552", "type":"schedule"},
        {"name":"First Responders Schedule", "type":"schedule"}
    ],
    "visibleTo":[
        {"id":"4513b7ea-3b91-438f-b7e4-e3e54af9147c","type":"team"},
        {"name":"rocket_team","type":"team"},
        {"id":"bb4d9938-c3c2-455d-aaab-727aa701c0d8","type":"user"},
        {"username":"trinity@opsgenie.com","type":"user"}
    ],
    "actions": ["Restart", "AnExampleAction"],
    "tags": ["OverwriteQuietHours","Critical"],
    "details":{"key1":"value1","key2":"value2"},
    "entity":"An example entity",
    "priority":"P2"
}
{{/notification.isNew}}
{{#notification.isReminder}}
{{! BEGIN of block that is only included for reminder alerts }}
{{/notification.isReminder}}
{{#notification.isEnded}}
{{! BEGIN of block that is only included for ended alerts }}
{
    "user":"Observe monitoring",
    "source":"{{monitor.comment}}",
    "note":"Action executed via Alert API"
}
{{/notification.isEnded}}