Promote resources into notifications
Note
This document refers to the legacy alerting system, known as Monitors v1. See Monitors and Alerts for the updated version (v2). Note that all v1 Monitors will continue to function and are not deprecated. We advise users to create new monitors via the updated version.
You can promote events in an event stream or resource set to notifications. You may want a critical error such as a host down log message to trigger sending notifications to you.
For instance, you may have AWS services failing health checks, or your AWS CloudTrail service detects events relating to changes not made by specific automation users or roles.
You can configure the notifications to run as frequently as you want, from every minute up to a specified number of weeks.
Observe provides templates to assist with creating notifications for your services. The templates available for promoting resources into notifications include the following:
AWS
EC2 EBS Volume Status
EC2 Health Alert
ECS ECS Task Log Check
EPS File System Life Cycle State
ElastiCache Cluster Status
IAM Policy changed
RDS Increased Error Logs
Jenkins
jenkins-app/Failed Job
jenkins-app/Long Job > 100s
Linux Host Monitoring
Generic Process Down
Host is down
To promote resources into notifications without a template, use the following steps:
Log into Observe, and click the Monitors icon in the left navigation bar.
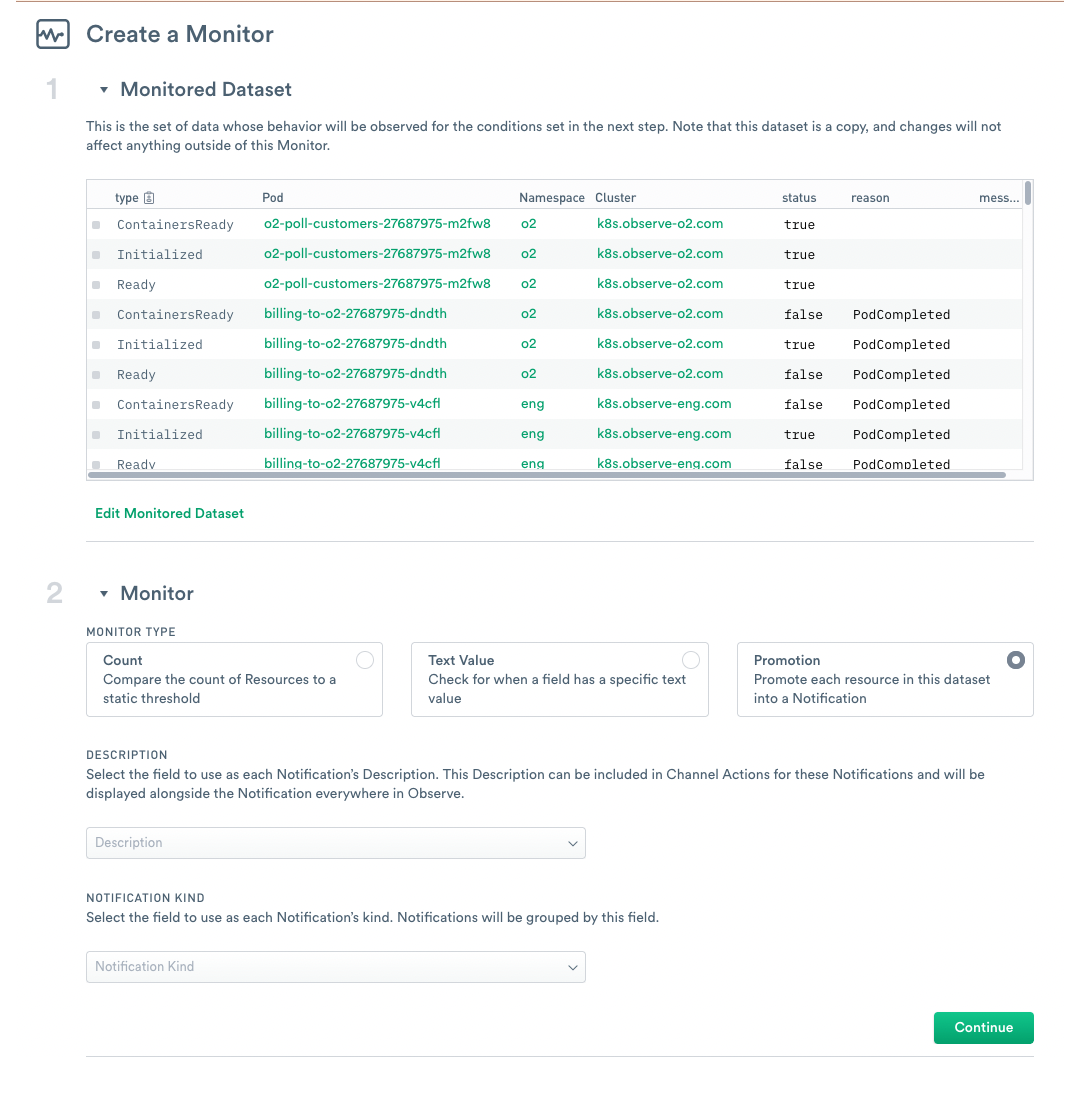
Click New Monitor and then click Promotion.
Select a Resource Set or Event Stream that you want to monitor.

Figure 1 - Configuring a Promote monitor
Under Monitor, select the field you want to display as the description of the notification.
Next, select the field to use as the Notification type.
Click Continue.

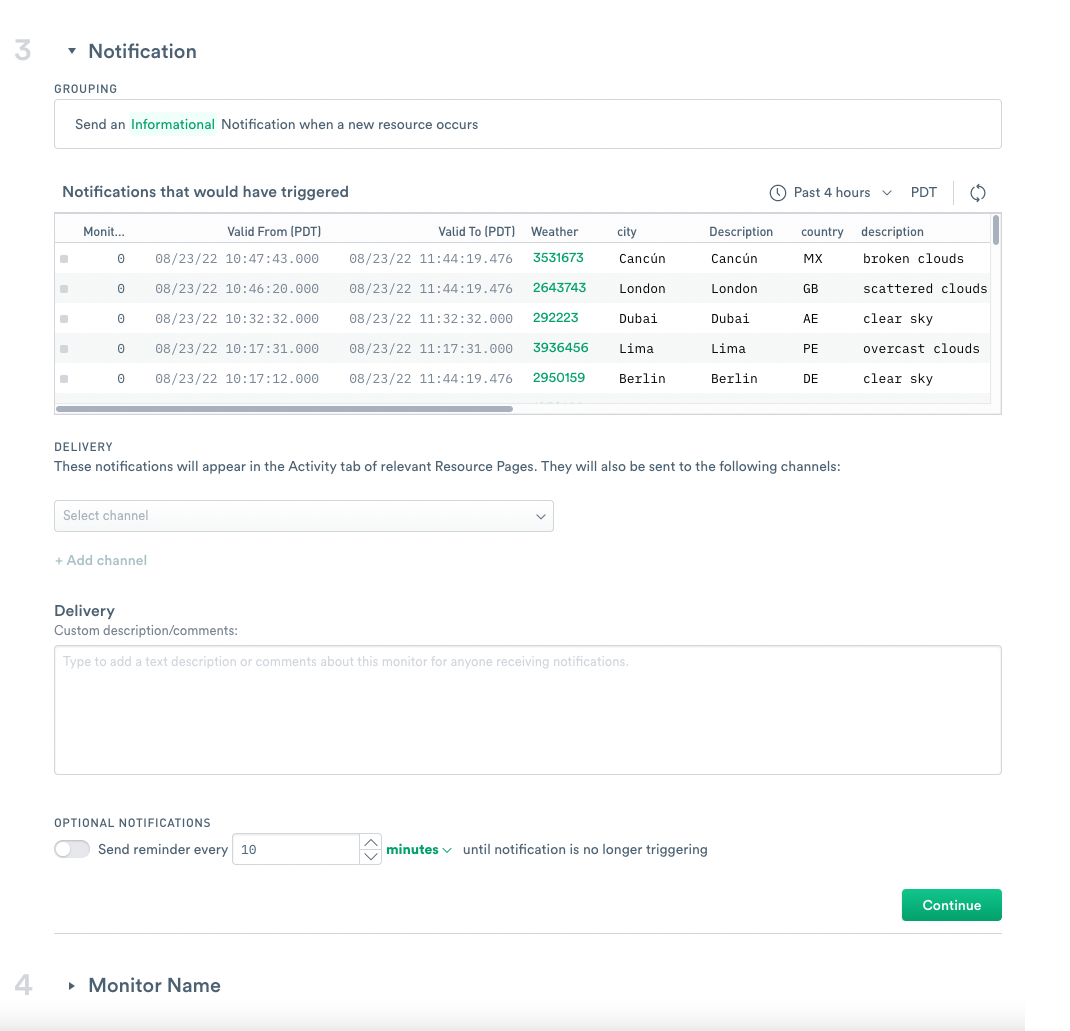
Figure 2 - Configuring a Promotion monitor
Select Informational or Important as the type of notification.
Select a shared action from the Add Action list.
Optionally, add a custom description or comment to the delivery message.
Click Continue and create a name for the monitor.
The new monitor now appears on the Monitor landing page.