Configure Microsoft Entra ID SSO
Observe supports using Microsoft Entra ID using Security Authentication Markup Language (SAML 2.0). Use the following steps to configure SSO for Microsoft Entra ID.
NoteUse of stem names instead of Observe customer IDs is possible, but you cannot configure Entra to support both at the same time.
Configure Microsoft Entra ID
- From the Microsoft Entra ID portal, navigate to the Enterprise applications page and click New Application.
- Click Create your own application.
- Select Integrate any other application you don't find in the gallery, and enter Observe as the Input Name.
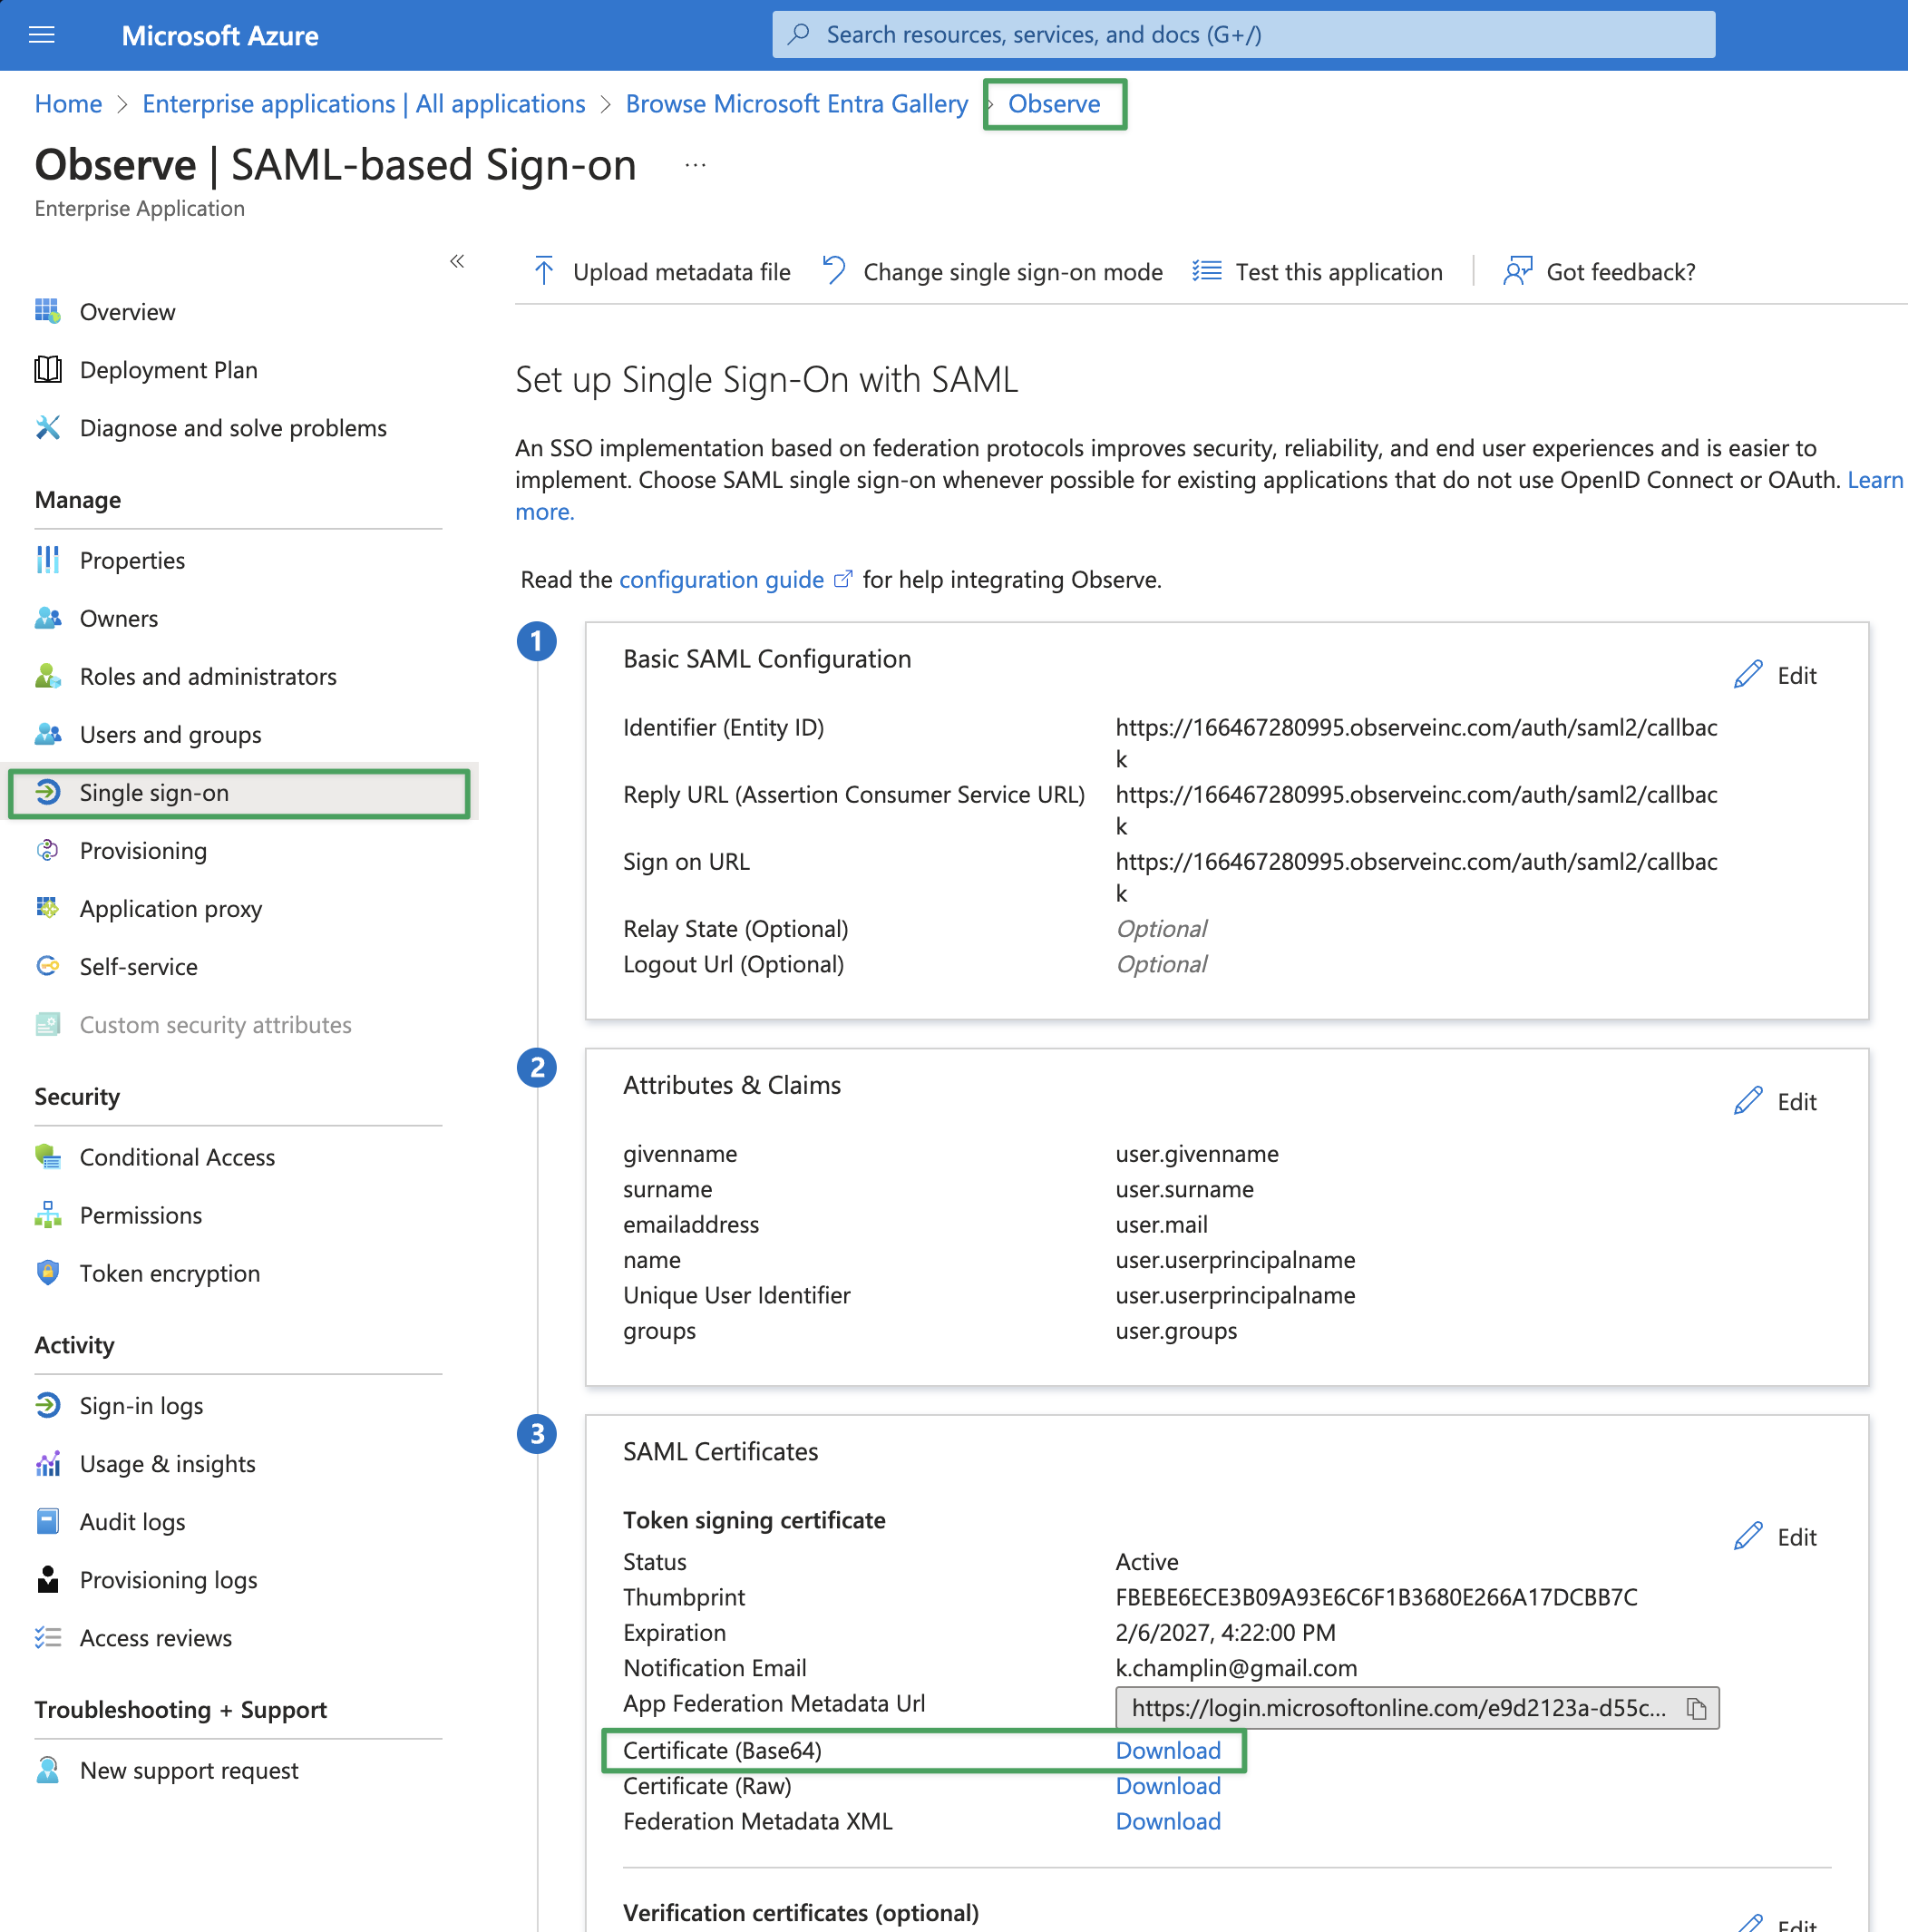
- Click Set up single sign-on, and then click SAML.
- Click Edit on the Basic SAML Configuration tile, and add the following URL to the Identifier (Entity ID), Reply URL (Assertion Consumer Service URL), and Sign on URL (Optional) fields:
https://${OBSERVE_CUSTOMER_ID}.${REGION_URL}/auth/saml2/callbackReplace ${OBSERVE_CUSTOMER_ID} with your Observe tenant ID, and ${REGION_URL} with the appropriate URL for your deployment region. See Observe deployment regions.

Claims configuration - default attributes vs custom attributes
Default attributes
If your users have email addresses assigned in Entra ID, you can use the default User Attributes & Claims.
To check if you have assigned email addresses, click Users in the Entra ID portal and select a name. The emails fields display under the Contact Info section, and either contain values or not.
Custom attributes
If the email User property is not populated in Entra ID, the SAML login will fail. You need to add the email addresses to the Users Properties, or update the emailaddress claim to use user.userprincipalname (UPN) instead of the default user.mail.
If the UPN login names do not match the user's email address, add the email address to the user's Entra ID profile. Please contact your Observe Data Engineer for further assistance.
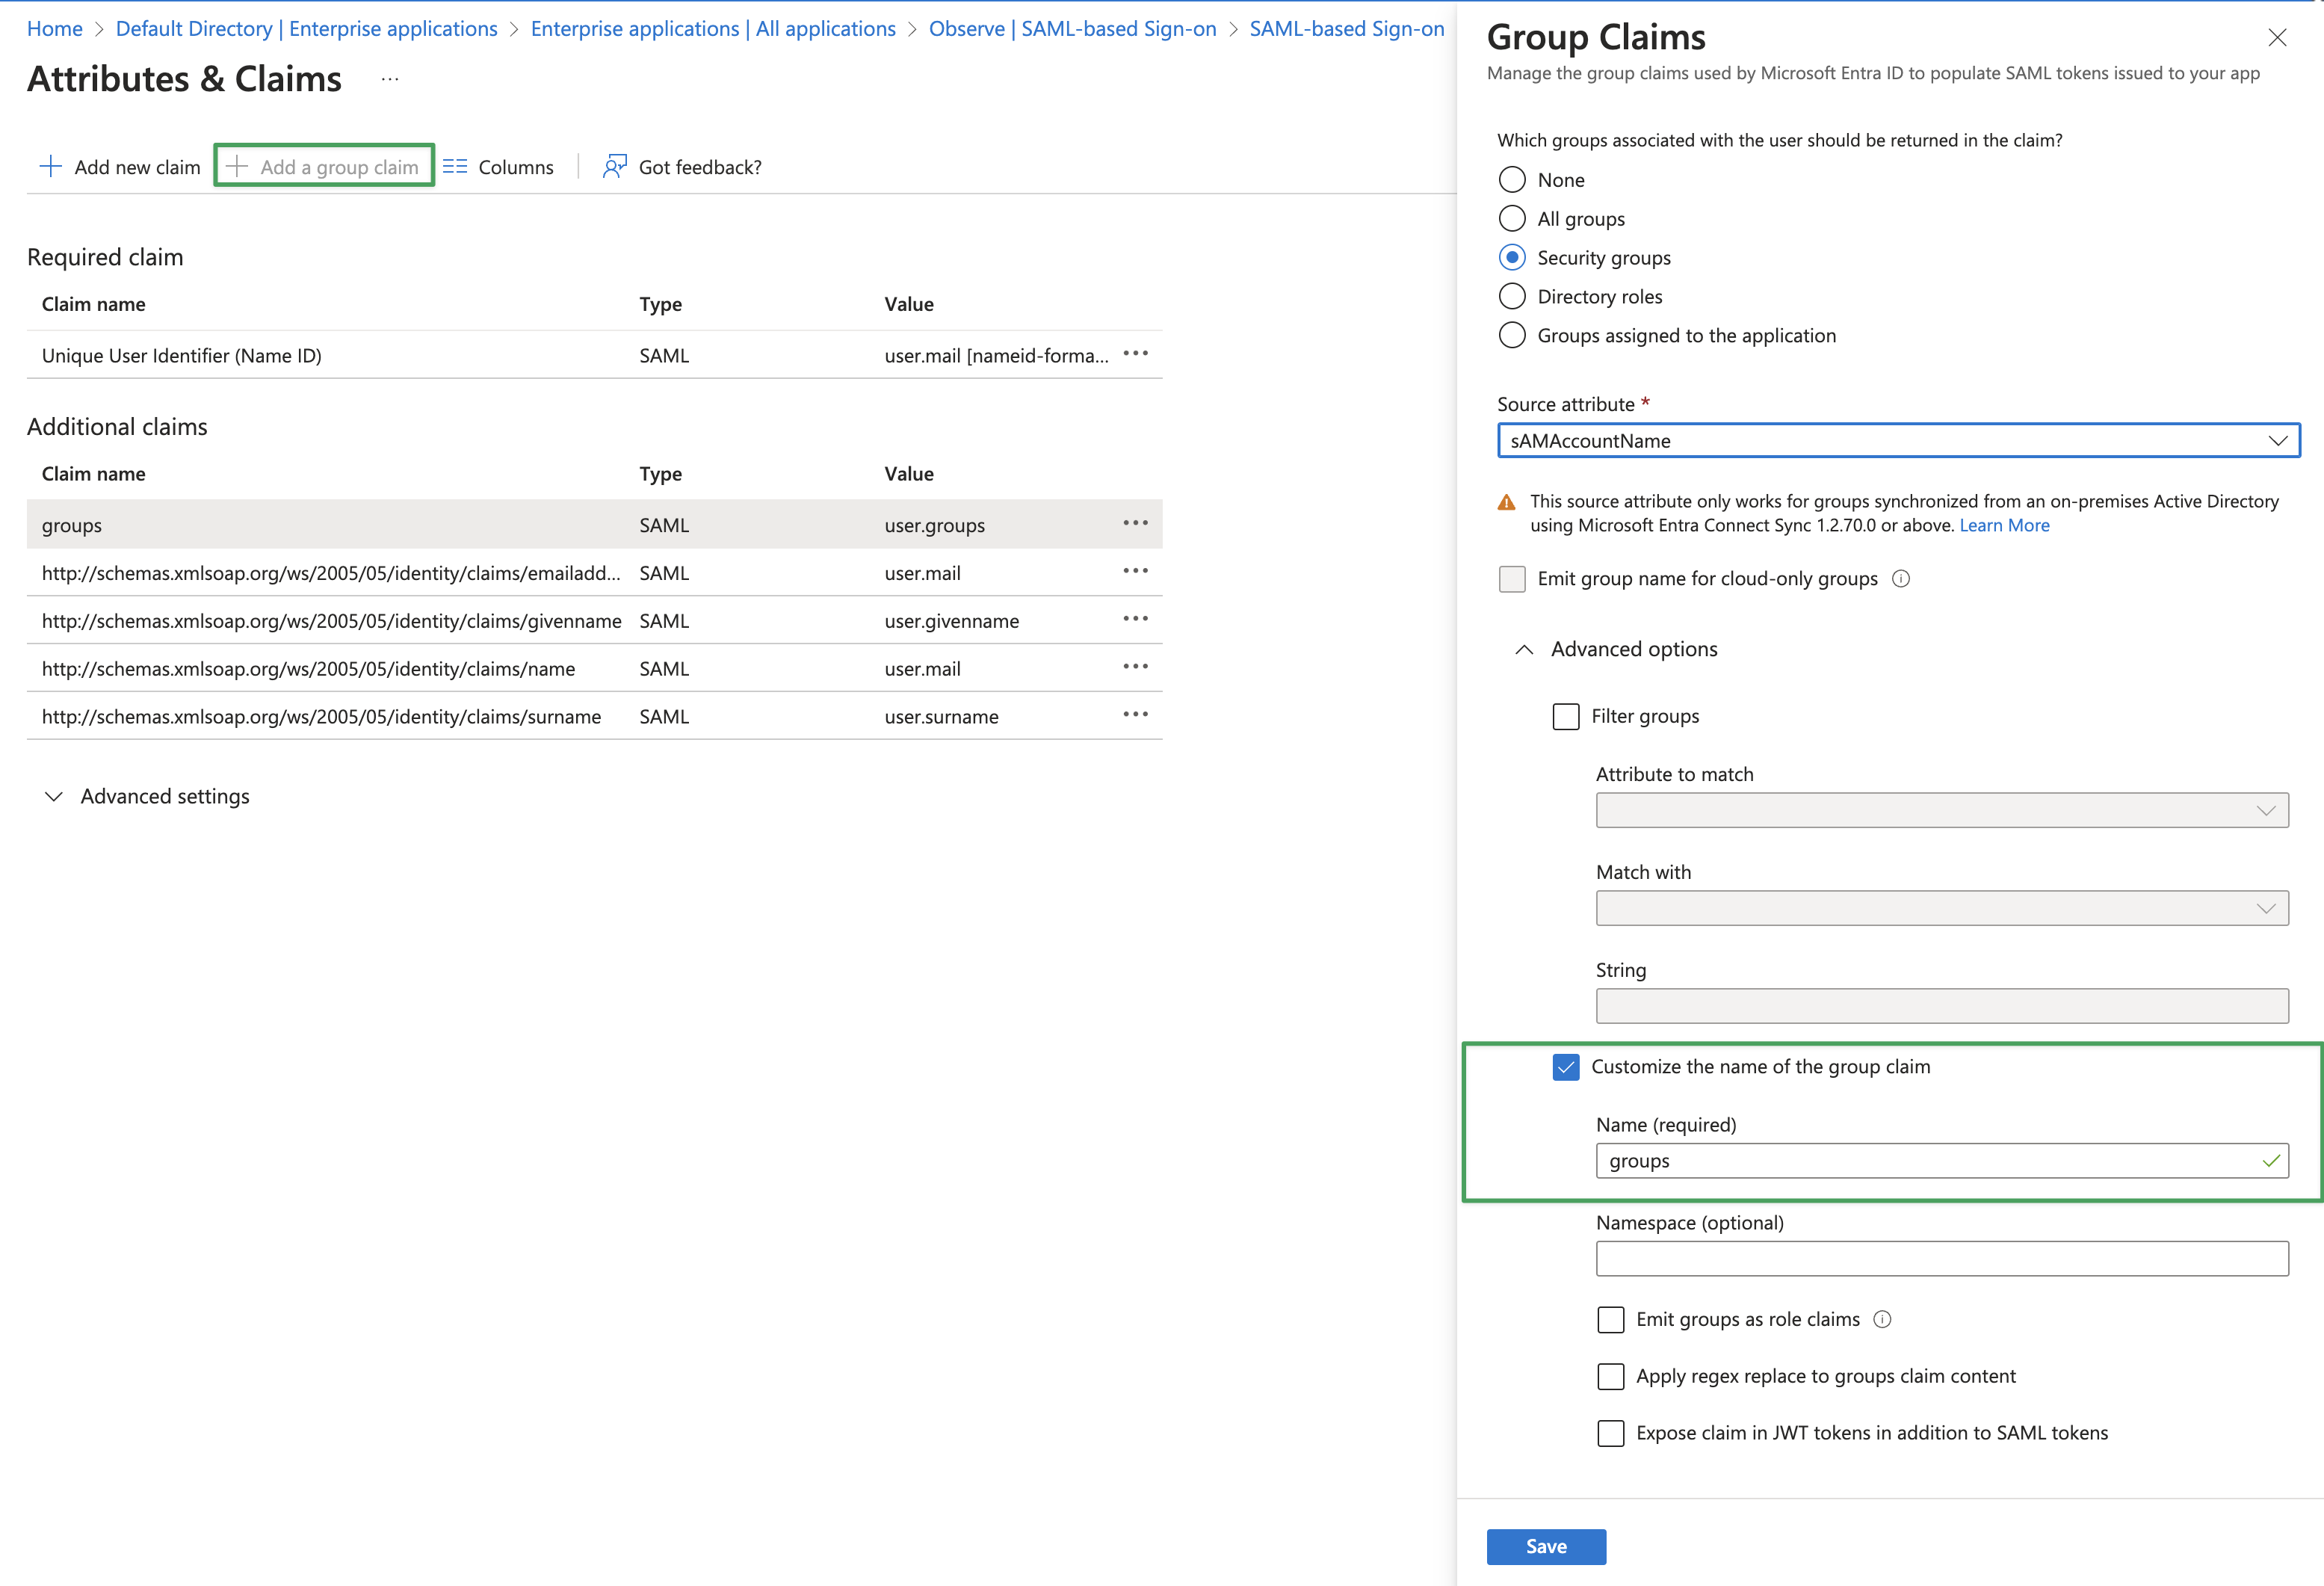
To update the attribute value for emailaddress navigate to the Attributes & Claims area of your Observe Enterprise App:
- Click the claim name
http://schemas.xmlsoap.org/ws/2005/05/identity/claims/emailaddress - Change the Source attribute field from
user.mailtouser.userprincipalname. - Click Save and then exit from the configuration.
Group membership attributes
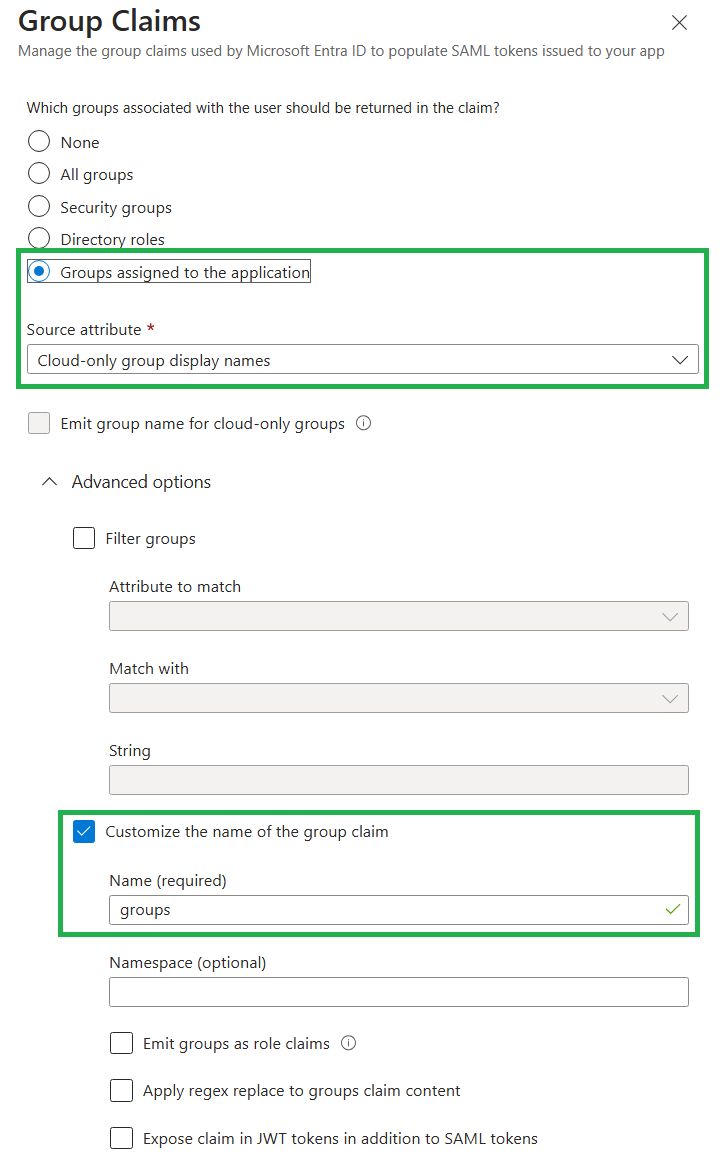
Observe supports the sending of group membership claims via SAML. In the Attributes & Claims area, select Add a group claim and select Customize the name of the group claim and in the Name (required) field, type groups (note this is case sensitive).
NoteObserve has tested the
All groupsandSecurity Groupswith both theGroup IDandsAMAccountNamesettings. In those cases, Entra ID will pass the GUID of the group, not the human readable name. To support passing the human readable group name, you can use the setting "Groups assigned to the application" where the "Source attribute" is "Cloud-only group display names".
Group ID names:
Display names:
Additional configuration settings
-
You can add the Observe SSO logo on the Properties page by downloading it from here.
-
Download the Base64 version of the SAML Signing Certificate. This is located in the Single sign-on > SAML Certificates section of your Observe Enterprise App.
-
Copy the Login URL from the Single sign-on page of Entra ID. It has the format
https://login.microsoftonline.com/${GUID}/saml2, where${GUID}will be a GUID specific to your Entra ID subscription.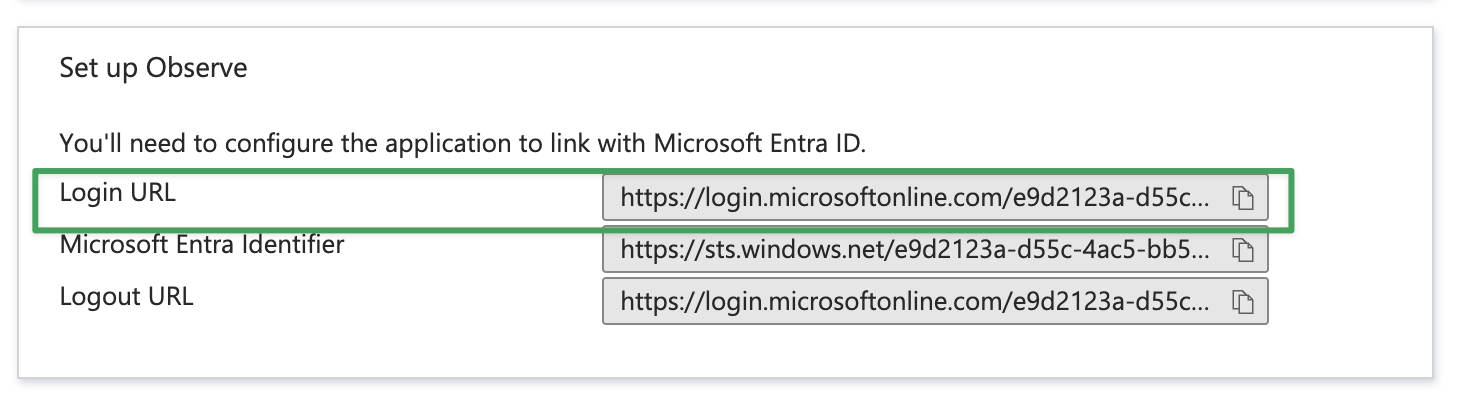
Configure Observe
Perform the following steps to configure Observe for Microsoft Entra ID SSO:
- In the left navigation rail, hover on your user name, then select Manage account.
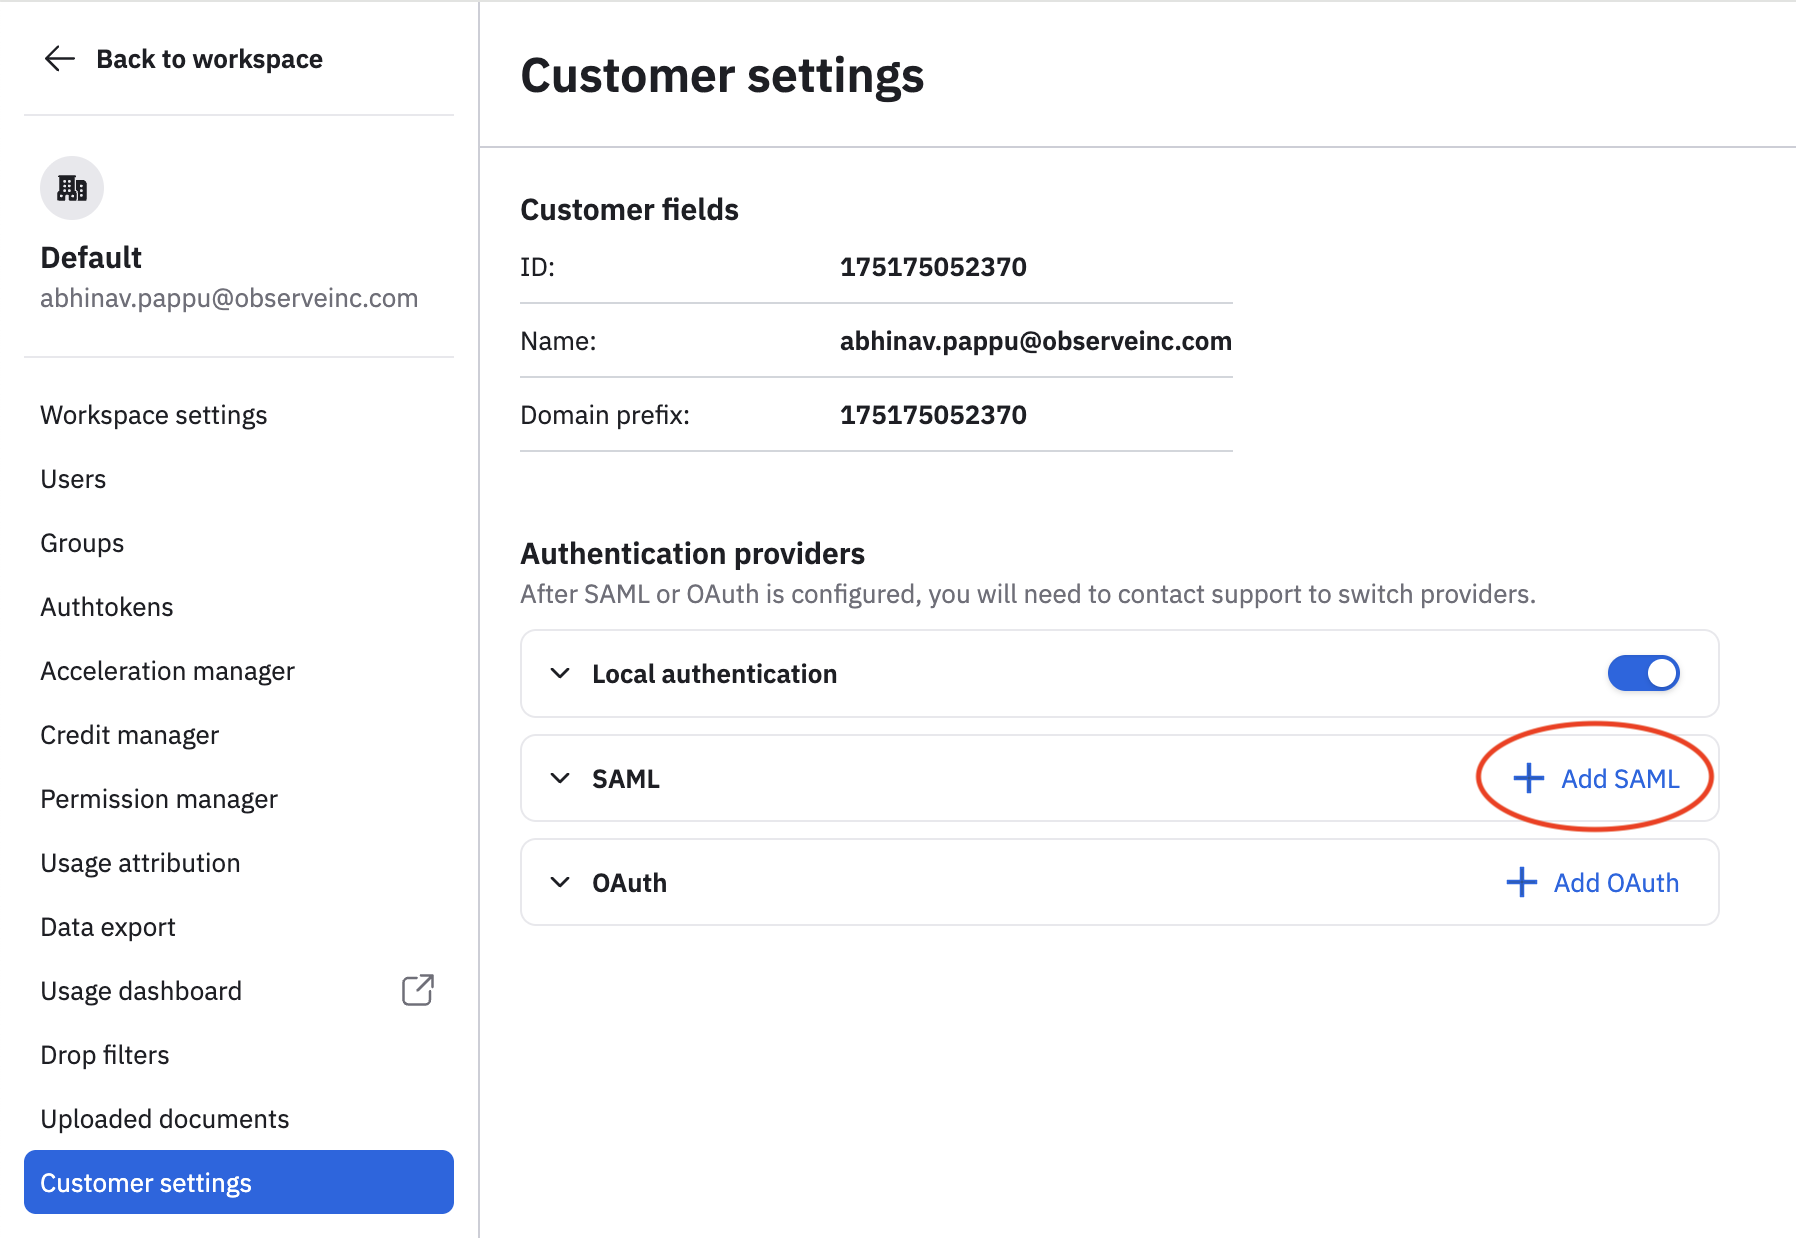
- Click Customer settings.
- Click Add SAML.
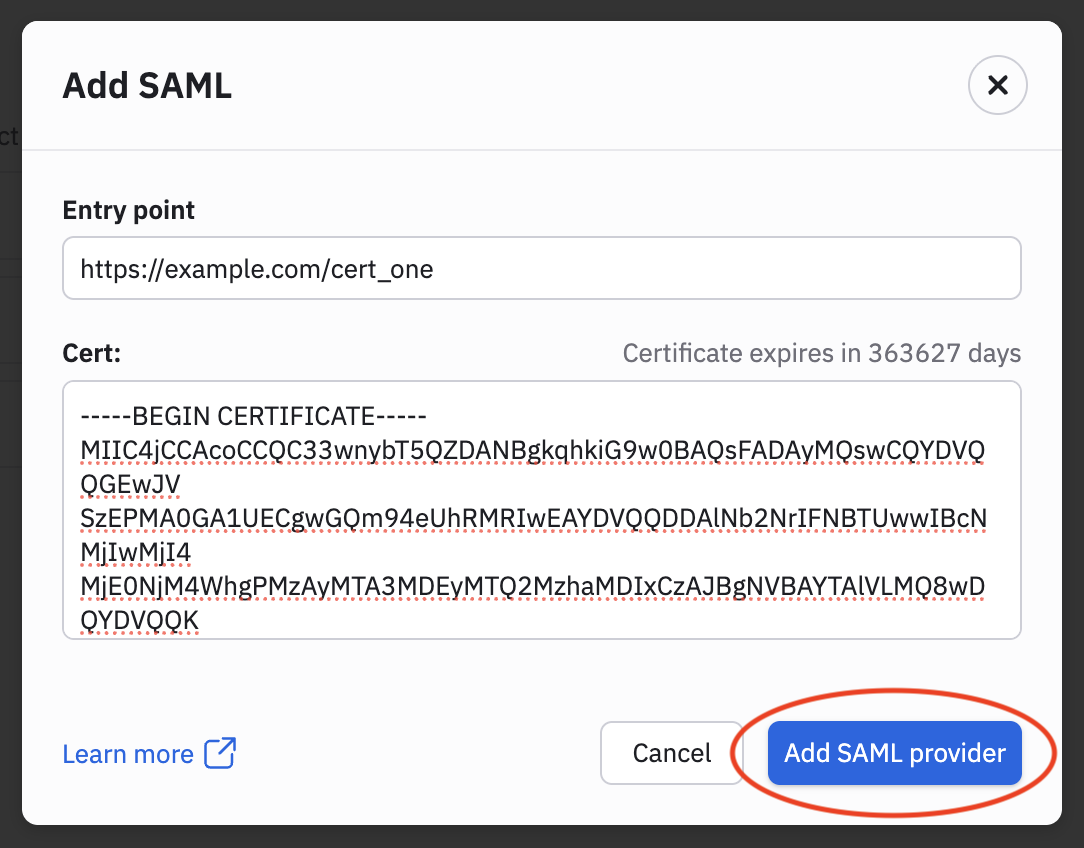
- Scroll down to Add SAML, and paste the Login URL that you copied in Additional configuration settings into the ENTRY POINT field of Observe's SAML configuration.
- Open the X.509 certificate from Additional configuration settings in a text editor and paste the Base64 certificate into the CERT field.
- Click Add SAML Provider.
Updated 6 months ago