

Configure Okta for SAML and SSO
Observe by Snowflake supports using Okta as an IdP with SAML support. Observe by Snowflake supports the following features:
- Identity Provider(IdP)-initiated SSO
- Service Provider-initiated SSO
- Just-In-Time Provisioning
Configure Okta for SAML
-
Log into Okta as the admin and go to the Admin page.
-
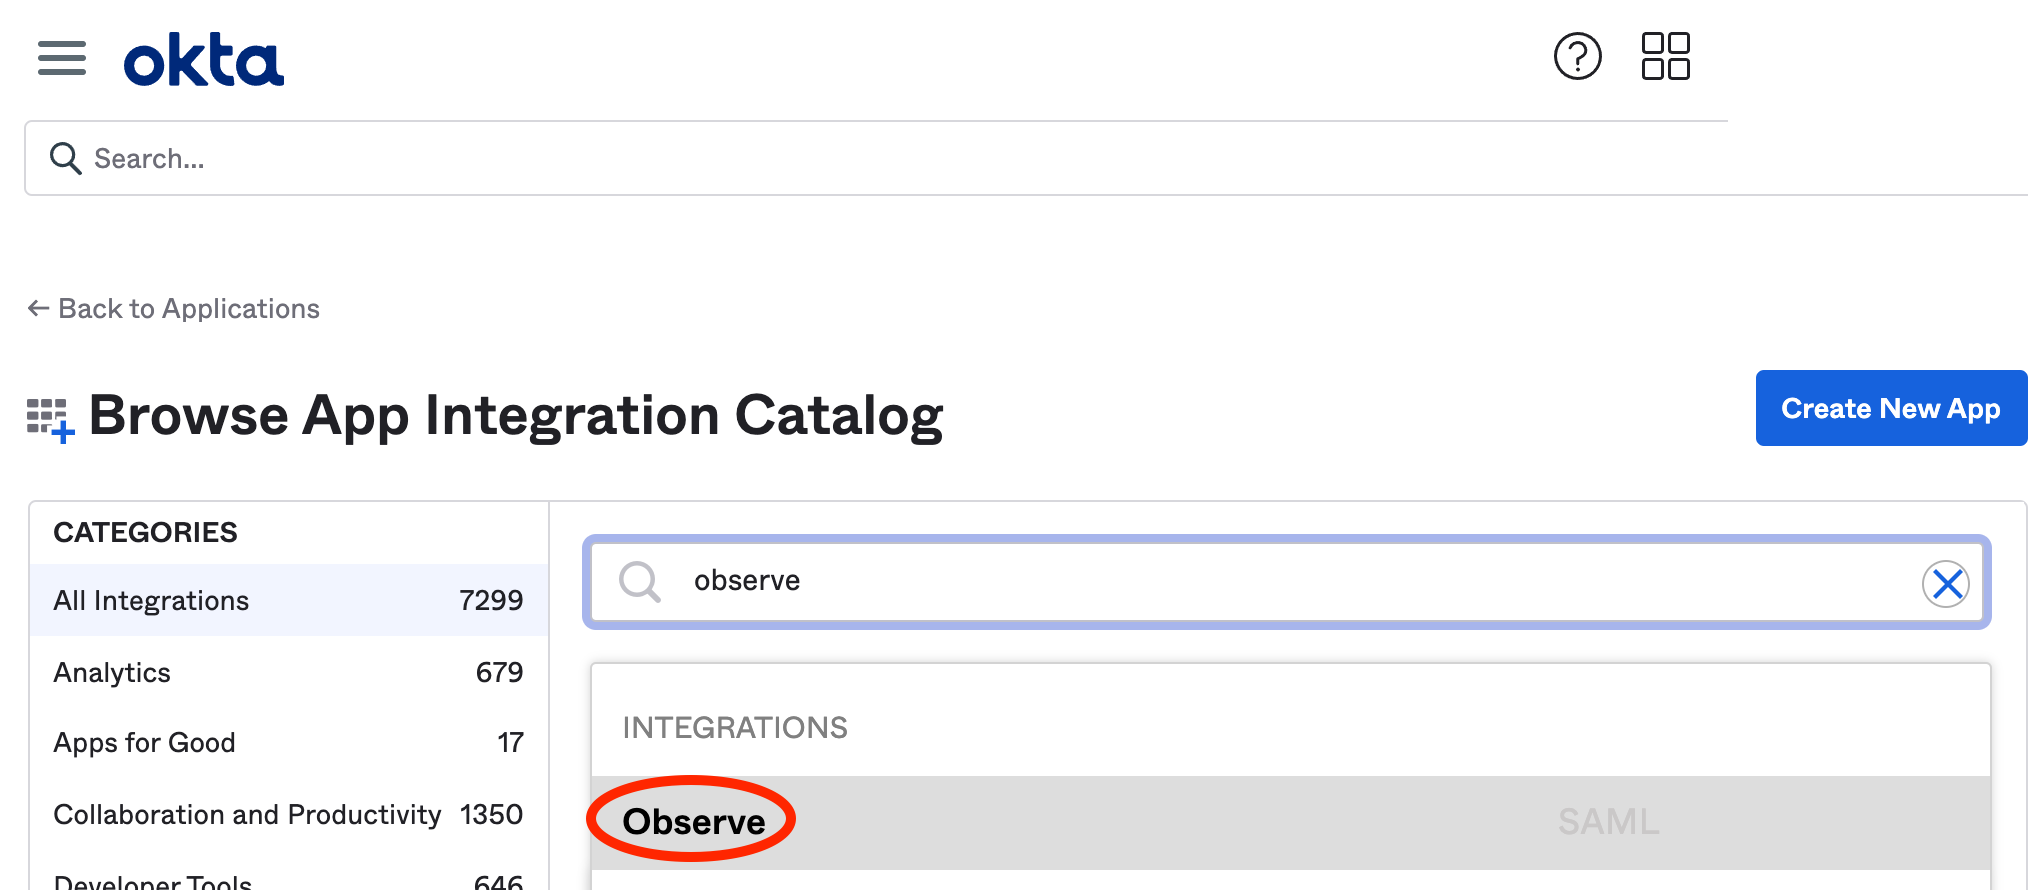
Navigate to Applications > Applications > Browse App Catalog.
-
Enter observe into the App Catalog search field and choose Observe.
-
Select Observe from the list of apps, and click Add.
-
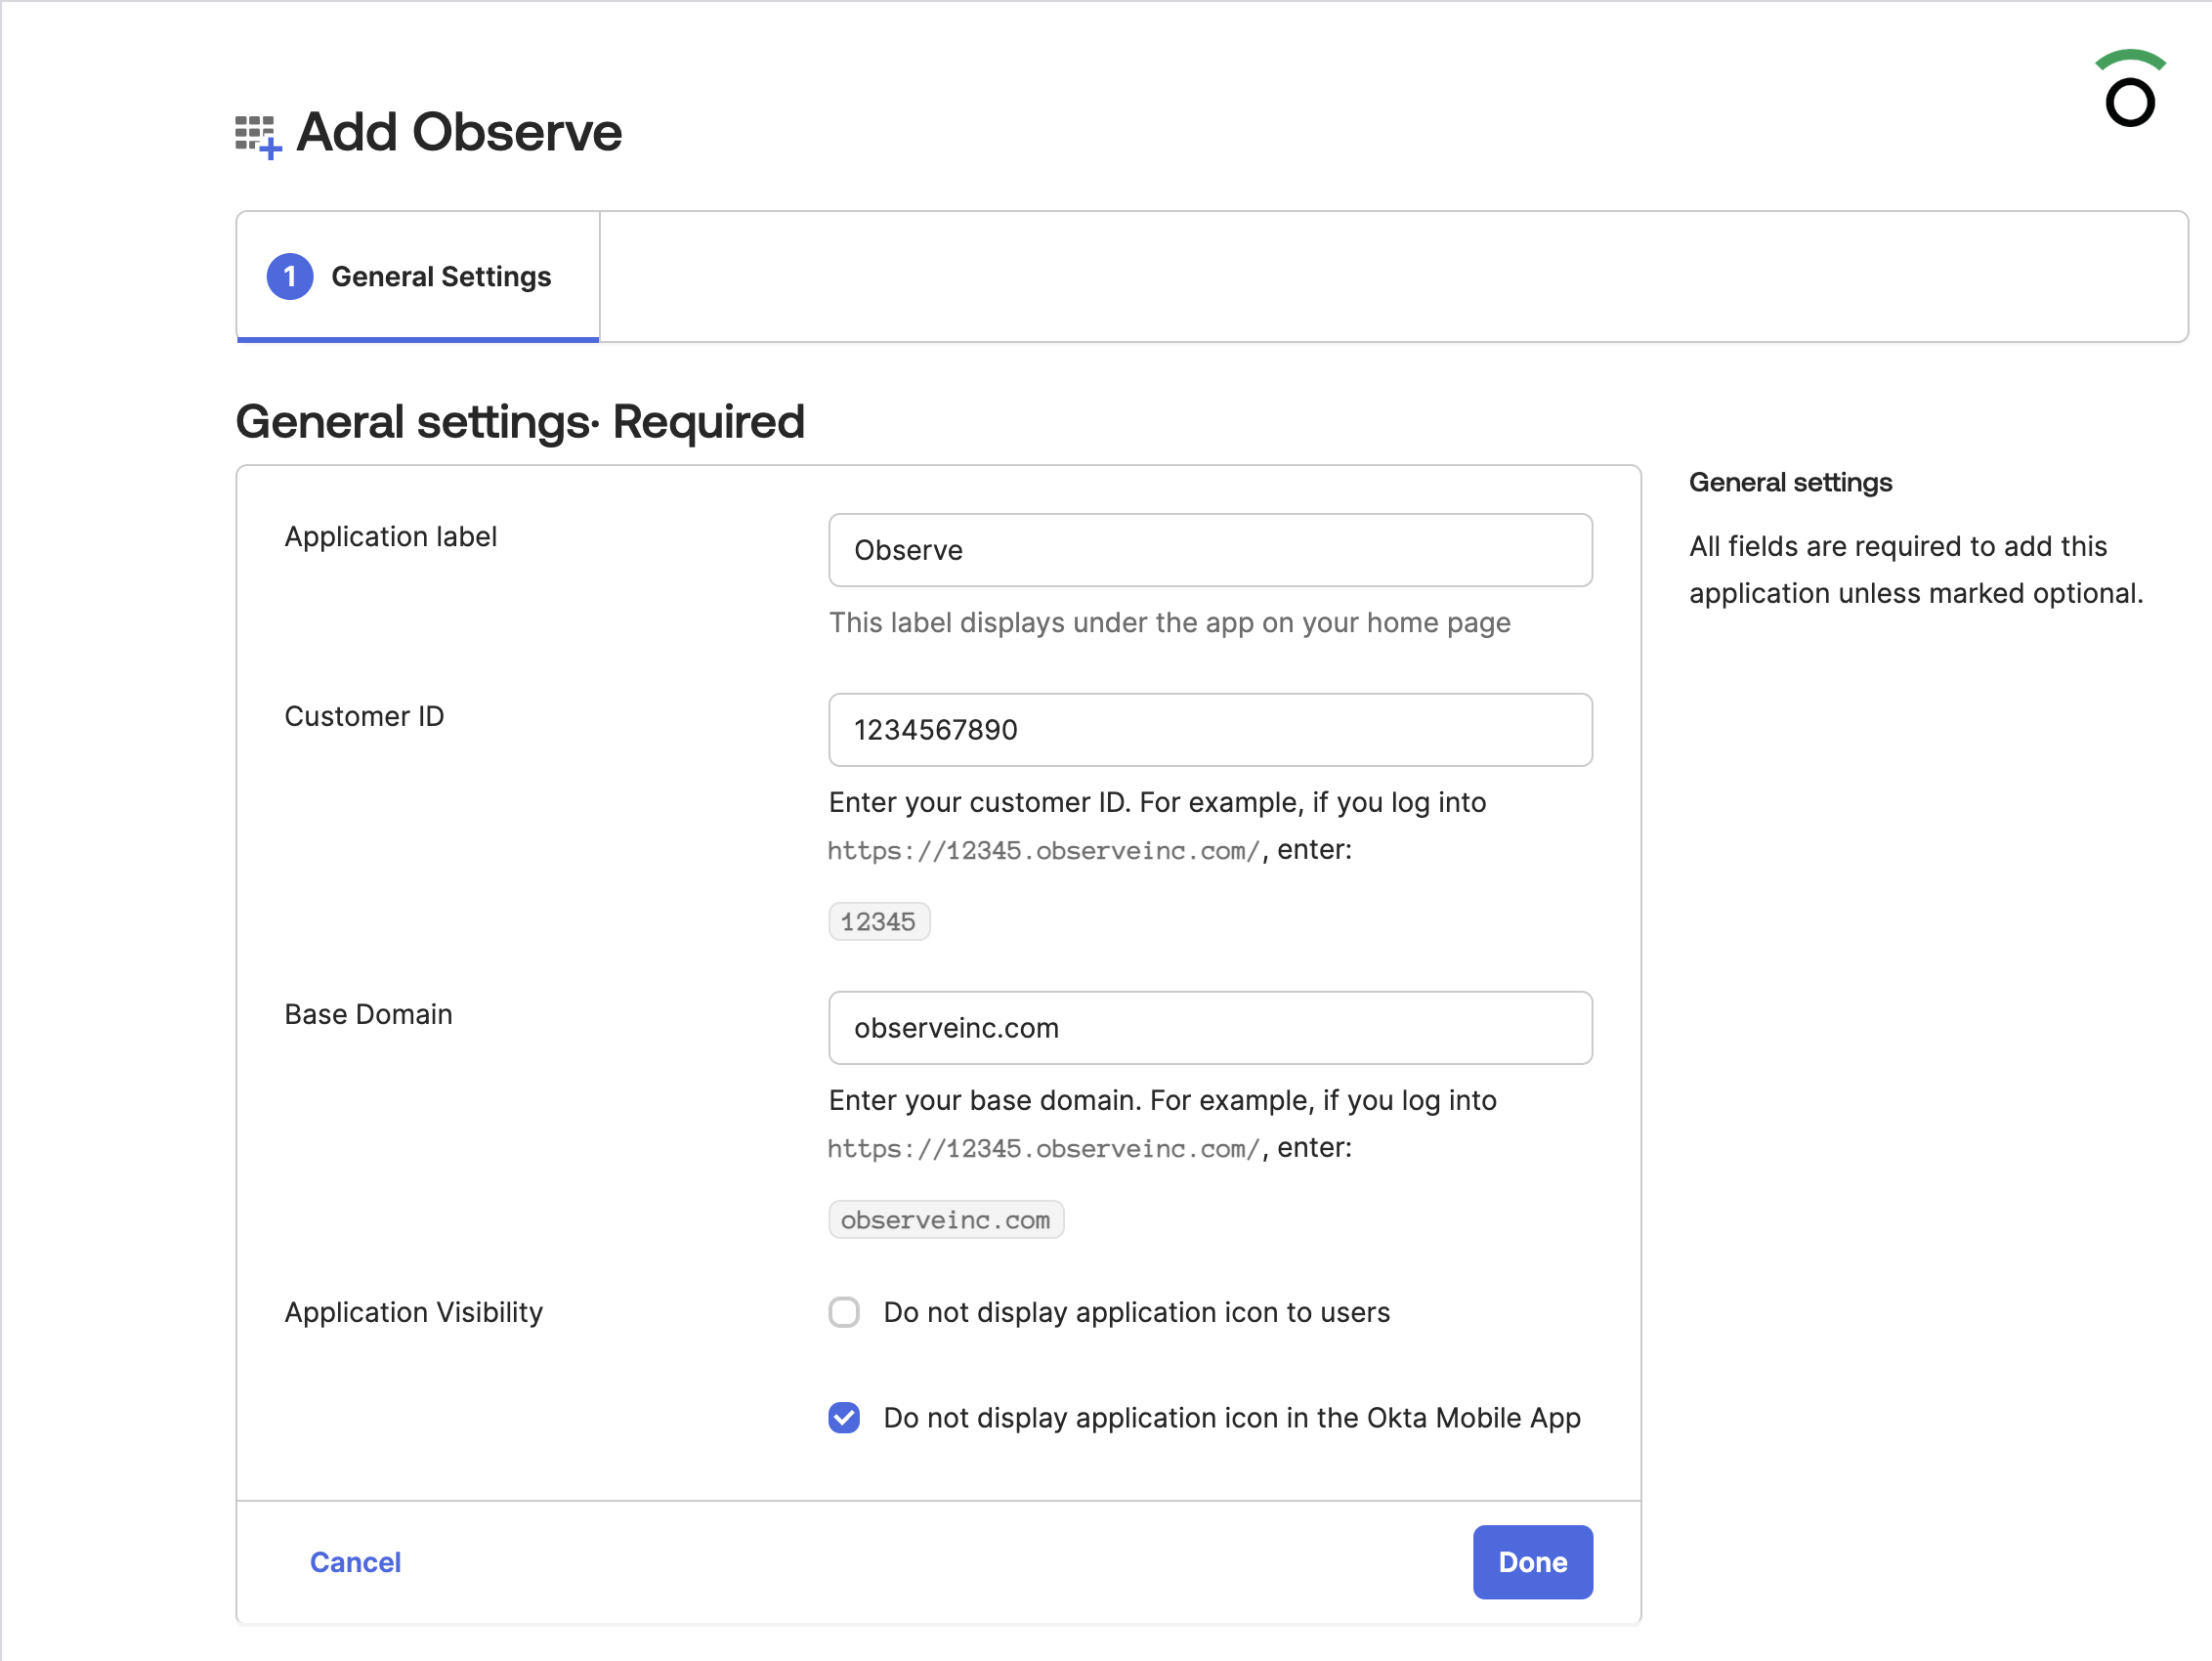
Enter your Observe by Snowflake customer ID as the Customer ID.
-
Enter the base domain for your region as the Base Domain. For example, if the URL for your Observe by Snowflake tenant is
123456789012.eu-1.observeinc.com, then the base domain iseu-1.observeinc.com. -
Select Do not display application icon in the Okta mobile app.
-
Add users and groups to Okta.
-
Click View Setup Instructions. Copy the text of the SAML certificate.
Group membership attributes
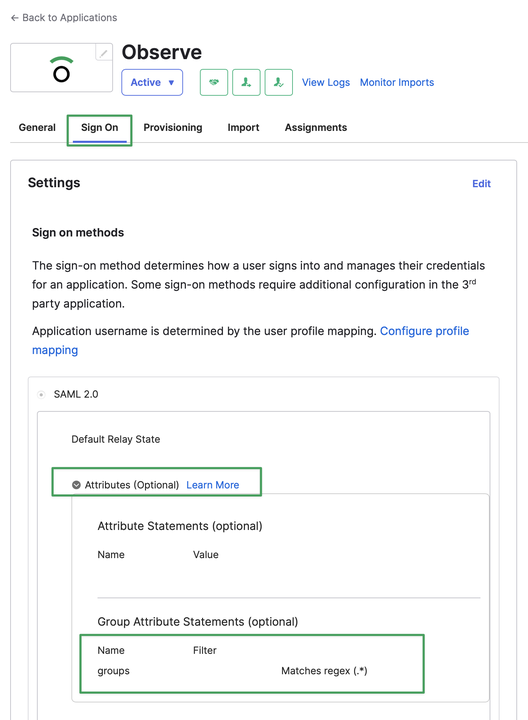
Observe by Snowflake supports receiving group membership claims via SAML. In the Sign On configuration area of the Observe by Snowflake app for Okta, click "Edit" in the top right, and then expand Attributes (optional) section, and select Group Attribute Statements (optional) and in the Name field, type groups (note this is case sensitive).
Configure Observe by Snowflake
Perform the following steps to configure Observe by Snowflake for Okta:
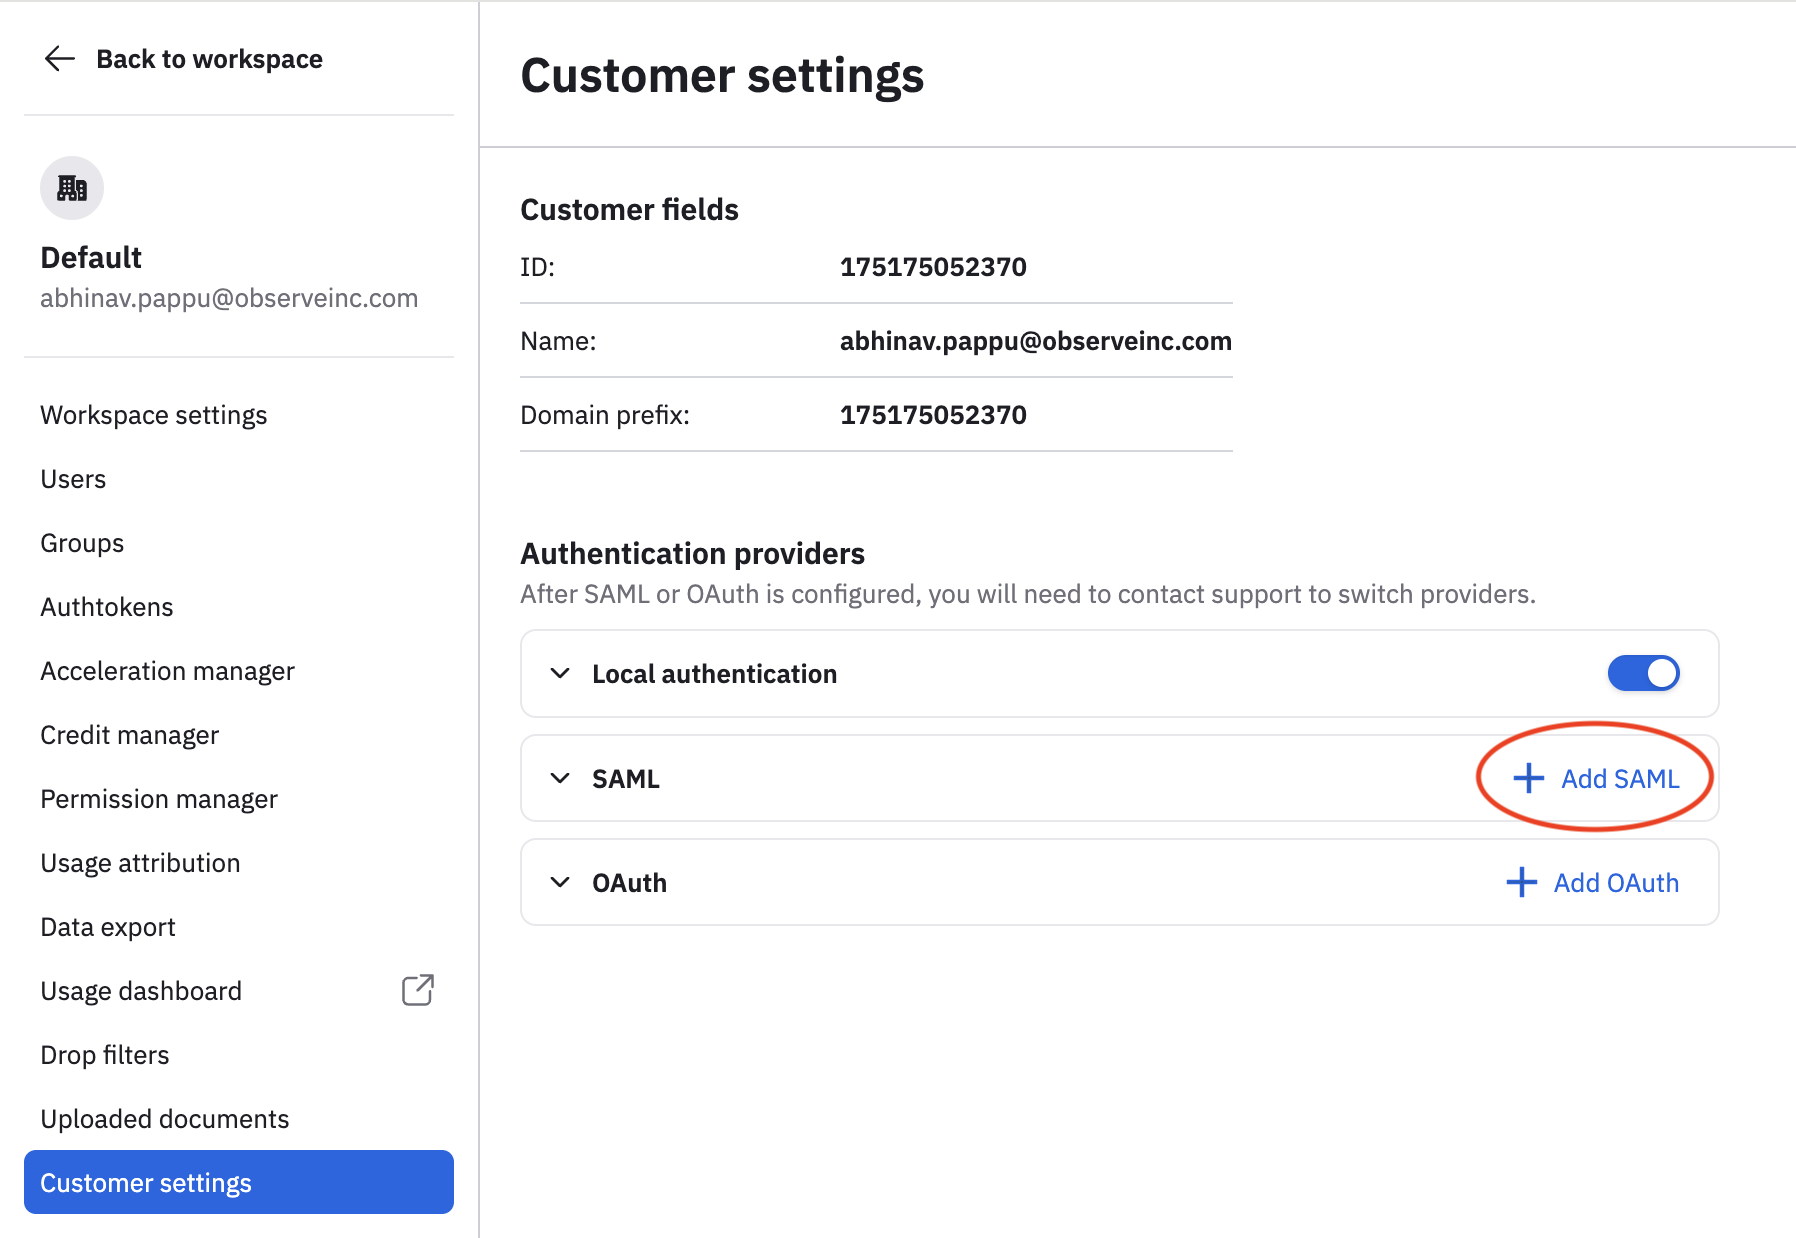
- In the left navigation rail, hover on your user name, then select Manage account.
- Click Customer settings.
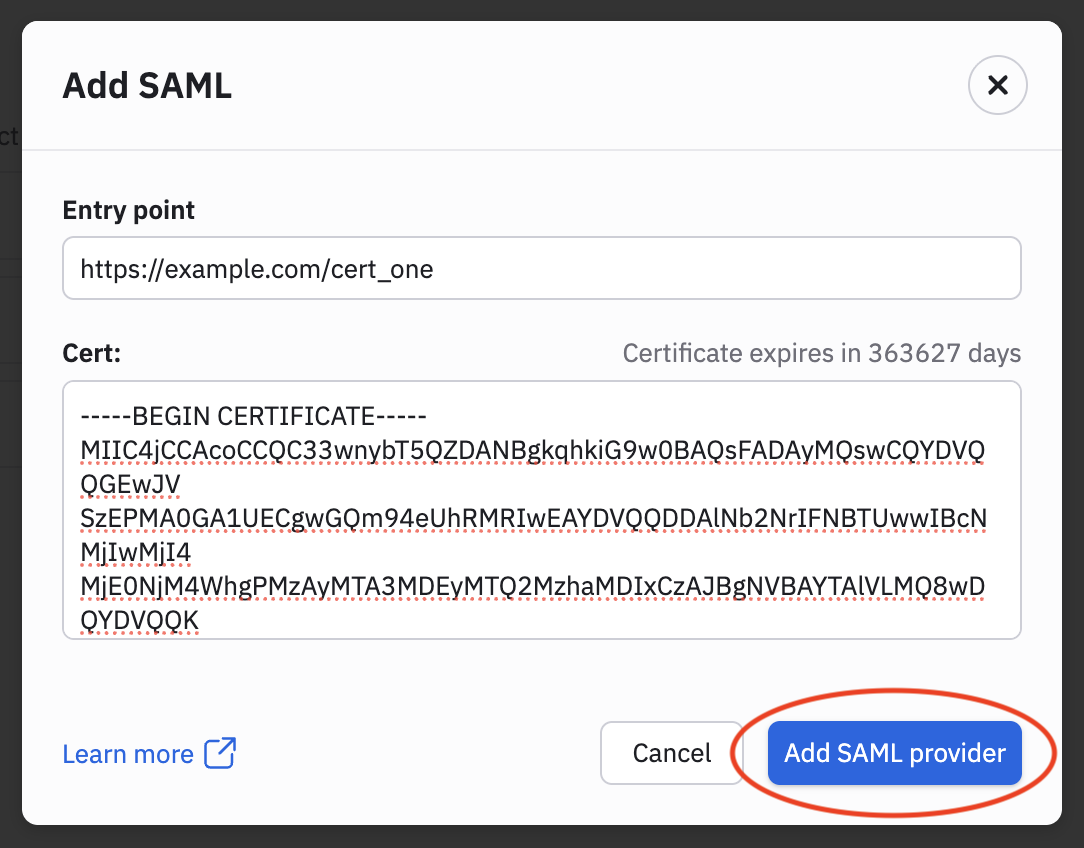
- Click Add SAML.
- In your Okta app, copy the value for Sign on URL and paste it into the Entry point field.
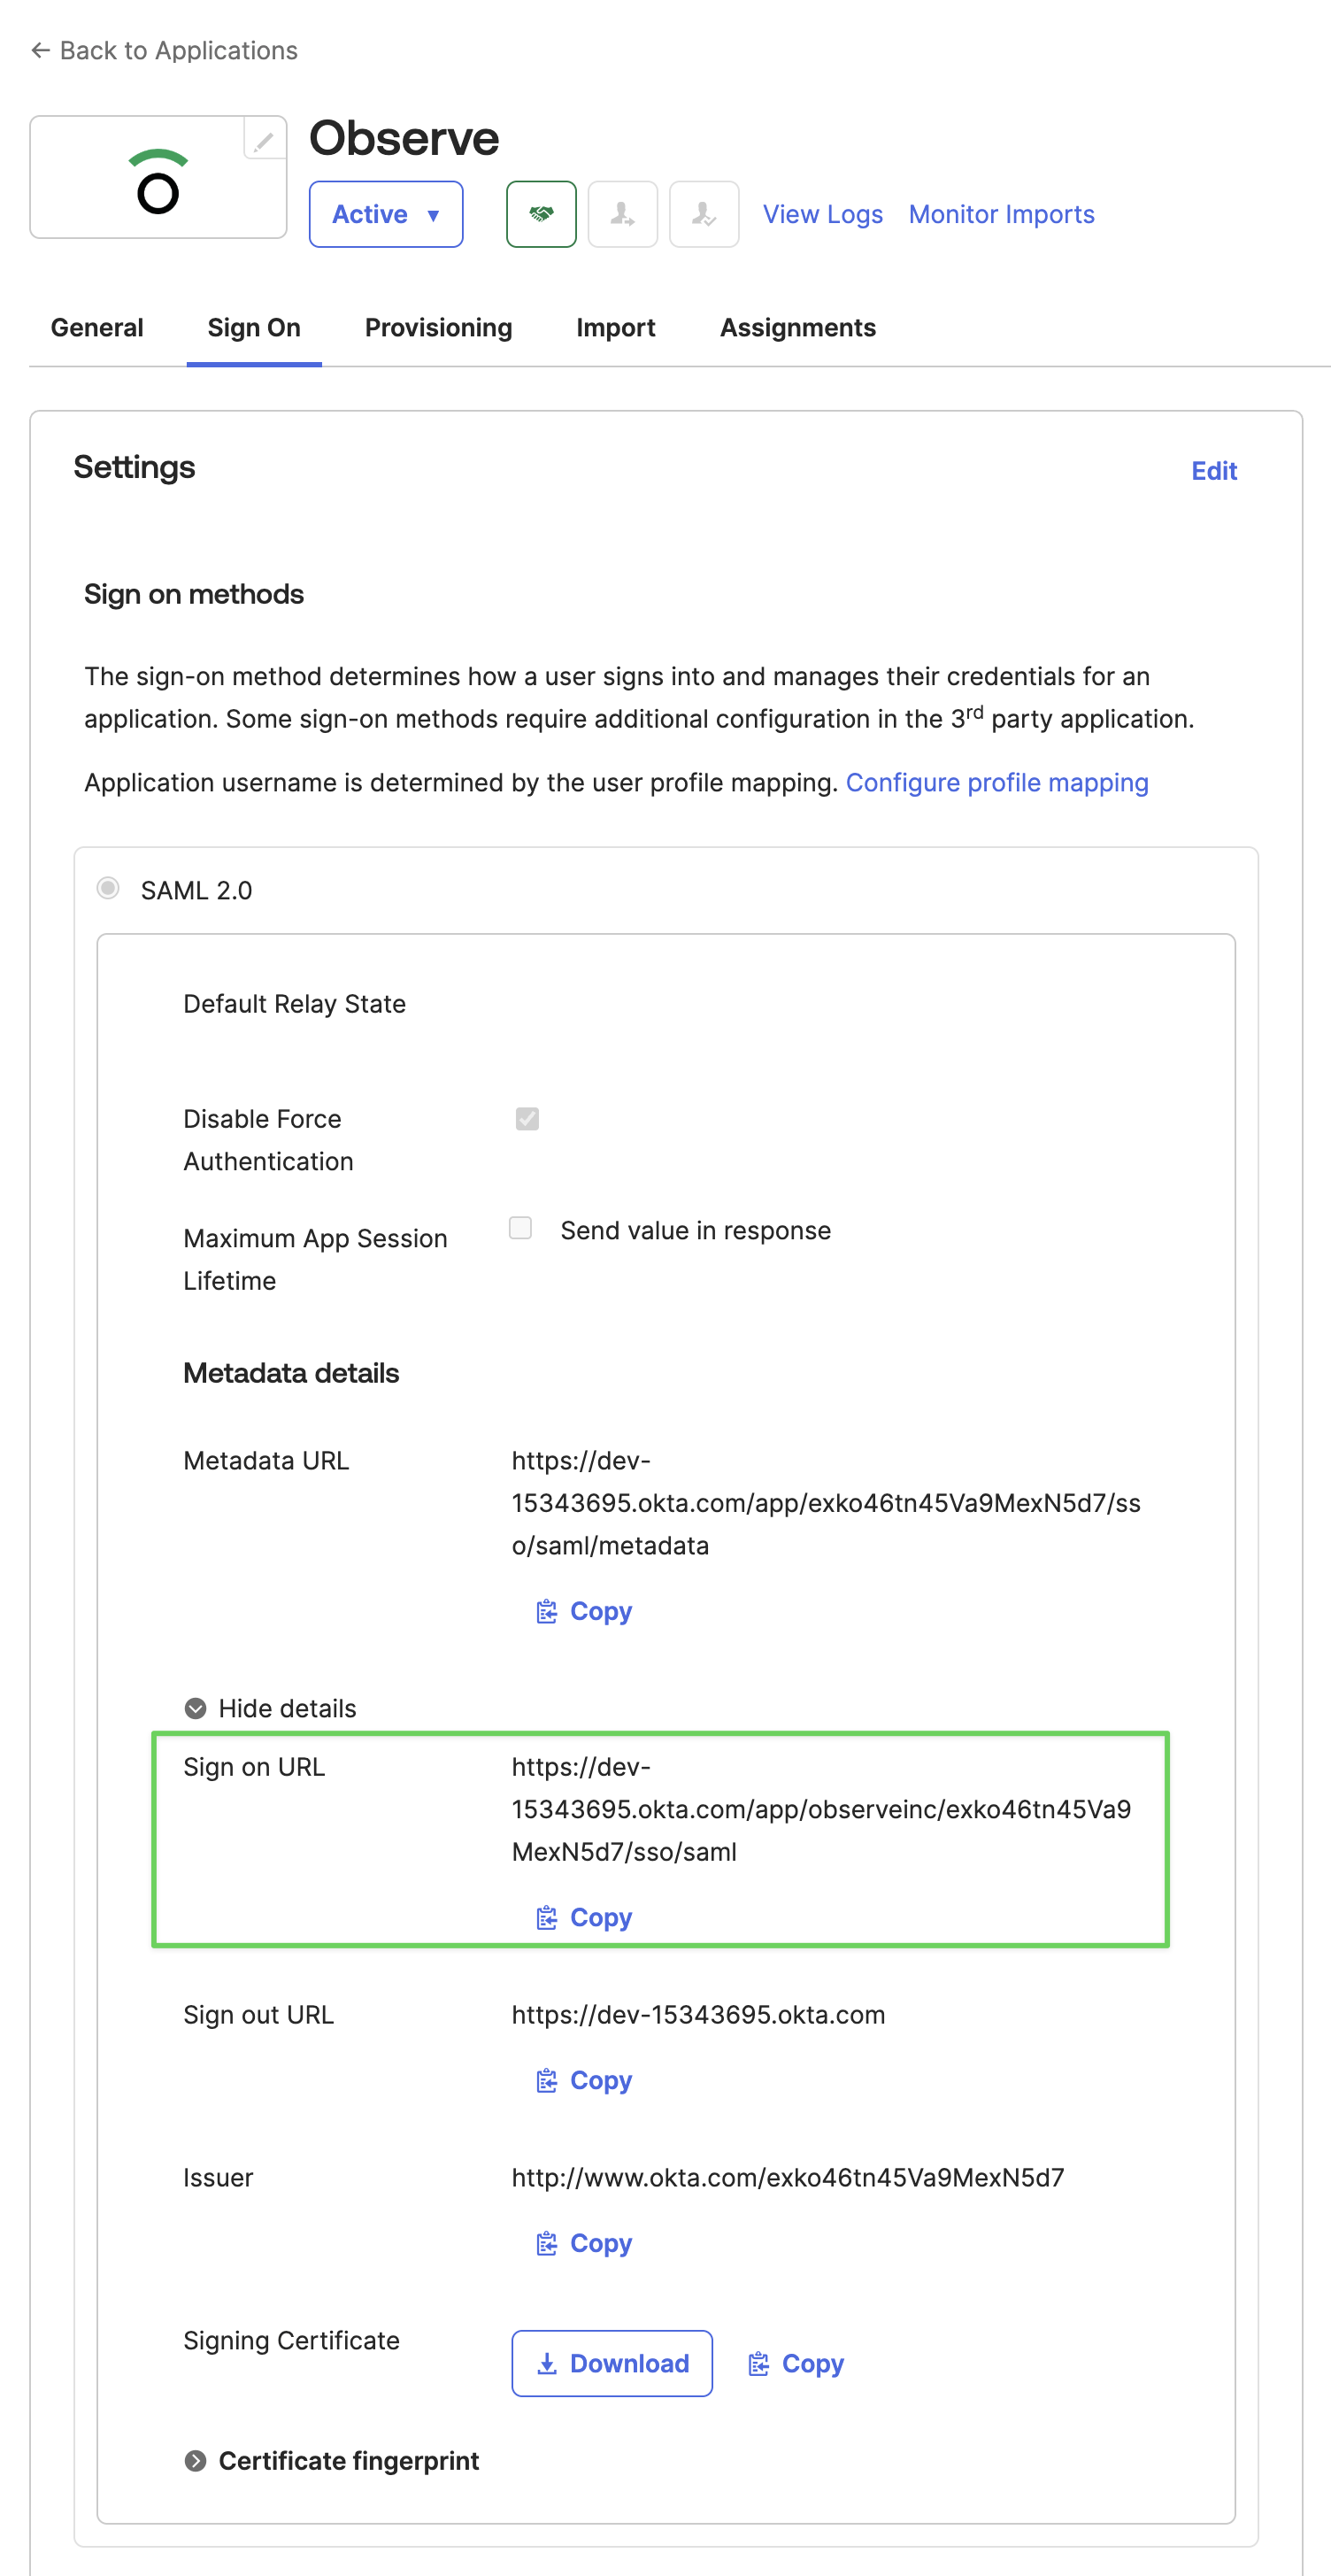
- Copy or download the Signing Certificate from your Okta app, and paste the certificate into the Cert field.
NoteCertificates must be in PEM/Base64 encoded format. The format starts with
-----BEGIN CERTIFICATE-----and ends with-----END CERTIFICATE-----and contains a base64 encoded string between the two.
- Click Add SAML Provider to finish the configuration.
Updated 1 day ago