Jira tickets
Prerequisites
Verify you have the following:
- Your Jira login credentials, with administrator privileges
- Your Observe Customer ID
- An Observe ingest token
NoteSome Observe instances may optionally use a name instead of Customer ID; if this is the case for your instance, contact your Observe data engineer to discuss implementation. A stem name will work as is, but a DNS redirect name may require client configuration.
Configure an outgoing webhook automation rule
Before you begin, view the Jira automation rule documentation.
- Log into Jira and go to Settings > Systems > Automation Rules
- On the Automation Rules page, choose Create rule to display a list of triggers.
- Click Issue created and then Save.
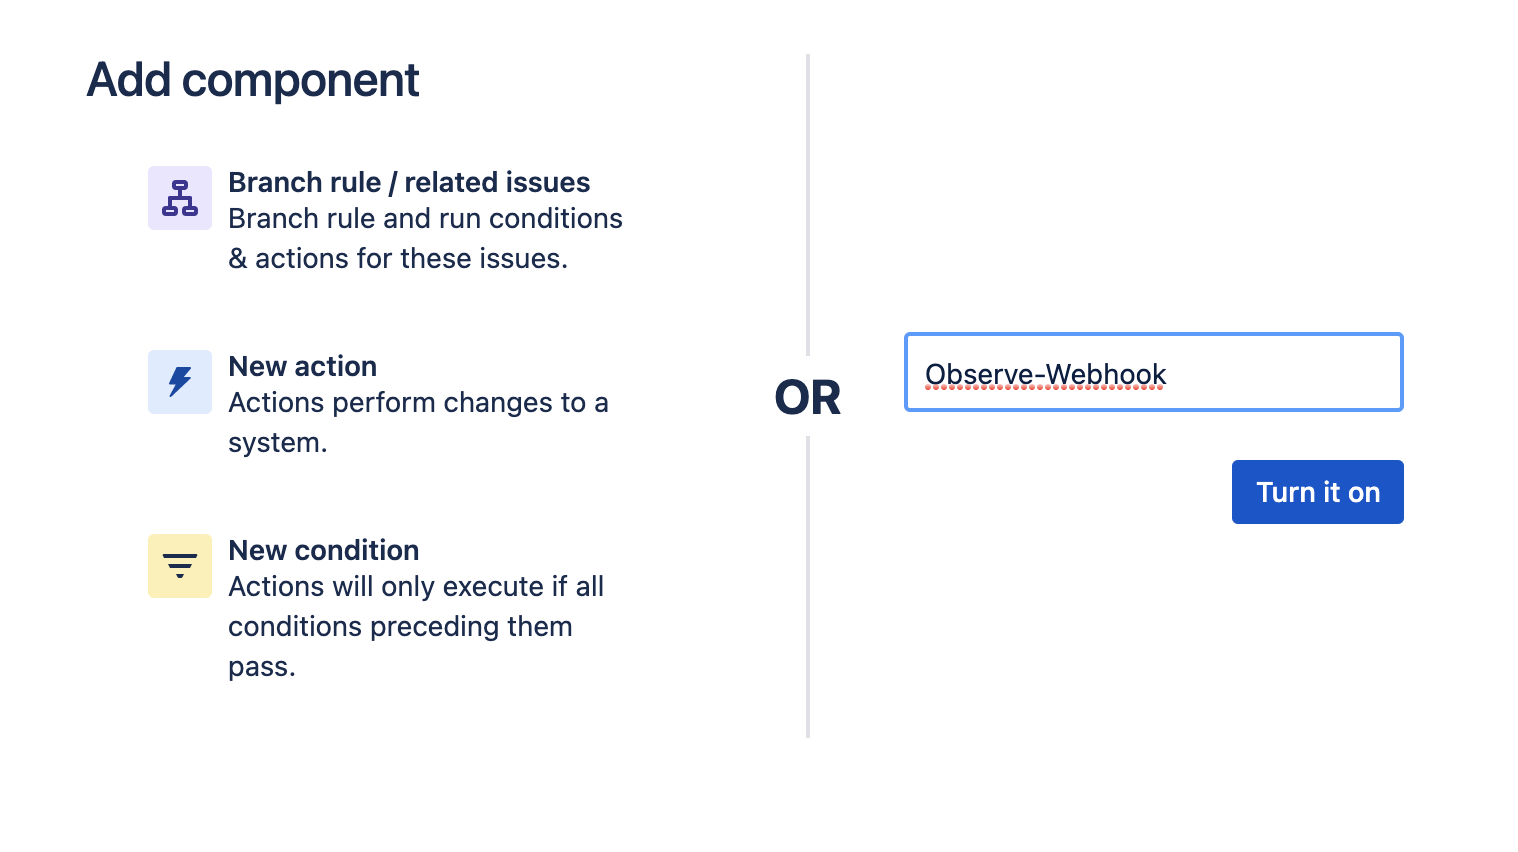
- From the Add component page, select New action from the list. Scroll to the Notifications section and choose Send web request.
- Fill in the HTTP target detail:
- Webhook URL:
https://{OBSERVE_CUSTOMER}.collect.observeinc.com/v1/http/jira - Header name: Authorization
- Header value:
Bearer {Observe Customer ID} {Observe Ingest Token} - HTTP method: POST
- Webhook body: issue data
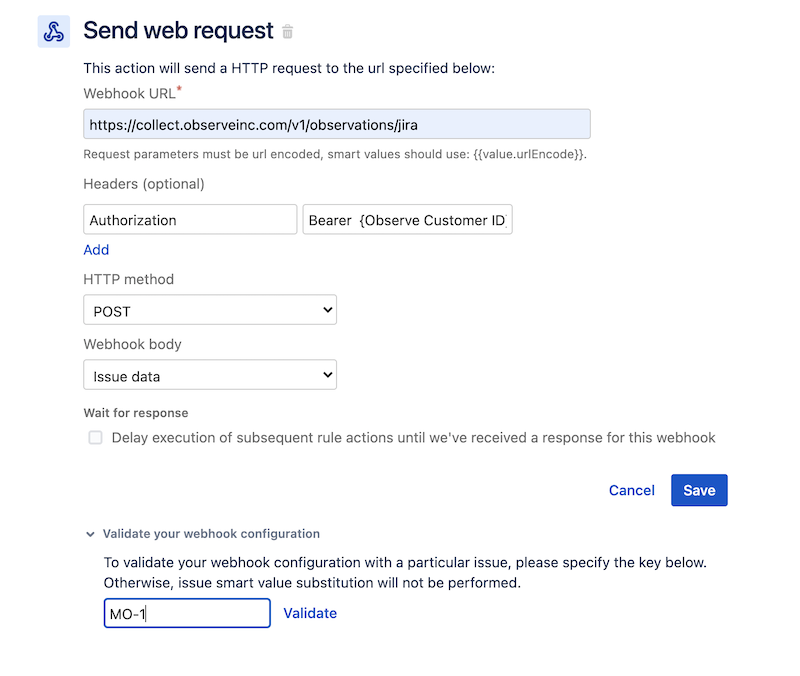
- Validate the webhook:
- Click to expand the Validate your webhook configuration section.
- Enter an open ticket or project ID to populate the test message. If you don't enter a valid project ID here, Jira may return a 400 error.
- Click Validate.
- Confirm that you receive the
HTTP/1.1 202 Acceptedresponse.
- Click Save to save the automation rule and webhook configuration.
- Give your automation rule a name such as "Observe-webhook"
- Click Turn it on to enable.
Verify ticket data ingestion
Perform the following steps to verify that Jira ticket ingestion is working:
-
Wait for, or initiate a ticket status change.
-
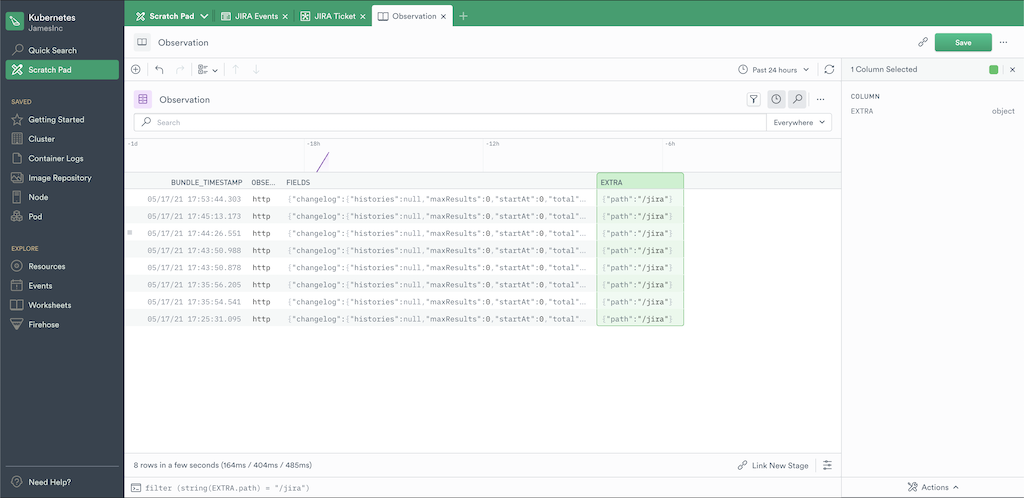
Log into Observe and open the source dataset associated with your Datastream in a worksheet.
-
Open the OPAL console and apply the following filters:
-
Verify ticket data exists.
Updated 6 months ago
Did this page help you?