Zendesk tickets
Ingest Zendesk ticket information by configuring a Webhook and trigger in Zendesk.
Prerequisites
To do this, you need the following information:
- Your Zendesk login credentials
- Your Observe Customer ID
- An Observe ingest token
NoteSome Observe instances may optionally use a name instead of Customer ID; if this is the case for your instance, contact your Observe data engineer to discuss implementation. A stem name will work as is, but a DNS redirect name may require client configuration.
Configure an outgoing webhook
-
log into Zendesk and go to Admin > Settings > Extensions.
-
On the Extensions page, choose Add target to display a list of target types. Choose HTTP target.
-
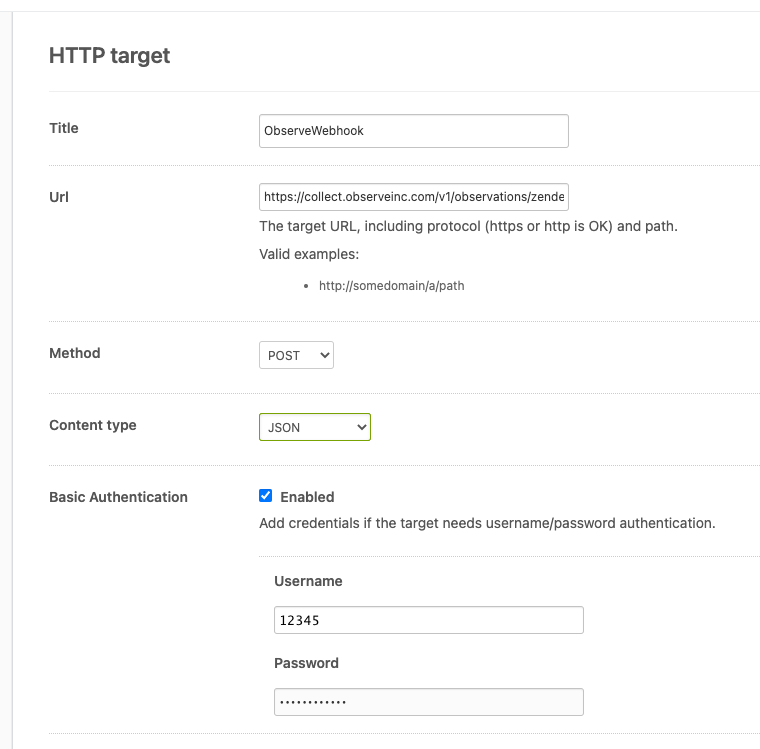
Add the HTTP target details.
- Title - Observe Webhook
- Url -
https://{OBSERVE_CUSTOMER}.collect.observeinc.com/v1/http/zendesk - Method - POST
- Content type - JSON
- Basic Authentication
-
Select Enabled.
-
Username: your Observe Customer ID
-
Password: your Observe Ingest Token
-
-
Test the webhook:
- Select Test target from the menu.
- Choose Submit.
- In the JSON body text field, provide a valid JSON body, such as
{"message":"Hello Zendesk!"}. - Choose Submit.
- Confirm that you receive the response
HTTP/1.1 202 Accepted.
If the JSON body text appears highlighted in red, this means you did not get a success response. Correct your configuration and try again.
-
Save the webhook configuration.
- Select Create target from the menu.
- Choose Submit.
Configure the trigger in Zendesk
-
Go to Admin > Business Rules > Triggers.
-
On the Triggers page, select Add trigger.
-
Add the trigger details:
- Trigger name - Observe Trigger
- Description - Send webhook to Observe
- Category - Notifications
- Conditions -
- Under Meet ANY of the following conditions, select the desired condition. For example, Status Changed.
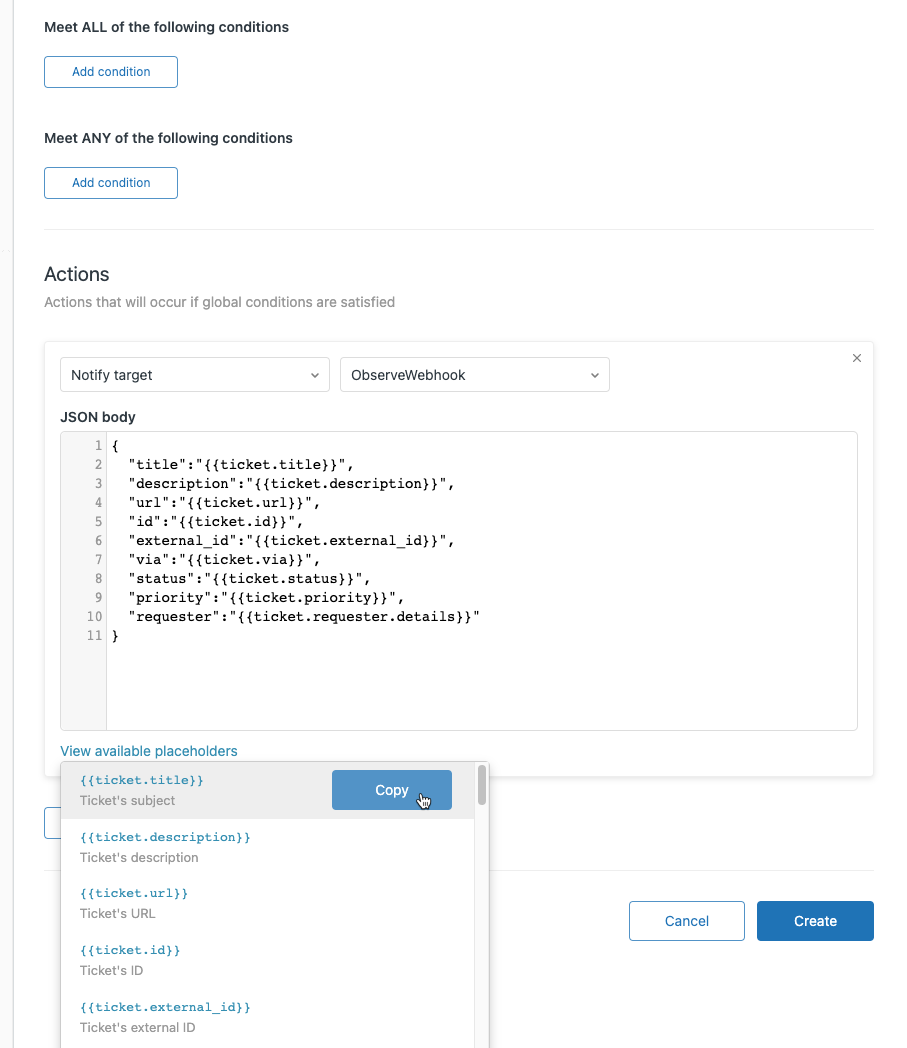
- Actions:
-
Select Notify target in the left menu.
-
Select the name of your Observe webhook from the right menu. For example, Observe Webhook.
-
In the JSON body text field, provide the desired payload:
For example,Sample JSON { "title":"{{ticket.title}}", "description":"{{ticket.description}}", "url":"{{ticket.url}}", "id":"{{ticket.id}}", "external_id":"{{ticket.external_id}}", "via":"{{ticket.via}}", "status":"{{ticket.status}}", "priority":"{{ticket.priority}}", "requester":"{{ticket.requester.details}}" } -
Click View available placeholders to see a list of available fields.
-
Click Create.
-
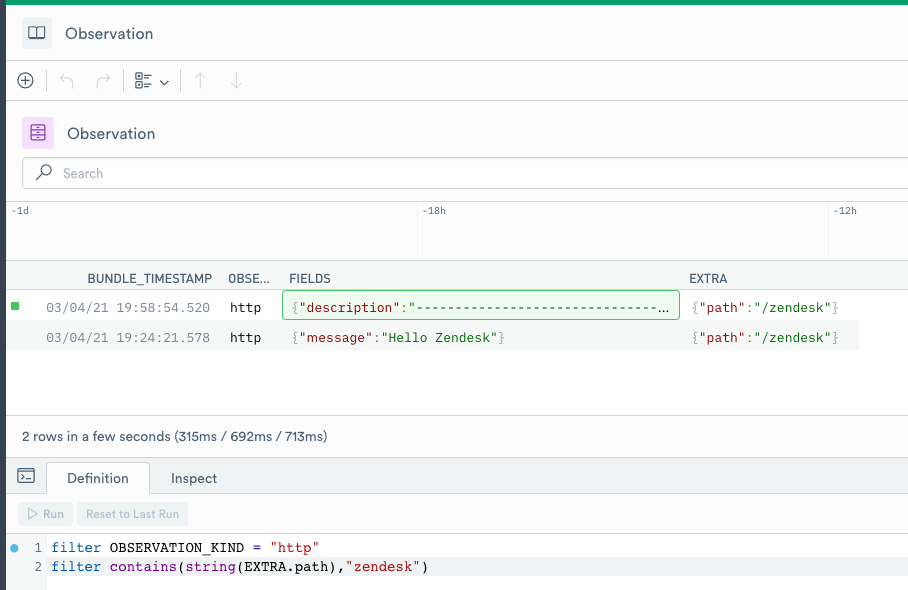
Verify ticket data ingestion
Perform the following steps to verify that Zendesk tickets are being ingested:
-
Wait for or initiate a ticket status change.
-
Log into Observe and open the source dataset associated with your Datastream in a worksheet.
-
Open the OPAL console and apply the following filters:
-
Verify that you can find ticket data:
Updated 6 months ago