

Search for improbable travel
This tutorial implements the classic "improbable travel" (a.k.a. "Superman problem") detection: when a user's successful logins happen too far apart geographically to be physically plausible for the elapsed time. Any pair whose implied speed exceeds 500 mph (804 km/h) is a candidate.
We'll use Snowflake's ❄️ ACCOUNT_USAGE.LOGIN_HISTORY view, exposed on this instance as the o4s/LOGIN_HISTORY Dataset. Each row already carries the client IP and a resolved CLIENT_GEO object with latitude and longitude.
Requirements
The tutorial requires an event Dataset with the following:
- A user's action, such as successful authentication.
- The user's location —
float64latitude and longitude forhaversine_distance_km. - A per-user identifier stable enough to lag() on. USER_NAME works here.
If your source uses only IP addresses, apply lookup_ip_info first to produce latitude and longitude columns. That step is unnecessary here because LOGIN_HISTORY.CLIENT_GEO already contains latitude, longitude, city, country, region, and timezone.
Plan for false positives. The tutorial calls out one identity used on both a laptop and a phone. On Snowflake login data the equivalent — and the biggest false-positive source on this instance — is a service account running in multiple AWS regions. SCHEDULER_0, INGEST_0, OBSERVE_CORTEX_SVC, and similar identities log in from Oregon, Virginia, Frankfurt, and Sydney within the same second because Snowflake ships their bytes from wherever is nearest. We filter those out below.
Choose the source Dataset
Identify the desired fields in the o4s/LOGIN_HISTORY Dataset:
- USER_NAME
- CLIENT_IP
- CLIENT_GEO.latitude
- CLIENT_GEO.longitude
- EVENT_TIMESTAMP
When planning for improbable travel data, consider the desired time range and granularity. It's best to review a shorter window of data in order to balance alert sensitivity with performance, such as four hours. You can also consider using 24 hours to catch the "overnight flight" scenario.
It's best to avoid summarizing commands such as timechart or statsby, so that the details of individual records are not missed. Note that these commands can be quite useful for related use cases, such as a dashboard showing the amount of traffic per region.
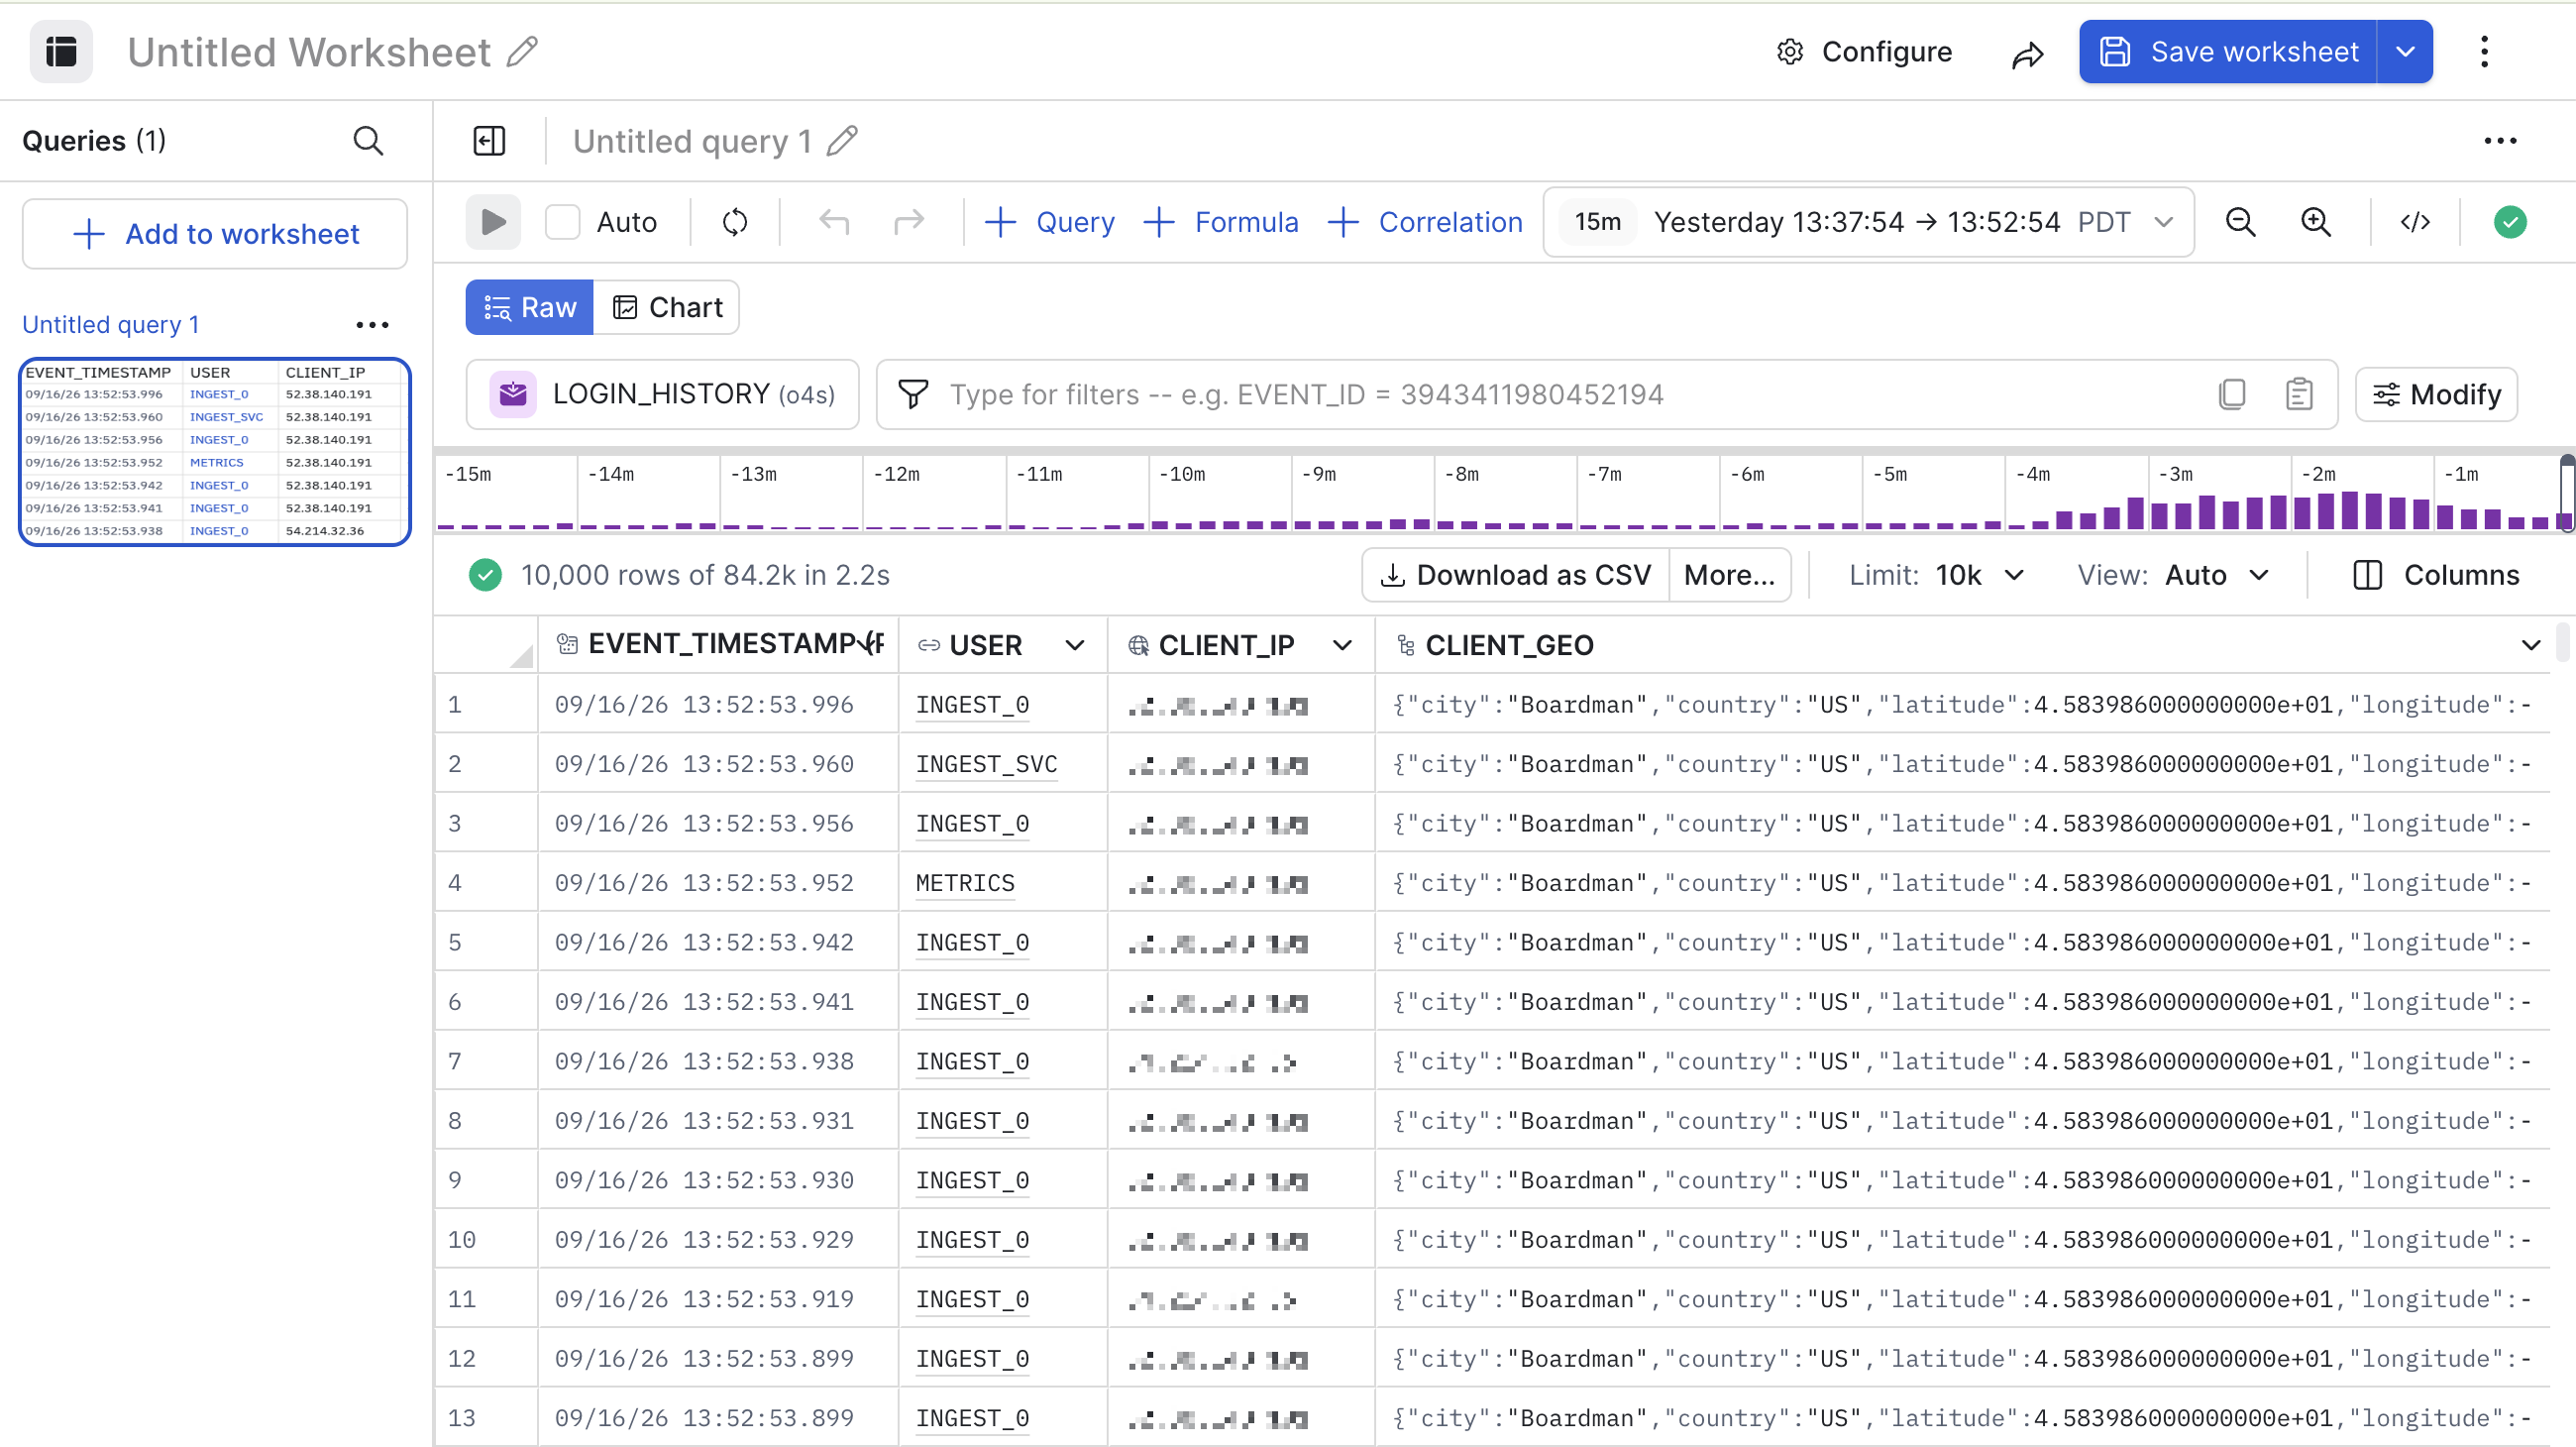
Below is the Dataset showing the desired fields:
Find travel distance and speed
We will write some OPAL to turn Snowflake login events into impossible travel metrics by evaluating how fast a user would have to move between consecutive interactive logins.
Perform the following steps:
-
Open your Dataset in a new worksheet.
-
Open the OPAL Console panel.
-
Use the following OPAL:
{`
// 1. Keep only successful interactive logins.
filter IS_SUCCESS = true and EVENT_TYPE = "LOGIN"

// 2. Extract geo columns from the CLIENT_GEO object. haversine_distance_km
//    needs float64.
make_col lat:float64(CLIENT_GEO.latitude),
  long:float64(CLIENT_GEO.longitude),
  city:string(CLIENT_GEO.city),
  country:string(CLIENT_GEO.country),
  user:USER_NAME,
  src:string(CLIENT_IP)
filter not is_null(lat) and not is_null(long)

// 3. Prune Snowflake service accounts (see the false-positive note above).
//    Snowflake's regex flavour rejects the (?i) inline flag, so we upper()
//    the field first, then substring-match.
make_col uname_upper:upper(user)
filter not match_regex(uname_upper, /_[0-9]+$/)
filter not contains(uname_upper, "SVC")
filter not contains(uname_upper, "SERVICE")
filter not contains(uname_upper, "SCHEDULER")
filter not contains(uname_upper, "INGEST")
filter not contains(uname_upper, "CORTEX")
filter not starts_with(uname_upper, "OBSERVE_")
drop_col uname_upper

// 4. Restrict to interactive auth factors. Drops key-pair / OAuth service auth.
filter FIRST_AUTHENTICATION_FACTOR = "PASSWORD"
   or FIRST_AUTHENTICATION_FACTOR = "SAML_ASSERTION"
   or FIRST_AUTHENTICATION_FACTOR = "EXTERNAL_TOKEN"

// 5. Look back up to 24h per user for the previous login's geo/time.
//    frame() is what makes this accelerable — required so we can build a
//    monitor on top of the published metrics dataset.
make_col lat_previous:window(lag(lat, 1), frame(back:1440m), group_by(user), order_by(EVENT_TIMESTAMP)),
  long_previous:window(lag(long, 1), frame(back:1440m), group_by(user), order_by(EVENT_TIMESTAMP)),
  timestamp_previous:window(lag(EVENT_TIMESTAMP, 1), frame(back:1440m), group_by(user), order_by(EVENT_TIMESTAMP))

// 6. Distance (km) and elapsed hours → required speed (km/h).
make_col distance:haversine_distance_km(lat, long, lat_previous, long_previous)
make_col event_duration:duration(timestamp_previous, EVENT_TIMESTAMP)
make_col event_duration_hr:event_duration/1h
make_col speed:distance/event_duration_hr

sort desc(EVENT_TIMESTAMP), asc(user)

// 7. Pack speed and distance into a metric object, then flatten so each
//    row is one metric point. Same shape the published dataset expects.
make_col metrics:make_object("travel_speed":speed, "travel_distance":distance)
flatten_leaves metrics

// 8. Match the published-dataset column list, plus the metric interface.
pick_col BUNDLE_TIMESTAMP:row_start_time(),
  valid_from:EVENT_TIMESTAMP,
  user,
  src,
  metric:string(_c_metrics_path),
  speed:float64(_c_metrics_value)

// Boolean flag for downstream filtering, sorting, or coloring in the UI.
// Use column-level Conditional Formatting on `speed` (right-click the
// column header) to get the color effect.
make_col is_improbable:speed >= 804

interface "metric", metric:metric, value:speed
`}- Click Run and check that the values are correct.
- Click Publish New Dataset and name it Improbable Travel Metrics, then click Publish to publish the new Dataset.
Create the Monitor
When we created the Dataset, we did not describe the speed limit. In this step, we will create a Monitor and add a filter for our speed limit.
-
Open your saved Metrics Dataset.
-
Click Create Monitor.
-
Click Edit Monitored Dataset.
-
Open the Opal console window and add the following to the end:
// Keep only the speed metric above 500 mph.
filter metric = "travel_speed" and speed >= 804
-
Click Apply.
-
Set the Monitor type to Count and the time window to the past hour.
-
Set alert grouping to user — this is our per-identity field.
-
These are point-in-time alerts, so leave status updates off.
-
Name it Improbable Travel Alert.
-
Click Save to activate your Monitor.
Updated 27 days ago